
Whipple Monte Progress


Thread Starter


Joined: Feb 2008
Posts: 6,474

Unfortunately I haven't had much time to work on it lately- only had a few hours today to work on her.
Still working on getting the dual fuel pump setup finished. Today I got the holes drilled in the top plate- and the new nickel plated brass and aluminum fittings assembled and attached through the top for the two feed lines. Added some JB Weld for insurance, and that is drying now. That gives me a pair of 5/16" nickel plated hose barbs hanging into the top plate for my 5/16" submersible fuel hose (that crap is like $25 / foot!).
Also got the wiring harnesses soldered and made up. I'm running 12 gauge to each pump harness -I ended up ordering alcohol/fuel resistant wire and heat shrink from mcmaster carr for the wiring inside the tank. Still need to run the wiring through the top plate- and make up a separate weather pack harness for it (4x 12 gauge wires). The stock harness is only going to be used for the level sensor.
After that, I want to weld in a couple more braces between the two existing hard lines in the tank to try and keep from all the extra load being carried by the stock return hard line only- and it should be all set to go.
Got new rubber hose to connect to the filler neck, and a new rubber vent hose- so I'm hoping to get the tank put back in next weekend.
Still plan to cut a hole in the trunk floor and make up an access plate- just in case I have pump troubles in the future- I sure hate dropping the tank...
Wish I had more progress... but that's all I've got for now.

Thread Starter
Joined: Feb 2008
Posts: 6,474
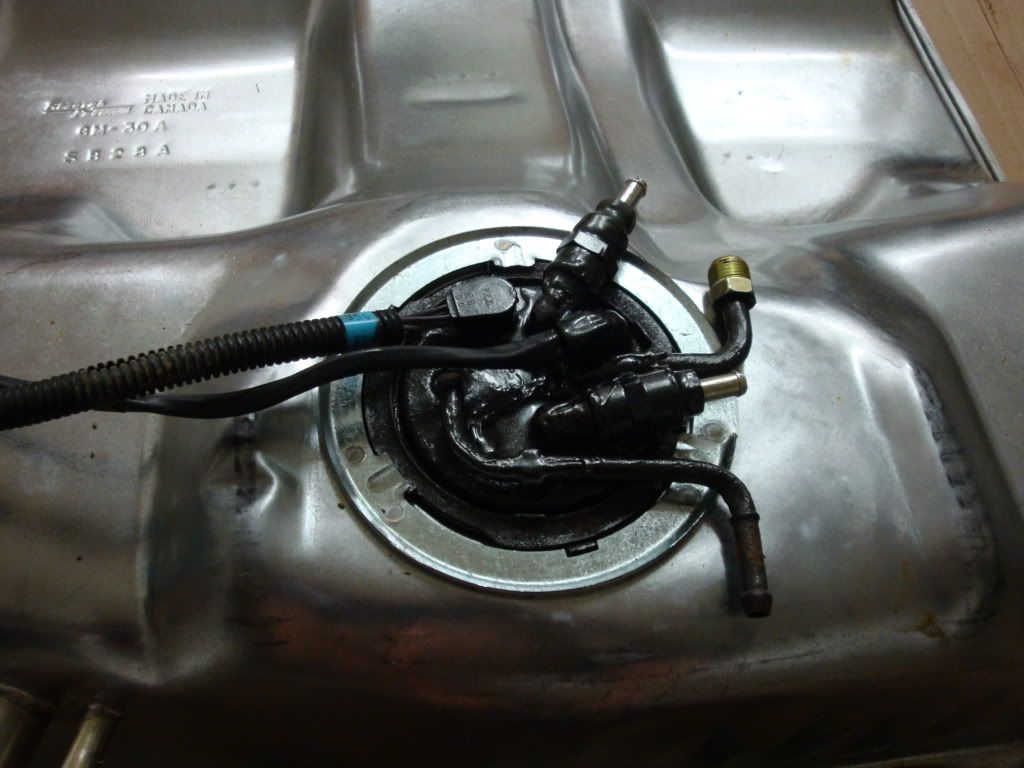
Had a good chunk of today to mess with it again. Finally got both pumps in, and installed. Man what a pain that was... Ended up welding some connecting links between the two tubes to try and make sure all the stress wasn't just going through the smaller tube. Also had to stick a different sock on the new pump- as the Walbro sock wouldn't fit through the hole.
Had to trim a couple of notches into the gas tank opening to get everything to clear (and it still takes a ton of maneuvering to get it in there), but the o-ring still has plenty of room to seal. What a pain in the butt...
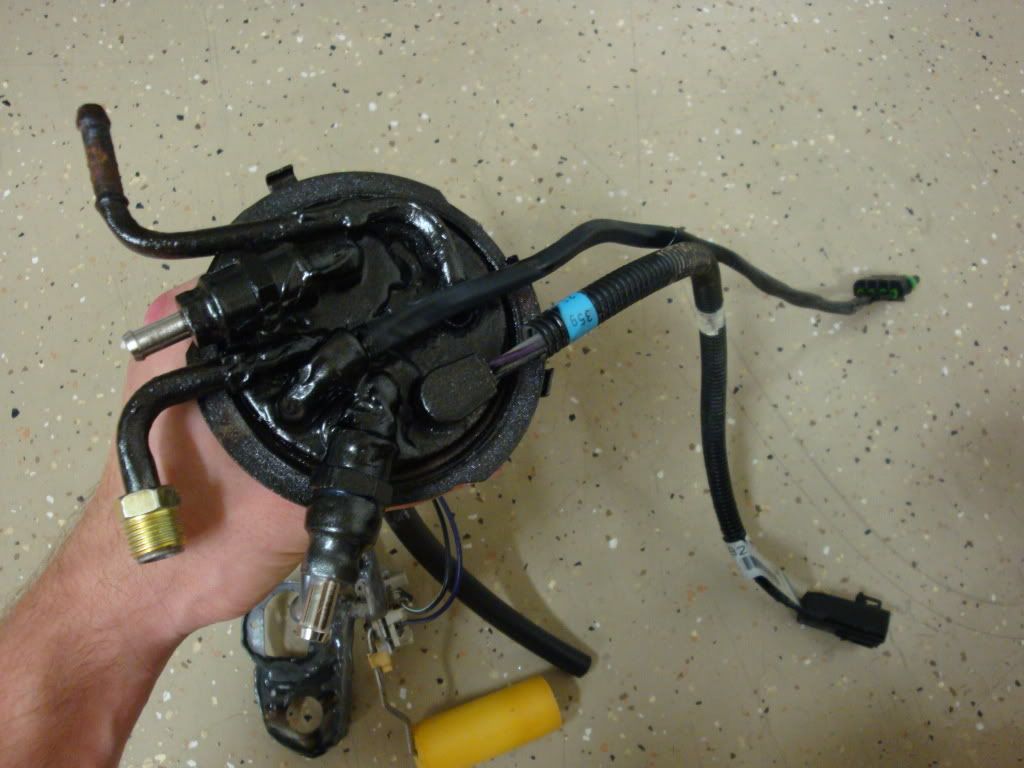
Pic of the top:
I'm using the stock feed line as the new return- just flared it and put a new line nut on it. The two nipples are the new feed lines. Left the stock vent line, and cut off the stock return line flush with the surface. Also epoxied a 90* elbow in to run my new power wires through, and sealed them in.
I know the paint looks crumby- between the epoxy and the rust converter- the surface looks like crap- but it's going to be hidden anyways- just didn't want it rusting up any more.
Pic of everything installed:
The new sock looks goofy next to the old one- but I had to get something that I could bend 90* right next to the pump inlet to get it to fit through the tank opening. All of the new wiring is chem resistant, as is the heat shrink- so it shouldn't have any problems standing up to E85 long term.
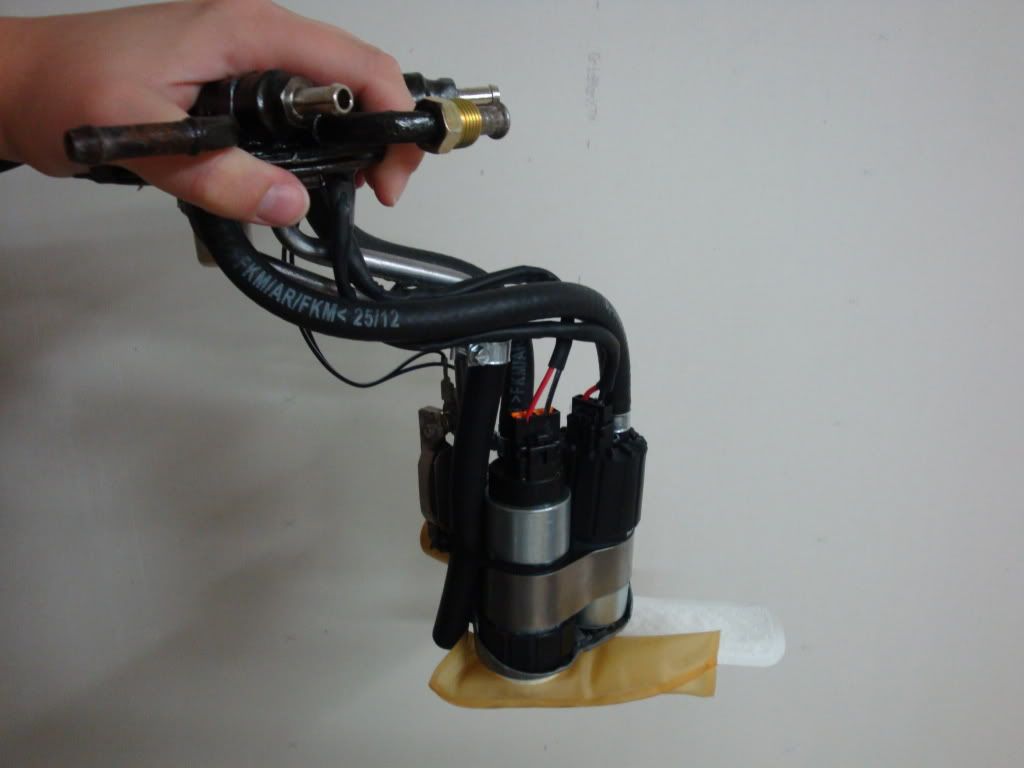
Installed:
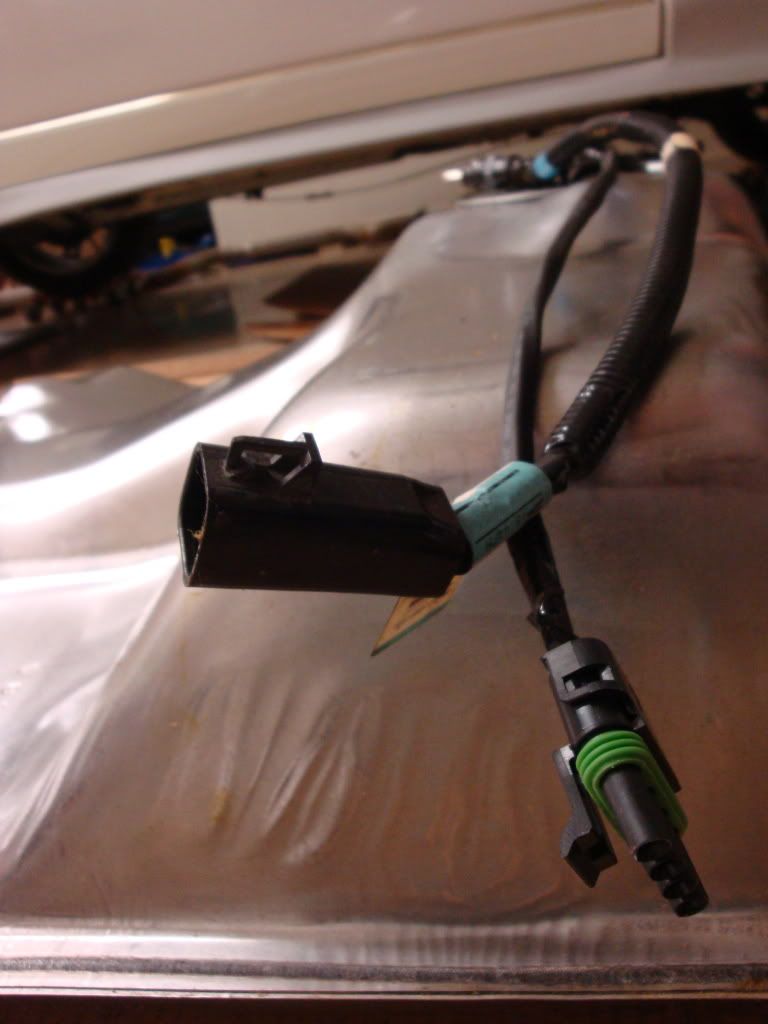
Wire harnesses ready to go:
Just need to run the new power wire from the inside of the car to the pumps. Everything up to this plug is 12 gauge (separate wiring for each pump in case I do a hobbs switch later). Also bought a mating plug to run the wiring from the car to it.
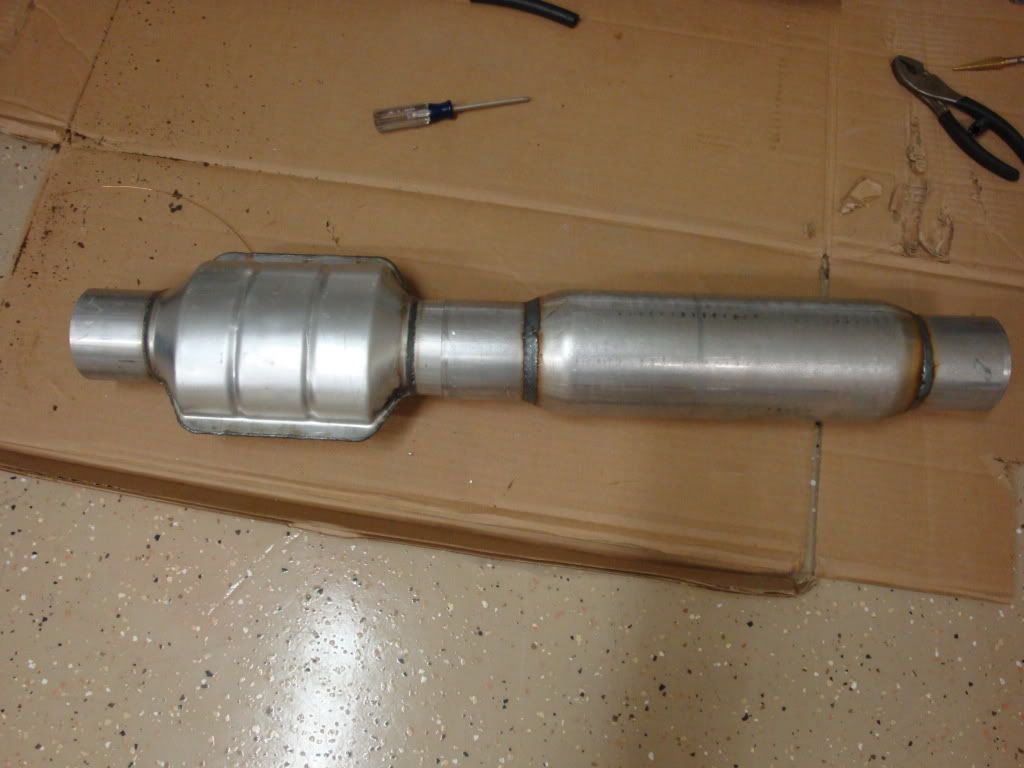
Next welding project- welding the 'cat' to the resonator:
Had to trim a couple of notches into the gas tank opening to get everything to clear (and it still takes a ton of maneuvering to get it in there), but the o-ring still has plenty of room to seal. What a pain in the butt...
Pic of the top:
I'm using the stock feed line as the new return- just flared it and put a new line nut on it. The two nipples are the new feed lines. Left the stock vent line, and cut off the stock return line flush with the surface. Also epoxied a 90* elbow in to run my new power wires through, and sealed them in.
I know the paint looks crumby- between the epoxy and the rust converter- the surface looks like crap- but it's going to be hidden anyways- just didn't want it rusting up any more.
Pic of everything installed:
The new sock looks goofy next to the old one- but I had to get something that I could bend 90* right next to the pump inlet to get it to fit through the tank opening. All of the new wiring is chem resistant, as is the heat shrink- so it shouldn't have any problems standing up to E85 long term.
Installed:
Wire harnesses ready to go:
Just need to run the new power wire from the inside of the car to the pumps. Everything up to this plug is 12 gauge (separate wiring for each pump in case I do a hobbs switch later). Also bought a mating plug to run the wiring from the car to it.
Next welding project- welding the 'cat' to the resonator:


Thread
Thread Starter
Forum
Replies
Last Post
Tip92
Engine/Transmission/Performance Adders
10
Dec 3, 2008 09:06 PM