
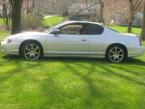
2004 silver bullet monte carlo SQ build


Cool stuff..I love building custom computers..
When I first started my amp layout in my 300 I almost gave up because it just wasnt going as planned.. then sat on it for 3 or 4 days and gave it another go and everything just fell into place and came out just as I wanted for the most part. Still have a few things to go about doing on it but It should Finnish up good...
Hope you can get something going good with the design..

Thread Starter
|


Joined: Dec 2010
Posts: 697
got a little video to share with you guys. once i get all the plug ins working and figuire out how to acualy use the software i'll upload another video. probobly after i get the flip out display. which is on it's way 
centrafuse demo - YouTube
centrafuse demo - YouTube
Thread Starter
|
Joined: Dec 2010
Posts: 697
alright. update, got more things worked out. it's really just been a massive R&D for this carputer, it's constantly figuiring out the easiest way to wire, fewest wires, yada yada. i'm quote proud of this topology i came up with. it is very streamline and requires only 1 backbone data line ran, and 1 video line ran. it's a bit hard to understand, but i'll be running ONE single USB 3.0 extension out the back of the computer from the trunk, up to the hub,t he hub will than get mounted to the inside of the center console, with the touchscreens USB pugged into it, the DVD rom will be powered and the data will travel through this backbone as well, the bandwith on USB 3.0 is just MASSIVE, if i was using 2.0 i'd be skechy about all this power and bandwith being used, but 3.0 is essencialy e-sata in this case.
enough chatering, here's the layout.

I'll be doing this mod to the screen i have (already in my posession and setup and configuried, i have a video i'll share in a moment.

~~~~~~~~ VIDEO ~~~~~~~~~~~~
centafuse test on touch screen - YouTube
~~~~~~~~ VIDEO ~~~~~~~~~~~~
it's gonna run me 180$ just for the periferals for my system. literly, the usb 3.0 to sata converter is 30$ than i need another 10$ to go from sata to slimline sata. i also need that industrial USB hub that's 80$ plus a 30$ dvd rom drive. USB externals, toslink cable was surprisenly 5$ for a 10 foot cable, so i'll have plenty of slack.
some other updates, i got the video card for the touchscreen, as i desovered my motherboard is all digital so i had to get a video card with d-sub analog output. after some research i came up with this card, it's an ATI card with 256 cores, that runs at 10 watts or less, 13 watts max load, 7 watts iddle. so for my needs i'll be drawin between 7 and 10 watts. on top of the 100 watt CPU, figuire 50 watts for the motherboard. so we're really close to the 250 watt limit of my power supply plus a 15 watt Hard drive, a 6 watt SSD, and the dvd rom is another 15 watts if running (it'll never be running) and the dvd rom in the front will have it's own indipendent power feed, as you can see the adapter i found has external power, so not only am i not uisng my hub's power, i'm not using my computers power to power that drive. giving me plenty of head room for all my demands.


this is my latest layout, as you can see back to external procesisng. not a big deal in the long term, another 100$ over the internal processing choice.

enough chatering, here's the layout.
I'll be doing this mod to the screen i have (already in my posession and setup and configuried, i have a video i'll share in a moment.
~~~~~~~~ VIDEO ~~~~~~~~~~~~
centafuse test on touch screen - YouTube
~~~~~~~~ VIDEO ~~~~~~~~~~~~
it's gonna run me 180$ just for the periferals for my system. literly, the usb 3.0 to sata converter is 30$ than i need another 10$ to go from sata to slimline sata. i also need that industrial USB hub that's 80$ plus a 30$ dvd rom drive. USB externals, toslink cable was surprisenly 5$ for a 10 foot cable, so i'll have plenty of slack.
some other updates, i got the video card for the touchscreen, as i desovered my motherboard is all digital so i had to get a video card with d-sub analog output. after some research i came up with this card, it's an ATI card with 256 cores, that runs at 10 watts or less, 13 watts max load, 7 watts iddle. so for my needs i'll be drawin between 7 and 10 watts. on top of the 100 watt CPU, figuire 50 watts for the motherboard. so we're really close to the 250 watt limit of my power supply
plus a 15 watt Hard drive, a 6 watt SSD, and the dvd rom is another 15 watts if running (it'll never be running) and the dvd rom in the front will have it's own indipendent power feed, as you can see the adapter i found has external power, so not only am i not uisng my hub's power, i'm not using my computers power to power that drive. giving me plenty of head room for all my demands. this is my latest layout, as you can see back to external procesisng. not a big deal in the long term, another 100$ over the internal processing choice.
Last edited by walkingonabullet; Dec 18, 2011 at 10:40 AM.


Thread Starter
|
Joined: Dec 2010
Posts: 697
minotaur ORDERED  i'll be going with the helix P dsp unit like noted above. i just sold my 2 alpine PDX amps. some of that moneys going for Christmas so i'll be saving for a little bit longer. i might end up going with the C unit if its out by the time i have the cash but anyways.
i removed the old deck today..wow forgot how much work i put into that job haha, just wow. the wiring and soldeirng impressed even myself O_O very solid work lol, massive pain in the *** to remove because of all the hooks i had though. but just sharing i guess, no real updates.


and shipped out :P

i'll be going with the helix P dsp unit like noted above. i just sold my 2 alpine PDX amps. some of that moneys going for Christmas so i'll be saving for a little bit longer. i might end up going with the C unit if its out by the time i have the cash but anyways.i removed the old deck today..wow forgot how much work i put into that job haha, just wow. the wiring and soldeirng impressed even myself O_O very solid work lol, massive pain in the *** to remove because of all the hooks i had though. but just sharing i guess, no real updates.
and shipped out :P
Thread Starter
|
Joined: Dec 2010
Posts: 697
alright! got some fab work in :P i had to fab the case pretty hard to get the sound card to fit since i didnt have a pci slot i had to use a converter and that had it sititng up higher and that caused me all kinds of headachs, pretty much had to tear it all down so I could take a grinder to it to grind out the space needed for the sound card in its new position. this is the LAST of the internal work in the computer its self, ive also added a small plate I fabbed over the second harness and bolted it to that to hold the sound card still while it's in my car, cause a car obviously isn't a static environment.


here you can see i had to cut into this, i also wraped it with some tape so that the contacts of the transister on the back of the card doesn't short on the metal, which could be trouble :-s


so theirs that, i did a few more things that i didn't take pictures of, but you get the idea. this will be essentially my processor. 170$ 30$ for the adapter.
and onto my side project. i put in a new 24" LED backlit LCD for my gaming rig, so i took some pictures for ****s and giggles to log it.

old screen, now the new side monitor (i origonaly had a 17" and this one, i got rid of the 17" and replaced it with the old 22")


here you can see i had to cut into this, i also wraped it with some tape so that the contacts of the transister on the back of the card doesn't short on the metal, which could be trouble :-s
so theirs that, i did a few more things that i didn't take pictures of, but you get the idea. this will be essentially my processor. 170$ 30$ for the adapter.
and onto my side project. i put in a new 24" LED backlit LCD for my gaming rig, so i took some pictures for ****s and giggles to log it.
old screen, now the new side monitor (i origonaly had a 17" and this one, i got rid of the 17" and replaced it with the old 22")


comming togeather wonderfuly man! i want to see that carputer in action! its gonna be sick. those amps your running are beautiful! i love the plexiglass heat sinks on them. wiring all that will be a fun task! :p
Thread Starter
|
Joined: Dec 2010
Posts: 697
ahh loving this wheather, i really should of done more than make a set of rings this week but i havne't had much modivation to anything of late. been a really hard year, 2011 by far my werst year, but allot happend some good some bad. well its 2012 and its a new start heres the rings i made with the grills i picked up awhile back, dont think ima recess them like i though i might.
currently i don't even have my car, its at A & S instillation getting the alarm fixed FINELY. was gonna get the windows tinted while it was in the shop, but i had extra expediences that i did not anticipate they wouldn't use the bypass i had purchased and they wouldn't use the old one i had on the current alarm. got a viper this time, can't go wrong with a viper...I hope O_O
anyways, here are some pictures so at least im not ranting, the clerences look good, i think it'll be mounted osmething like this, except maybe a 1\4" off the door panel, but since it was just laying their i couldn't really mock it up all that well :P


oh, and lets not forget the deer I hit 3 weeks ago, was a glancing blow but it did some considerible damage to my wallet, well it would of had I not claimed it with my insurance, they origonaly quoted 1300$ but it came out to 2500$. needed a new hood, and my whole front end was pretty much painted. the colors are still a little wonky, i wasn't to happy with the blending but once everything gets some wear on it I'm sure it'll even out. its honestly as close as he could get it, its just the aged parts are some what obviouse in the right lighting. fortunately its very very hard to tell.
BEFORE - what you can't see is a crack in the middle of the bumper, and you can see the one large crack in the head light, their were 2 cracks. i honestly didnt even notice the crack in the bumper or the head light until my insurance agent told me about em lol

AFTER -

heres the rings i made with the grills i picked up awhile back, dont think ima recess them like i though i might. currently i don't even have my car, its at A & S instillation getting the alarm fixed FINELY. was gonna get the windows tinted while it was in the shop, but i had extra expediences that i did not anticipate
they wouldn't use the bypass i had purchased and they wouldn't use the old one i had on the current alarm. got a viper this time, can't go wrong with a viper...I hope O_O anyways, here are some pictures so at least im not ranting, the clerences look good, i think it'll be mounted osmething like this, except maybe a 1\4" off the door panel, but since it was just laying their i couldn't really mock it up all that well :P
oh, and lets not forget the deer I hit 3 weeks ago, was a glancing blow but it did some considerible damage to my wallet, well it would of had I not claimed it with my insurance, they origonaly quoted 1300$ but it came out to 2500$. needed a new hood, and my whole front end was pretty much painted. the colors are still a little wonky, i wasn't to happy with the blending but once everything gets some wear on it I'm sure it'll even out. its honestly as close as he could get it, its just the aged parts are some what obviouse in the right lighting. fortunately its very very hard to tell.
BEFORE - what you can't see is a crack in the middle of the bumper, and you can see the one large crack in the head light, their were 2 cracks. i honestly didnt even notice the crack in the bumper or the head light until my insurance agent told me about em lol
AFTER -
