
Whipple status update


Thread Starter


Joined: Feb 2008
Posts: 6,477

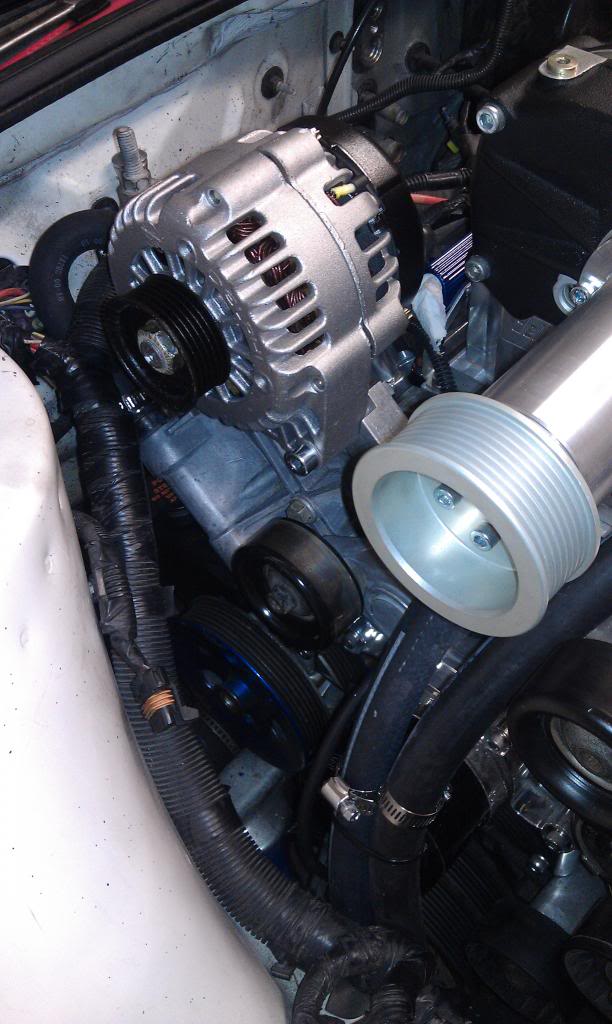
Didn't get much more done today other than all the running to get the parts. I set up the alternator and mount real quick though. The tensioner looks like it will work perfectly, it just barely clears the IC hoses. It is a little tight at the firewall plug with the coolant hoses, but I can work around that.
However, the new alternator runs smack into the whipple now. With the old 98 setup, it was close, but didn't quite touch (of course the tensioner sat right in front of the rear IC port, so that setup would never work). It's a solid 3/4" off from bolting up. Looks like I'm going to have to order the ZZP alternator relocation brackets....
However, the new alternator runs smack into the whipple now. With the old 98 setup, it was close, but didn't quite touch (of course the tensioner sat right in front of the rear IC port, so that setup would never work). It's a solid 3/4" off from bolting up. Looks like I'm going to have to order the ZZP alternator relocation brackets....
Monte Of The Month -- May 2012
Monte Of The Year 2012
Monte Of The Month -- February 2017
Monte Of The Year 2012
Monte Of The Month -- February 2017

Joined: Jan 2008
Posts: 4,945
From: Mountains of Utah
Nice bit of work you have outlined for yourself. Best of luck. The Aeromotive fuel pump speed controller is top notch!
Sucks the alternator is being a bear. It's always something, my motto in life is "Don't worry, nothing will be okay!"
Won't be long and we can all see your build on a few videos getting busy blasting around the streets, er I mean track...
Sucks the alternator is being a bear. It's always something, my motto in life is "Don't worry, nothing will be okay!"
Won't be long and we can all see your build on a few videos getting busy blasting around the streets, er I mean track...
Thread Starter
Joined: Feb 2008
Posts: 6,477
Well, it looks like we're back rolling again. Last night I placed an order for some overnight parts from Japan (in the fast & furious voice). Not really, but they are overnight parts from ZZP  (the alternator relocation brackets).
I got a new NAPA alternator in today to replace the nasty old junkyard one, and grabbed some steel to build brackets for the catch cans and to build into supports for the IC lines.
Still waiting on 2 more things other than the alternator brackets:
-I ordered two inner CV axle boot kits from Napa so I can rebuild my hybrid axles. One came in fine in a nice new Napa box. The other came in an old style beat up box missing the grease, the axle clips, and the small end boot clamp. Waiting on a replacement to come in from the LA distribution center.
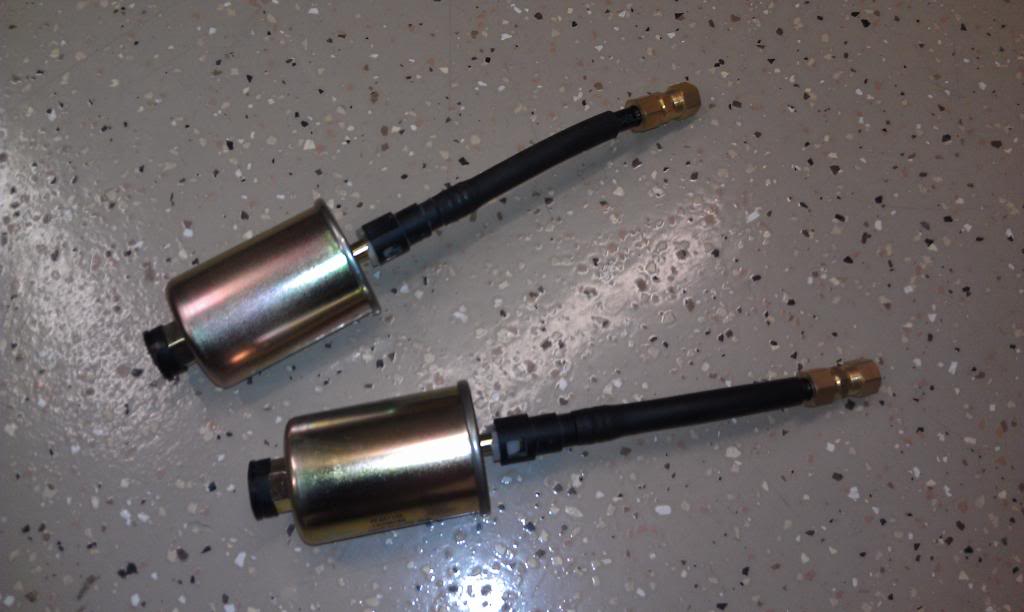
-I ordered some fittings from Oriely's to connect 3/8" steel line to 3/8" nylon line (compression fittings on both end). That'll let me use the quick disconnects I grabbed at the junkyard on the fuel filters without using a bunch of adapters or the nylon barbs.
Thanks! Just a quick question- did you need anything special to connect the tach wire on that thing? I know it says you need a special adapter for LS engines and such, just wasn't sure if you had any issues just tapping off the ICM harness?
That's the most frustrating thing about this recent round of the build is that not hardly a single project seems to go smoothly anymore without need all kinds of customization and tweaking and $50 in adapters from the parts store.
One good example of this is the stupid cutout I got from Jegs. I have a Jegs cutout, with a Jegs 3" flange set, with a Jegs gasket & bolt kit. This stuff should all match perfectly since it's all from the same vendor. I go to dry fit the parts just to make sure they all bolt together, and sure enough- they don't. I got the 'thick' flange to minimize warpage when I weld it on. Even without the gasket- just the cutout and flange, I still only have literally 1 thread poking out. Even if the flange were half this thickness, by the time I add a gasket, it certainly wouldn't have had enough thread to even fill the nut completely. One more trip to Ace for new bolts...
It's so much easier doing mods to the vette where the parts just bolt on and go, but I know in the end that this will be more rewarding.
(the alternator relocation brackets).I got a new NAPA alternator in today to replace the nasty old junkyard one, and grabbed some steel to build brackets for the catch cans and to build into supports for the IC lines.
Still waiting on 2 more things other than the alternator brackets:
-I ordered two inner CV axle boot kits from Napa so I can rebuild my hybrid axles. One came in fine in a nice new Napa box. The other came in an old style beat up box missing the grease, the axle clips, and the small end boot clamp. Waiting on a replacement to come in from the LA distribution center.
-I ordered some fittings from Oriely's to connect 3/8" steel line to 3/8" nylon line (compression fittings on both end). That'll let me use the quick disconnects I grabbed at the junkyard on the fuel filters without using a bunch of adapters or the nylon barbs.
Sucks the alternator is being a bear. It's always something, my motto in life is "Don't worry, nothing will be okay!"
One good example of this is the stupid cutout I got from Jegs. I have a Jegs cutout, with a Jegs 3" flange set, with a Jegs gasket & bolt kit. This stuff should all match perfectly since it's all from the same vendor. I go to dry fit the parts just to make sure they all bolt together, and sure enough- they don't. I got the 'thick' flange to minimize warpage when I weld it on. Even without the gasket- just the cutout and flange, I still only have literally 1 thread poking out. Even if the flange were half this thickness, by the time I add a gasket, it certainly wouldn't have had enough thread to even fill the nut completely. One more trip to Ace for new bolts...
It's so much easier doing mods to the vette where the parts just bolt on and go, but I know in the end that this will be more rewarding.
Last edited by bumpin96monte; Apr 24, 2014 at 06:54 PM.
Thread Starter
Joined: Feb 2008
Posts: 6,477
Not a whole lot of progress today:
-Cleaned up and painted the last of the upper mounts (the passenger side rad support connection).
-Cleaned up the new alternator mount/tensioner (broke both coolant elbows off inside, took forever to get them out).
-Filled the SC with oil. No leaks- woot!
-Test fit the new alternator mount/tensioner- fits great. Not sure what to do about the coolant lines though. It's going to clutter it up a bit in the rear if I hook them back up, but looping them might look goofy too.
-Got the SC tensioner back on with my new nut from the junkyard. Out of the 4,8 rib SC belts I have, not a single one fits. It's shorter than my shortest belt by at least an inch. Looks like I've got some running to do tomorrow.
-Trying to look for a spot to mount the catch cans. It looks like they're going to end up right in front of the ABS controller / right under the intake. If I go that route, it's going to be a pain to empty them, and I'll also have to run my fuel hard lines much further up. I'm not sure of any other places to go without making the lines much longer.
-Messed with a location for the FPR. I still can't find a spot I'm happy with. The easy spot would be on the passenger side strut tower. The downside here is that it will look a bit messy with all the lines (2 feeds, 1 return). I'd like to mount it almost right on a rail, or near them. I guess I'll have to see if I have space there once the alternator goes in.
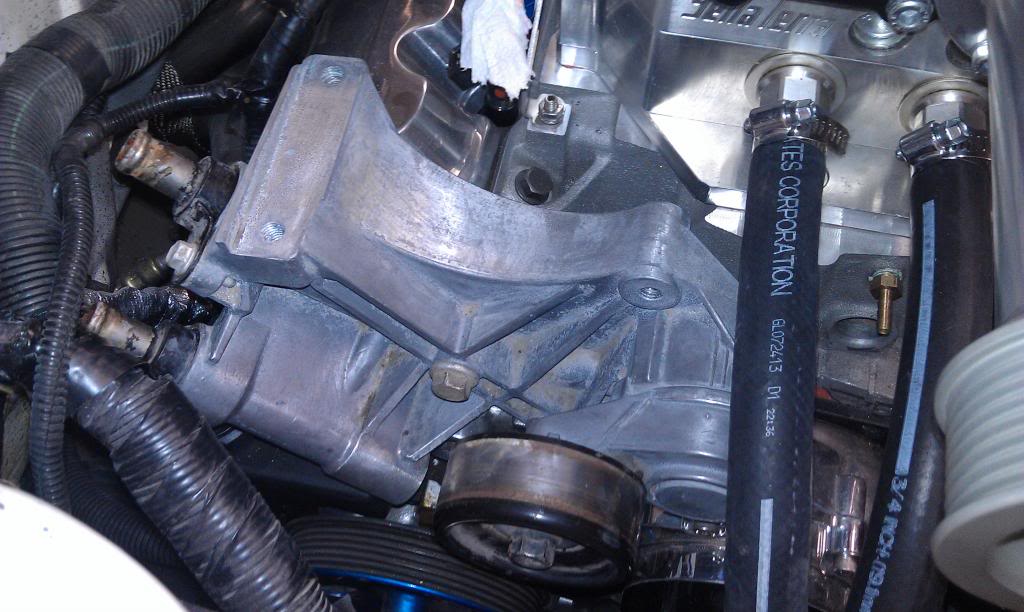
Still need to finish cleaning the bracket, but got most of the dust/grease cleaned off. Just bolted it up to make sure it fits, and to make sure the tensioner works. That tensioner is sure is super stiff!
-Cleaned up and painted the last of the upper mounts (the passenger side rad support connection).
-Cleaned up the new alternator mount/tensioner (broke both coolant elbows off inside, took forever to get them out).
-Filled the SC with oil. No leaks- woot!
-Test fit the new alternator mount/tensioner- fits great. Not sure what to do about the coolant lines though. It's going to clutter it up a bit in the rear if I hook them back up, but looping them might look goofy too.
-Got the SC tensioner back on with my new nut from the junkyard. Out of the 4,8 rib SC belts I have, not a single one fits. It's shorter than my shortest belt by at least an inch. Looks like I've got some running to do tomorrow.
-Trying to look for a spot to mount the catch cans. It looks like they're going to end up right in front of the ABS controller / right under the intake. If I go that route, it's going to be a pain to empty them, and I'll also have to run my fuel hard lines much further up. I'm not sure of any other places to go without making the lines much longer.
-Messed with a location for the FPR. I still can't find a spot I'm happy with. The easy spot would be on the passenger side strut tower. The downside here is that it will look a bit messy with all the lines (2 feeds, 1 return). I'd like to mount it almost right on a rail, or near them. I guess I'll have to see if I have space there once the alternator goes in.
Still need to finish cleaning the bracket, but got most of the dust/grease cleaned off. Just bolted it up to make sure it fits, and to make sure the tensioner works. That tensioner is sure is super stiff!

Thread Starter
Joined: Feb 2008
Posts: 6,477
Made some headway today, although not as much as I would've liked to. Seems like everything is still fighting.
-Finished painting and installing passenger side dogbone setup
-Finished cleaning and final installed alternator bracket / tensioner
-Installed alternator and relocation kit. Ended up fitting great with the relocation kit
-Finished installing trans dipstick. This was a total pain in the butt. Due to the proximity to the headers, I wanted to put heat shield wrap on it. This involved taking off the end fittings (Lokar dipstick). That part went great, but putting it back on, the steel braid got caught up in the threads and goofed them all up when I went to tighten it. Had to do all kinds of work to finally get it back together. Should've just left it as it was, and screwed it to the firewall.
-Looped the heater hose. This was a bit of a pain too. I tried to do it with regular 5/8" hose, and it kinked completely closed. Had to go back to the parts store to get some pre-formed hose that was close and cut that to fit.
-Tried to install the new accessory belt. That was a big no-go. The clubgp FAQ said I needed a 060887 Gates belt. I guess it's no longer carried, so I got the next closest one- the 060885. Figures, it's too short. That'll go back tomorrow for the next step longer. I still have no idea if I'll have to swap tensioner pullies either. With the 98 setup, the belt coming off the crank pulley hit the PS pulley until I put on a 3.5" pulley on the tensioner (stock is 3.0"). If I get the next step belt longer, and it hits- I hope that I can still use the same belt length if I need to swap tensioners...
-Tried to install the special ordered $50 SC belt. I have 4 laying around, all are too long. There was one available 1" shorter, and one available almost 2" shorter than my current shortest belt. I got the shorter one of the two options. Of course, it doesn't fit. In a pinch I suppose I could barely get it on there with some prying and stretching (I got 6 of 8 ribs on the blower), but the tensioner was literally maxed. I think I'm going to keep it though- it might fit my 74mm or 64mm pullies (right now the blower has an 82mm). Still have to go order a new one tomorrow.
-Started filling the cooling system. Looks to be good with no leaks. Tomorrow is the T-stat and upper hose and to finish filling it.
-Tried to start installing the wiring harness. That's a no-go too. The injector plugs won't fit. The big spring clip deal hits the valve covers. Looks like I'm going to have to pull the fuel rails back off to plug the injectors in, and then install the injectors/rail plugged into the harness. I'm not sure if it's the AL valve covers, or the Bosch Racing injectors- but one of the two is causing an unusual interference issue.
Some pics from today:
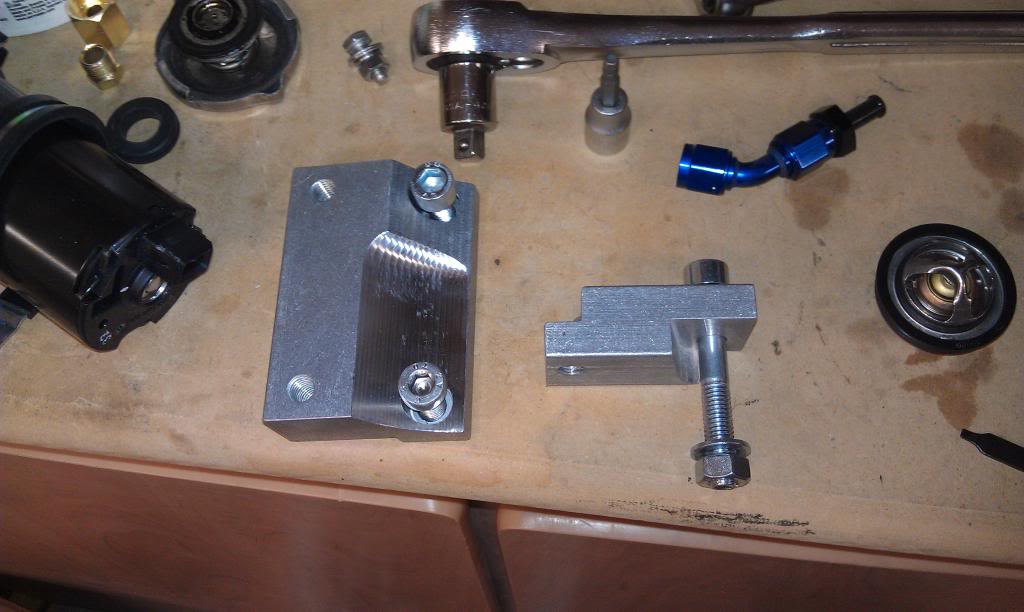
ZZP alt relocation brackets
Trans dipstick installed
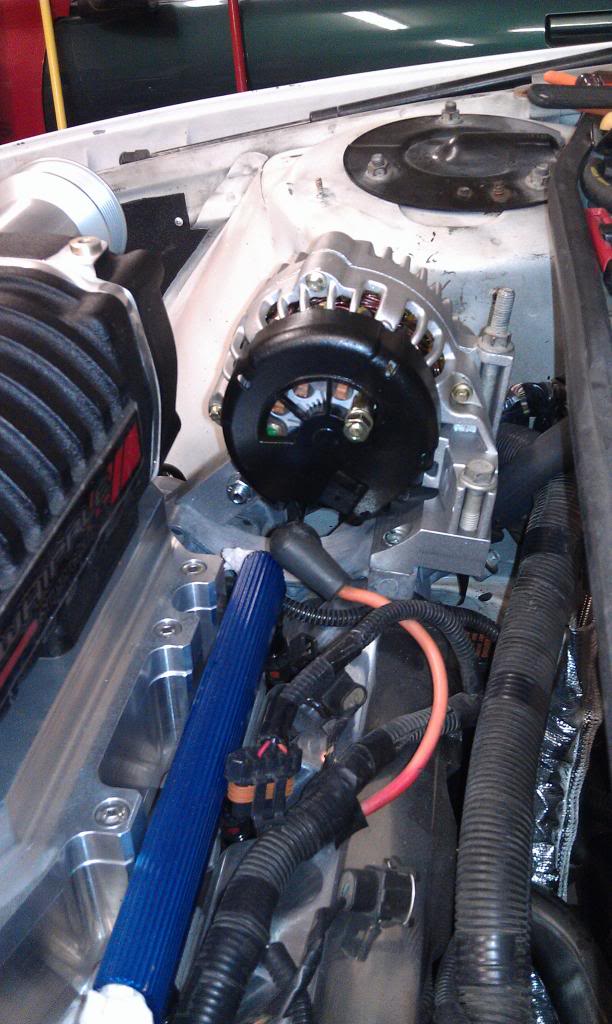
Alternator mounted
Alternator rear
Both dogbone mounts installed
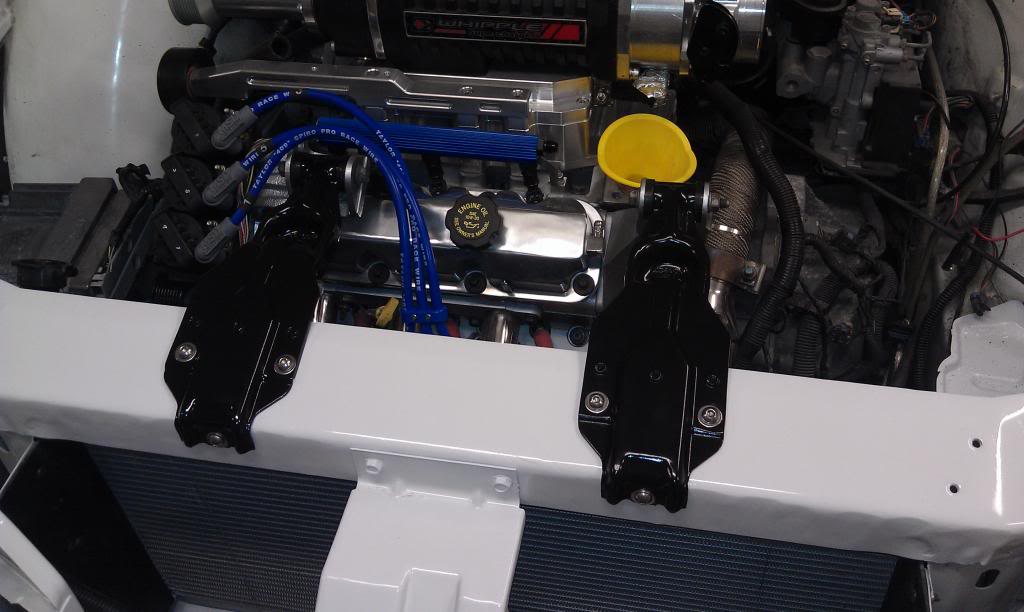
-Finished painting and installing passenger side dogbone setup
-Finished cleaning and final installed alternator bracket / tensioner
-Installed alternator and relocation kit. Ended up fitting great with the relocation kit
-Finished installing trans dipstick. This was a total pain in the butt. Due to the proximity to the headers, I wanted to put heat shield wrap on it. This involved taking off the end fittings (Lokar dipstick). That part went great, but putting it back on, the steel braid got caught up in the threads and goofed them all up when I went to tighten it. Had to do all kinds of work to finally get it back together. Should've just left it as it was, and screwed it to the firewall.
-Looped the heater hose. This was a bit of a pain too. I tried to do it with regular 5/8" hose, and it kinked completely closed. Had to go back to the parts store to get some pre-formed hose that was close and cut that to fit.
-Tried to install the new accessory belt. That was a big no-go. The clubgp FAQ said I needed a 060887 Gates belt. I guess it's no longer carried, so I got the next closest one- the 060885. Figures, it's too short. That'll go back tomorrow for the next step longer. I still have no idea if I'll have to swap tensioner pullies either. With the 98 setup, the belt coming off the crank pulley hit the PS pulley until I put on a 3.5" pulley on the tensioner (stock is 3.0"). If I get the next step belt longer, and it hits- I hope that I can still use the same belt length if I need to swap tensioners...
-Tried to install the special ordered $50 SC belt. I have 4 laying around, all are too long. There was one available 1" shorter, and one available almost 2" shorter than my current shortest belt. I got the shorter one of the two options. Of course, it doesn't fit. In a pinch I suppose I could barely get it on there with some prying and stretching (I got 6 of 8 ribs on the blower), but the tensioner was literally maxed. I think I'm going to keep it though- it might fit my 74mm or 64mm pullies (right now the blower has an 82mm). Still have to go order a new one tomorrow.
-Started filling the cooling system. Looks to be good with no leaks. Tomorrow is the T-stat and upper hose and to finish filling it.
-Tried to start installing the wiring harness. That's a no-go too. The injector plugs won't fit. The big spring clip deal hits the valve covers. Looks like I'm going to have to pull the fuel rails back off to plug the injectors in, and then install the injectors/rail plugged into the harness. I'm not sure if it's the AL valve covers, or the Bosch Racing injectors- but one of the two is causing an unusual interference issue.
Some pics from today:
ZZP alt relocation brackets

Trans dipstick installed

Alternator mounted

Alternator rear

Both dogbone mounts installed

Last edited by bumpin96monte; Apr 26, 2014 at 12:14 AM.
Thread Starter
Joined: Feb 2008
Posts: 6,477
Made some decent progress today, although it is becoming apparent that getting her started is not going to happen this weekend.
Finally got adapters in to connect 3/8" nylon line to 3/8" steel line, so I got the fuel filters hooked up to the quick disconnects (they will be facing the right direction with the quick disconnects facing out vs how a lot of the GP people hook them up since the GP quick disconnect is on the inlet side).
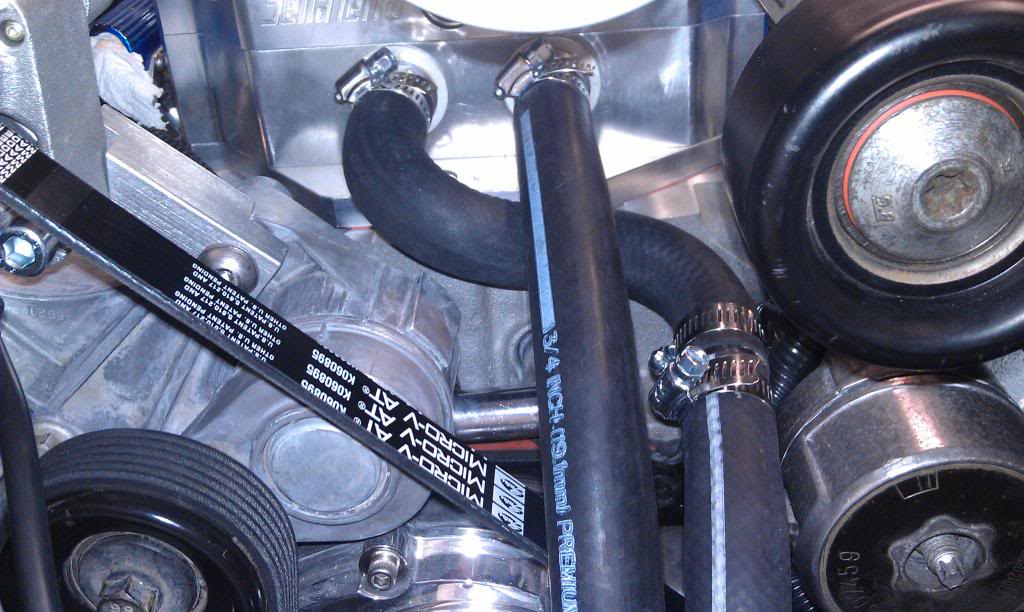
Ended up finding an accessory belt length that will work. Since they don't carry the size listed on clubgp, I went shorter initially and it didn't fit. The longer one works just fine. However, I also found out that one of my IC lines was resting on the belt. Had to go to the parts store again to get some pre-bent line to make sure it stays out of the way. It looks ugly with the extra splice, but I'd rather that that burn up a belt or a coolant line from them touching.
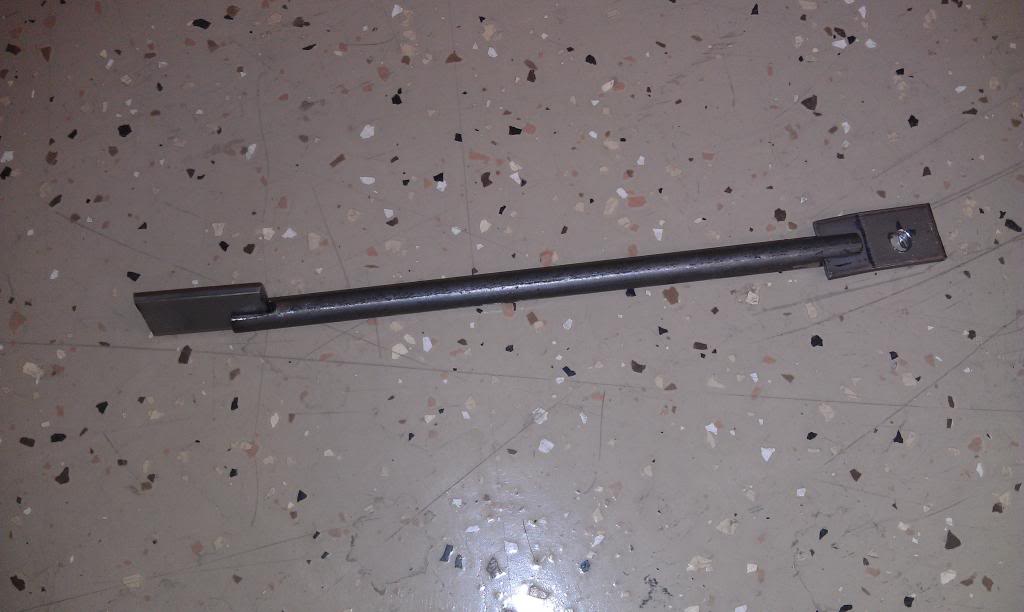
I started working on some brackets to hold the IC lines going down the side of the car. Because I am limited with how I can bend the metal, it didn't quite bend up how I planned, but it looks like it might still work. I want to try a little more bending to make it look nicer. The tab hanging out on the right side will be drilled through the pinch weld seam. The plan is to have at least 3 hangers to ensure proper support down the length of the car. I didn't build any more as I think I want to try another one a little differently to make it look more professional.

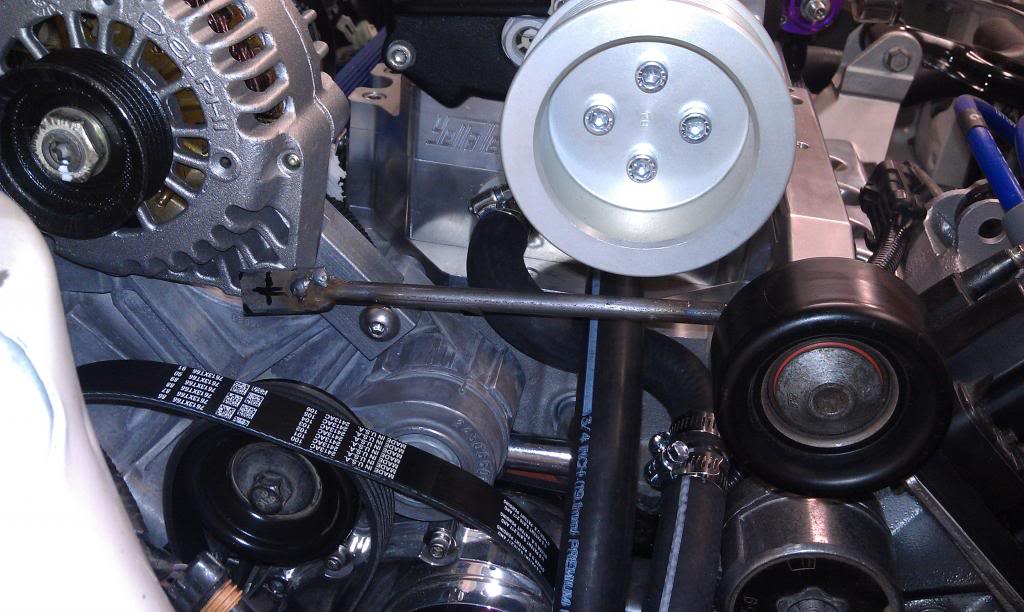
I had completely forgotten that when I bought the SC belt wrap setup, the previous owner had lost the alternator tie bar. This keeps the end from flexing around since there is so much distance to the first support.
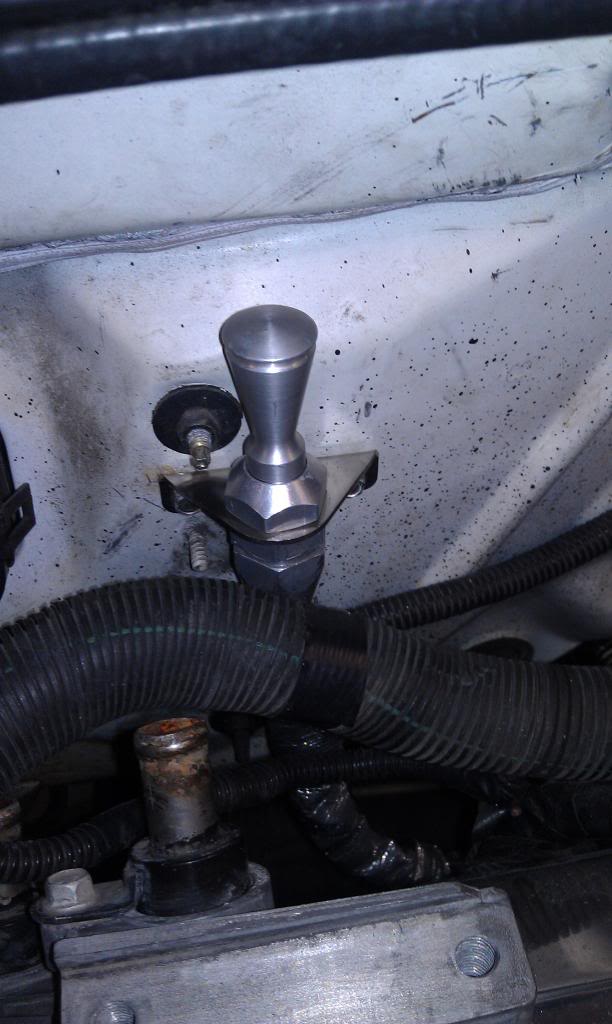
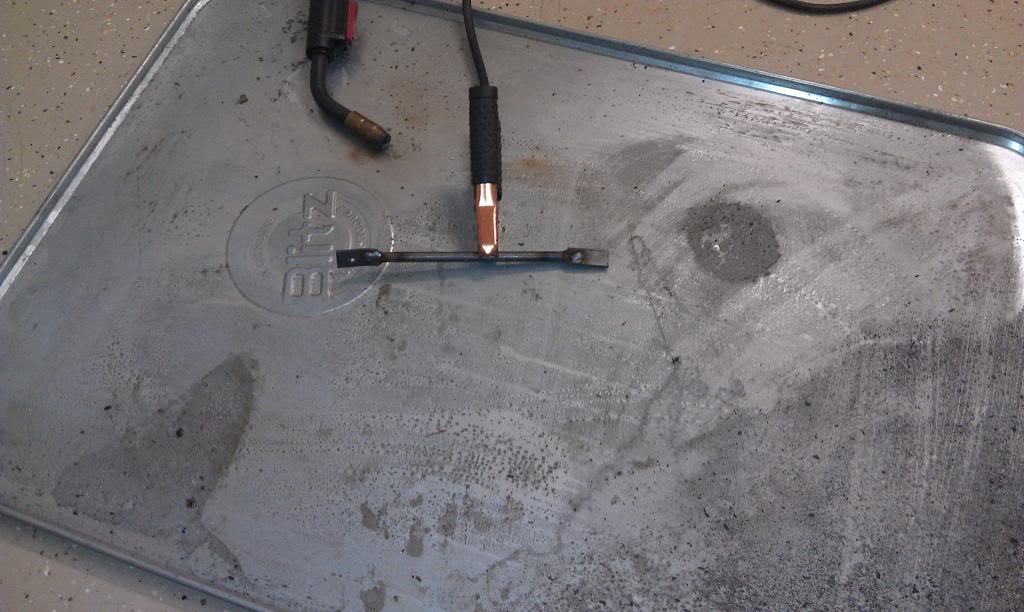
I cut some rod and some 1/8" plate to make the tie bar and the end mounts:
Welded up:
View from the front (it mounts underneath the belt wrap bar)- you can see it shooting straight back towards the alternator:
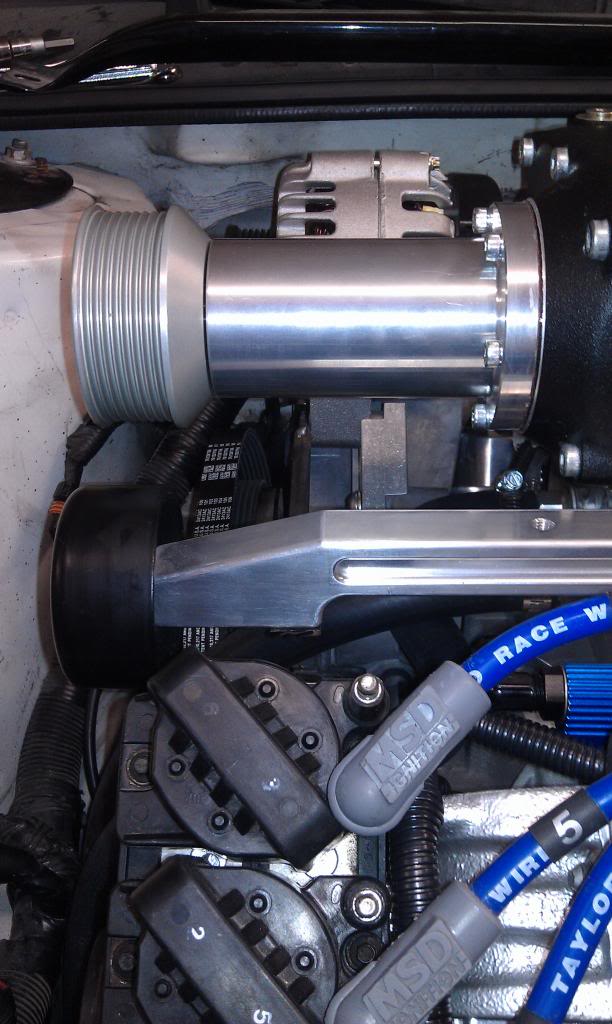
Side view. I still need to drill the rear mount hole, but I'm going to wait until I grind everything down tomorrow. The plan is to round off the ends, and blend the rod into the plates.
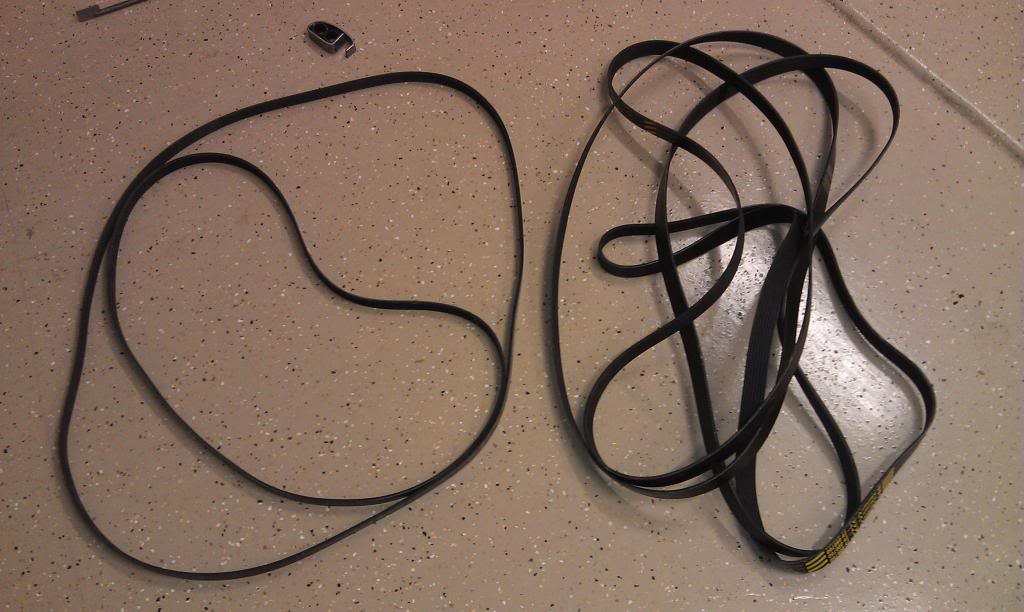
Pretty crazy, I had 6 belts going into this project, and not a single one worked. 2x 6 ribs and 4x 8 ribs and none work....
I did get the thermostat housing painted and back on. I used to have it polished, but it was corroded pretty heavily from not being polished in so long. I started buffing it back up, but figured it wasn't worth the hassle, so I just sprayed it.
Was also thinking about an alternative for the FPR setup. I could feed the rails from the passenger side, then the front rail would dump directly into the side (now bottom) of the FPR and the rear rail would have a braided hose to jump over the SC and dump into the top. Then I would have the return go back up the driver's side. It would certainly make everything a little more compact, but I'm not real crazy about going over the blower with fuel line (it's already super tall as it is), and it would put the vacuum line shooting up at an odd 45* angle.

The biggest set back today was the TB cable. I'm still not real sure of a plan for it. I think I'm going to make a bracket that attaches to the two inlet adapter mount points, but I'm having a hard time making something that will look good and eliminate flexing (usually the mount points are side by side instead of up/down). Just holding it in place, the cable seems extremely stiff, and the I still have the downside of a throttle cable looping around the passenger's side of the blower that looks dumb. Oh well...
Finally got adapters in to connect 3/8" nylon line to 3/8" steel line, so I got the fuel filters hooked up to the quick disconnects (they will be facing the right direction with the quick disconnects facing out vs how a lot of the GP people hook them up since the GP quick disconnect is on the inlet side).

Ended up finding an accessory belt length that will work. Since they don't carry the size listed on clubgp, I went shorter initially and it didn't fit. The longer one works just fine. However, I also found out that one of my IC lines was resting on the belt. Had to go to the parts store again to get some pre-bent line to make sure it stays out of the way. It looks ugly with the extra splice, but I'd rather that that burn up a belt or a coolant line from them touching.

I started working on some brackets to hold the IC lines going down the side of the car. Because I am limited with how I can bend the metal, it didn't quite bend up how I planned, but it looks like it might still work. I want to try a little more bending to make it look nicer. The tab hanging out on the right side will be drilled through the pinch weld seam. The plan is to have at least 3 hangers to ensure proper support down the length of the car. I didn't build any more as I think I want to try another one a little differently to make it look more professional.

I had completely forgotten that when I bought the SC belt wrap setup, the previous owner had lost the alternator tie bar. This keeps the end from flexing around since there is so much distance to the first support.
I cut some rod and some 1/8" plate to make the tie bar and the end mounts:

Welded up:

View from the front (it mounts underneath the belt wrap bar)- you can see it shooting straight back towards the alternator:

Side view. I still need to drill the rear mount hole, but I'm going to wait until I grind everything down tomorrow. The plan is to round off the ends, and blend the rod into the plates.

Pretty crazy, I had 6 belts going into this project, and not a single one worked. 2x 6 ribs and 4x 8 ribs and none work....

I did get the thermostat housing painted and back on. I used to have it polished, but it was corroded pretty heavily from not being polished in so long. I started buffing it back up, but figured it wasn't worth the hassle, so I just sprayed it.
Was also thinking about an alternative for the FPR setup. I could feed the rails from the passenger side, then the front rail would dump directly into the side (now bottom) of the FPR and the rear rail would have a braided hose to jump over the SC and dump into the top. Then I would have the return go back up the driver's side. It would certainly make everything a little more compact, but I'm not real crazy about going over the blower with fuel line (it's already super tall as it is), and it would put the vacuum line shooting up at an odd 45* angle.

The biggest set back today was the TB cable. I'm still not real sure of a plan for it. I think I'm going to make a bracket that attaches to the two inlet adapter mount points, but I'm having a hard time making something that will look good and eliminate flexing (usually the mount points are side by side instead of up/down). Just holding it in place, the cable seems extremely stiff, and the I still have the downside of a throttle cable looping around the passenger's side of the blower that looks dumb. Oh well...


Joined: Apr 2014
Posts: 26
very nicely done build...truely a piece of automotive art
In regards to your last few issues
1) Hoses running to cooler. Have you thought of using silicone hose for the connections, and the correct size aluminum tubing? Both are offered in various lengths, and bends. I have seen this done with many race teams here in NC. Plus with the aluminum tubing either polished or coated it would really make it stand out and give another WOW factor to your awesome build.
2) Alternator Tie Bar What about using Female threaded tubing and adjustable Rod ends? Not the right length but something like this.
Thread Starter
Joined: Feb 2008
Posts: 6,477
Been making a little more progress lately:
-Finished the alternator tie bar for the belt wrap kit.
-Got an accessory belt of the correct length installed.
-Got a SC belt that will work for my largest ~3.25" SC pulley only (unfortunately, the belt coming off the tensioner is pretty close to touching itself coming back across the belt wrap kit). I'm not entirely sure it will be able to drive like it is- it is really going to depend how much the tensioner rotates. I may end up having to go with smaller pullies on the tensioner (currently 3") and belt wrap (currently 2.75"). If nothing else, there certainly is no way to ever swap to a smaller pulley with the current setup, so I will have to work on something. This is absolutely the shortest belt I can fit on also (to rotate the tensioner as far as possible).
-Started getting the wiring put back together. Unfortunately, either the aluminum valve covers or the new injectors (or both) causes me to have to remove the fuel rail to plug in the injectors. It isn't really a big deal, just odd. The Bosch injectors are much shorter than stock and have to use an adapter hat on top to get the length correct, so I bet that's the cause. I did have to pull the harness apart around the inlet to the blower. I removed the boost bypass plug, and also had to reroute the IAC and TPS plugs since these parts will now be in a much different location. I'm still thinking about cutting off the adapters (TPS, IAT, MAF) and soldering the new 'correct' plug straight onto the harness. It would sure look a lot nicer, but it's one more project that doesn't NEED to happen to make the car run again either.
-The IC setup is fully run now. Total capacity is just under 4 gallons. I was a bit concerned about the Bosch pump not being able to keep up due to all the bends and hose length, but it works great. Does kinda sound like a waterfall inside the car when the tank isn't full- all the splashing in that aluminum tank in a big open trunk sure is noisy. Now that I've filled it above the return port, it's much quieter.
-I reinstalled the main radiator overflow tank, and finished off the engine's cooling system also. I've bled it as best I can (electric water pump,drilled thermostat)- but it's going to need to do a full cycle to operating temp to get it finished off.
-I tried to develop a solution to mount the boost bypass valve (basically a 1.5" vacuum actuated TB), but couldn't figure out anything. My original plan was to mount it on the bottom of the TB adapter since it is flat, but there is just no room left down there. The hard connector for the other end of the bypass in the lower IC sticks out too far, and my straight through bypass (vs 90* bypass) just can't make that tight of a turn and plug in. If I had got a 90* bypass, it might've been possible, but I can't justify spending another $300+ on one of those for the remote chance that it might work. So I broke down and took the TB adapter to a fabrication shop last Monday. They're going to machine a block to weld onto the firewall side of the TB adapter so I have a flat place to mount the bypass valve to. They're also going to weld off all the rest of the holes as well (EGR, old bypass valve, etc). I hate having to take stuff out to get it done, but I just don't have the machine tools or the aluminum welding confidence to do it right.
-Started running the fuel lines off the tank. Ran into more road blocks there. I had planned to put both filters staggered in the OEM location, but that isn't going to work. I can put one there, and the other will have to go in the divot about halfway up the car. I also had planned to use the stock line holders, but they're too brittle. Getting the OEM lines out breaks them. So I'm going to switch gears and probably just use those rubber lined P clips to hold them on.
-Got the PCM tune all finished up tonight. I basically went back to the OEM tune and started from there- tune for injectors, e85, different maf, no egr, no evap, no ac, etc. I took some wild guesses on a few tables (like PE enable %- since this TB will flow a lot more air than stock at less TPS %)- but it should be close enough to start it and drive it around the block until I start dialing things in. I did read up a bit on tuning to run constant open loop with a WB. That's definitely interesting, I'll have to look into that more once I start driving it and tuning.
-Built an aluminum cover for the gas tank access panel. The pumps are crazy loud in the car (just powering them up for a second or two). I'm thinking that once they have fuel in them to actually push, and once the tank gets fuel in it, that it won't be nearly as bad. Right now, it's probably just acting like a big sheet steel speaker box. If nothing else, I could always dynamat the new cover.
The job list is certainly getting shorter. Here is what remains (listed from most difficult/time consuming to least):
-Run fuel hard lines
-Fab TB cable bracket, route cable
-Finish wiring (IC pump, fuel pumps, IC fans, water pump, engine harness,etc)
-Fab mount for catch cans, run vacuum tubing
-Reinstall exhaust. Weld in new cutout, "cat", and resonator.
-Mount FPR/run AN flex hoses to FPR and to hard lines
-Install ARP wheel studs on all 4 corners (have 1 broken front stud, back studs are too short)
-Rebuild axles
-Remove front interior panels and ensure there is adequate clearance to headers.
-Build a bypass tube to connect the bypass valve and IC opening
-Replace trans filter, fluid, and gasket
-Fab simple mount for MAP sensor
-Paint/reinstall STB/cross braces
-Reinstall front bumper
-Upload PCM tune
-Done!
That is a cool idea, and would certainly be a lot more durable in the long run. Any idea how they bend that stuff? I think that's my biggest unknown with hard piping it.
That's a good idea also, it would certainly look nice and be more than strong enough for the application.
I actually ended up finishing the bar that I had in the previous pictures, and it did turn out rather nice (obviously nowhere near as professional looking as the one you posted, but certainly a lot more sturdy than the piece of twisted flat stock that it would've come with originally). I am thinking about pulling it back off to weld some 1/8" rod 'hoops' to it to keep the fuel lines and the coolant lines away from the belts. It would be nice to have that piece of mind since there is so much going on in that area.
-Finished the alternator tie bar for the belt wrap kit.
-Got an accessory belt of the correct length installed.
-Got a SC belt that will work for my largest ~3.25" SC pulley only (unfortunately, the belt coming off the tensioner is pretty close to touching itself coming back across the belt wrap kit). I'm not entirely sure it will be able to drive like it is- it is really going to depend how much the tensioner rotates. I may end up having to go with smaller pullies on the tensioner (currently 3") and belt wrap (currently 2.75"). If nothing else, there certainly is no way to ever swap to a smaller pulley with the current setup, so I will have to work on something. This is absolutely the shortest belt I can fit on also (to rotate the tensioner as far as possible).
-Started getting the wiring put back together. Unfortunately, either the aluminum valve covers or the new injectors (or both) causes me to have to remove the fuel rail to plug in the injectors. It isn't really a big deal, just odd. The Bosch injectors are much shorter than stock and have to use an adapter hat on top to get the length correct, so I bet that's the cause. I did have to pull the harness apart around the inlet to the blower. I removed the boost bypass plug, and also had to reroute the IAC and TPS plugs since these parts will now be in a much different location. I'm still thinking about cutting off the adapters (TPS, IAT, MAF) and soldering the new 'correct' plug straight onto the harness. It would sure look a lot nicer, but it's one more project that doesn't NEED to happen to make the car run again either.
-The IC setup is fully run now. Total capacity is just under 4 gallons. I was a bit concerned about the Bosch pump not being able to keep up due to all the bends and hose length, but it works great. Does kinda sound like a waterfall inside the car when the tank isn't full- all the splashing in that aluminum tank in a big open trunk sure is noisy. Now that I've filled it above the return port, it's much quieter.
-I reinstalled the main radiator overflow tank, and finished off the engine's cooling system also. I've bled it as best I can (electric water pump,drilled thermostat)- but it's going to need to do a full cycle to operating temp to get it finished off.
-I tried to develop a solution to mount the boost bypass valve (basically a 1.5" vacuum actuated TB), but couldn't figure out anything. My original plan was to mount it on the bottom of the TB adapter since it is flat, but there is just no room left down there. The hard connector for the other end of the bypass in the lower IC sticks out too far, and my straight through bypass (vs 90* bypass) just can't make that tight of a turn and plug in. If I had got a 90* bypass, it might've been possible, but I can't justify spending another $300+ on one of those for the remote chance that it might work. So I broke down and took the TB adapter to a fabrication shop last Monday. They're going to machine a block to weld onto the firewall side of the TB adapter so I have a flat place to mount the bypass valve to. They're also going to weld off all the rest of the holes as well (EGR, old bypass valve, etc). I hate having to take stuff out to get it done, but I just don't have the machine tools or the aluminum welding confidence to do it right.
-Started running the fuel lines off the tank. Ran into more road blocks there. I had planned to put both filters staggered in the OEM location, but that isn't going to work. I can put one there, and the other will have to go in the divot about halfway up the car. I also had planned to use the stock line holders, but they're too brittle. Getting the OEM lines out breaks them. So I'm going to switch gears and probably just use those rubber lined P clips to hold them on.
-Got the PCM tune all finished up tonight. I basically went back to the OEM tune and started from there- tune for injectors, e85, different maf, no egr, no evap, no ac, etc. I took some wild guesses on a few tables (like PE enable %- since this TB will flow a lot more air than stock at less TPS %)- but it should be close enough to start it and drive it around the block until I start dialing things in. I did read up a bit on tuning to run constant open loop with a WB. That's definitely interesting, I'll have to look into that more once I start driving it and tuning.
-Built an aluminum cover for the gas tank access panel. The pumps are crazy loud in the car (just powering them up for a second or two). I'm thinking that once they have fuel in them to actually push, and once the tank gets fuel in it, that it won't be nearly as bad. Right now, it's probably just acting like a big sheet steel speaker box. If nothing else, I could always dynamat the new cover.
The job list is certainly getting shorter. Here is what remains (listed from most difficult/time consuming to least):
-Run fuel hard lines
-Fab TB cable bracket, route cable
-Finish wiring (IC pump, fuel pumps, IC fans, water pump, engine harness,etc)
-Fab mount for catch cans, run vacuum tubing
-Reinstall exhaust. Weld in new cutout, "cat", and resonator.
-Mount FPR/run AN flex hoses to FPR and to hard lines
-Install ARP wheel studs on all 4 corners (have 1 broken front stud, back studs are too short)
-Rebuild axles
-Remove front interior panels and ensure there is adequate clearance to headers.
-Build a bypass tube to connect the bypass valve and IC opening
-Replace trans filter, fluid, and gasket
-Fab simple mount for MAP sensor
-Paint/reinstall STB/cross braces
-Reinstall front bumper
-Upload PCM tune
-Done!
2) Alternator Tie Bar What about using Female threaded tubing and adjustable Rod ends? Not the right length but something like this.
I actually ended up finishing the bar that I had in the previous pictures, and it did turn out rather nice (obviously nowhere near as professional looking as the one you posted, but certainly a lot more sturdy than the piece of twisted flat stock that it would've come with originally). I am thinking about pulling it back off to weld some 1/8" rod 'hoops' to it to keep the fuel lines and the coolant lines away from the belts. It would be nice to have that piece of mind since there is so much going on in that area.
Last edited by bumpin96monte; May 10, 2014 at 12:50 AM.


Thread Starter
Joined: Feb 2008
Posts: 6,477
Honestly, I didn't even hook the heater up. I just looped the fittings at the alternator bracket.
I might change my mind come next winter, but we'll see...
I might change my mind come next winter, but we'll see...