
headlight tint


STILL SLOW
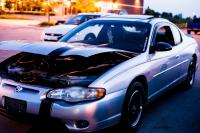
Monte Of The Month -- May 2010
Monte Of The Month -- May 2010


Joined: Sep 2008
Posts: 7,082
From: Nubraska

I baked mine, but how do you do you do that without melting the rubber trim at the bottom, and how do you get the rubber trim off and back on??
That reflector is impossible to pop off isnt it
That reflector is impossible to pop off isnt it
Thread Starter
|

Joined: Sep 2009
Posts: 46
From: WI
i put it on a cookie sheet with the face of the light facing up but i cut all of the rubber trim off..the first one i failed miserably and there was no way it was going back on but the other one came off all at once but when i was done i couldnt get it to go back on so i just pressed them together put them in the oven again and then used silicone around it worked fine.. what reflector are you talking about? the orange marker is part of the whole lense and i taped the reflectors on the inside


STILL SLOW
Monte Of The Month -- May 2010
Monte Of The Month -- May 2010
Joined: Sep 2008
Posts: 7,082
From: Nubraska
i put it on a cookie sheet with the face of the light facing up but i cut all of the rubber trim off..the first one i failed miserably and there was no way it was going back on but the other one came off all at once but when i was done i couldnt get it to go back on so i just pressed them together put them in the oven again and then used silicone around it worked fine.. what reflector are you talking about? the orange marker is part of the whole lense and i taped the reflectors on the inside
Thread Starter
|
Joined: Sep 2009
Posts: 46
From: WI
lol if i remember right, those are the biggest pictures that they allow in a message but ill put them in my album so they are bigger let me know if you need something cleared up idk if you can remove the marker from the lense it looks like it but it might be illegal too im not sure


Joined: Feb 2008
Posts: 134
From: Northern Minnesota
yeah, looks great man, i debated about trying to replace those ambers too, although i'd love to input some blue in there, i spose i could still try but i do think its illegal in mn. nice job though, looks great.