Lowering MistreSS
#41
 07-23-2012, 09:27 AM


They came out solid; obviously a spray paint. Whenever I use a spray paint I think I'm applying too thick a coat because it like builds up and runs/drips. Did you apply very thin coats and do several of them?
#42
07-23-2012, 12:37 PM


Join Date: Aug 2011
Location: Ann Arbor, Michigan
Posts: 4,779
Yep, I shot three lighter coats just for that reason. Waited about ten minutes between coats.


#44
07-23-2012, 08:36 PM
Join Date: Aug 2011
Location: Ann Arbor, Michigan
Posts: 4,779
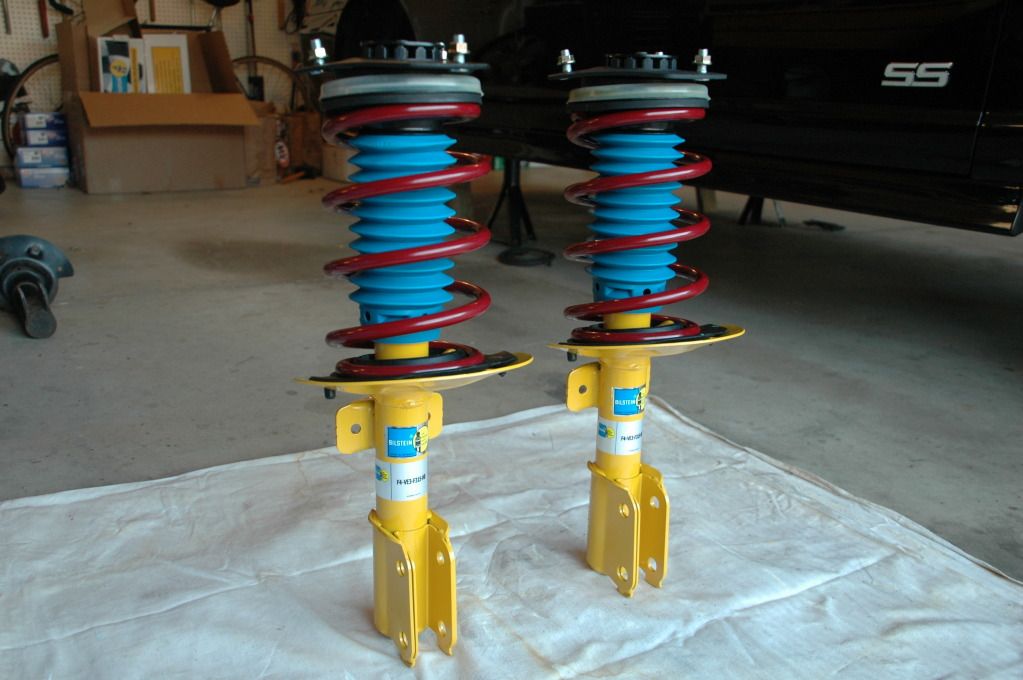
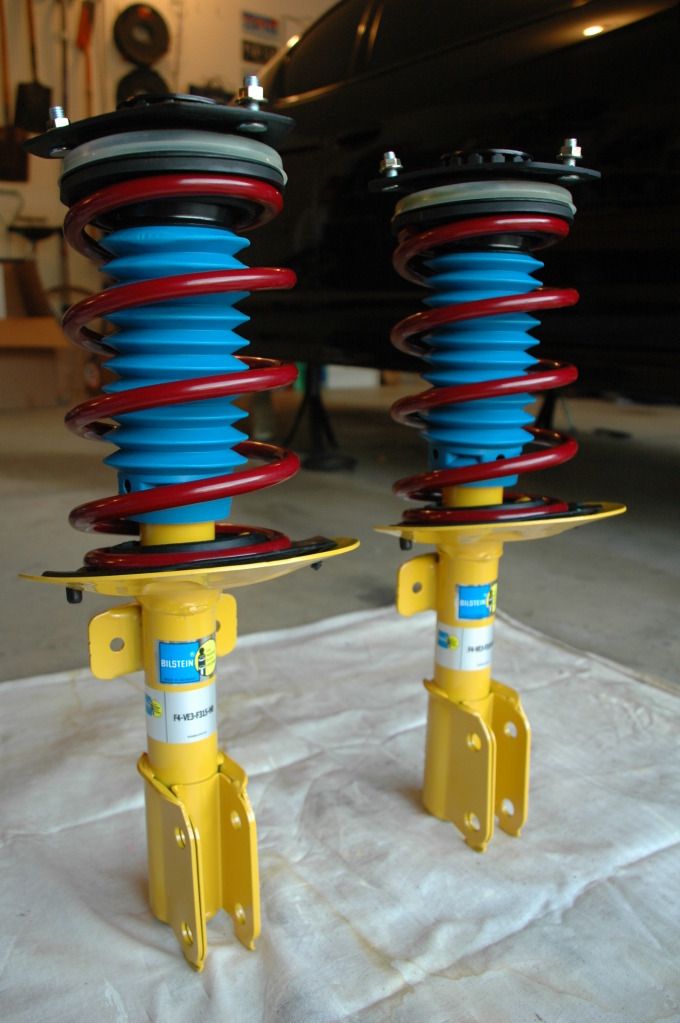
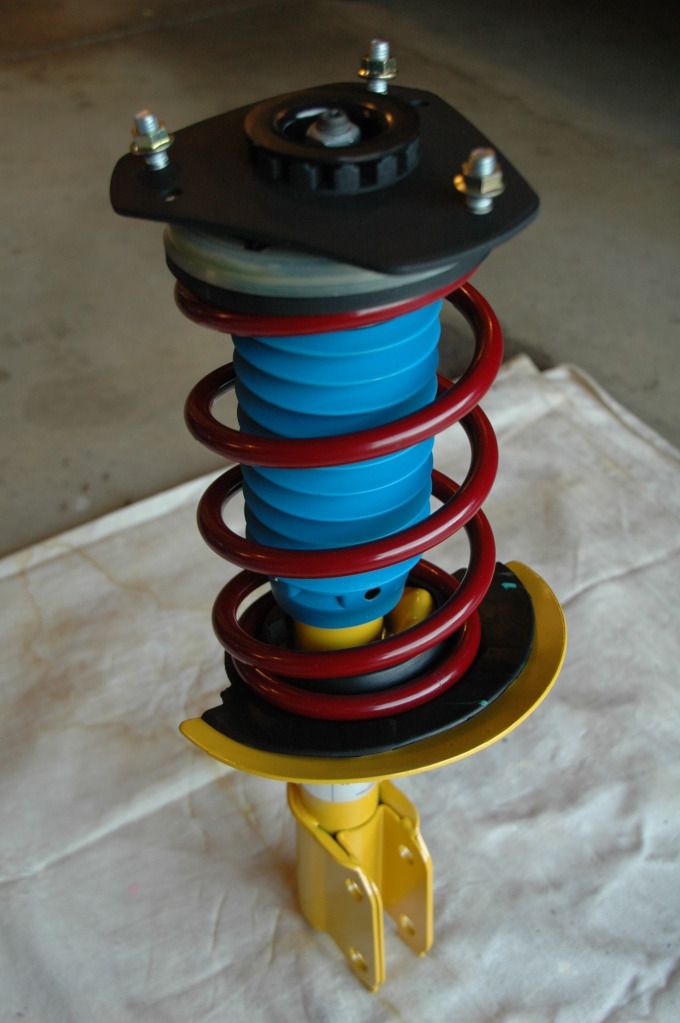
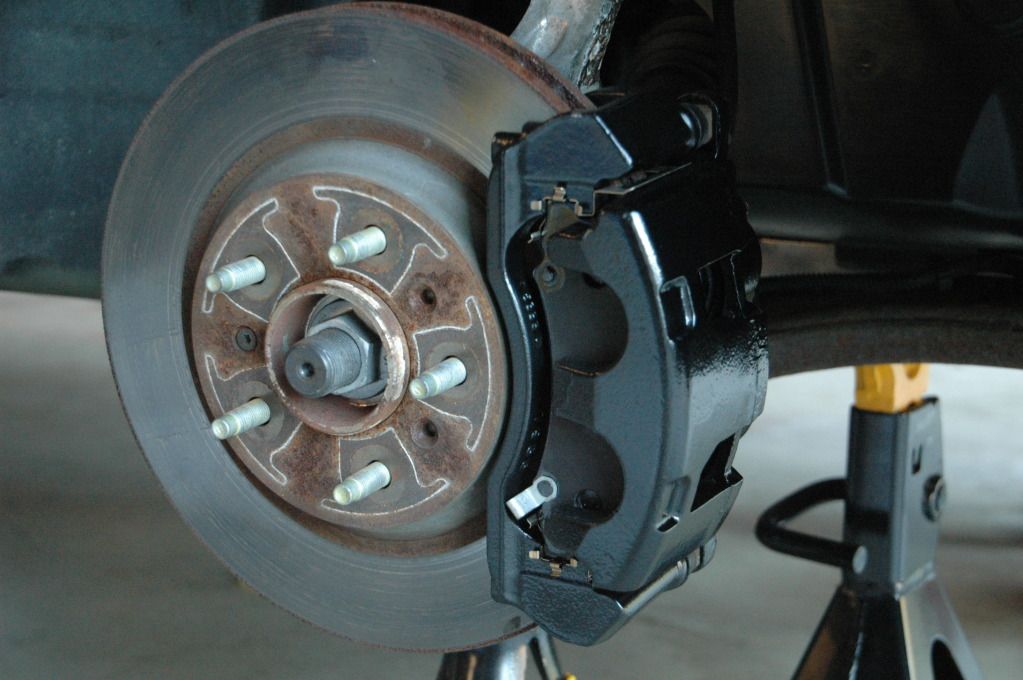
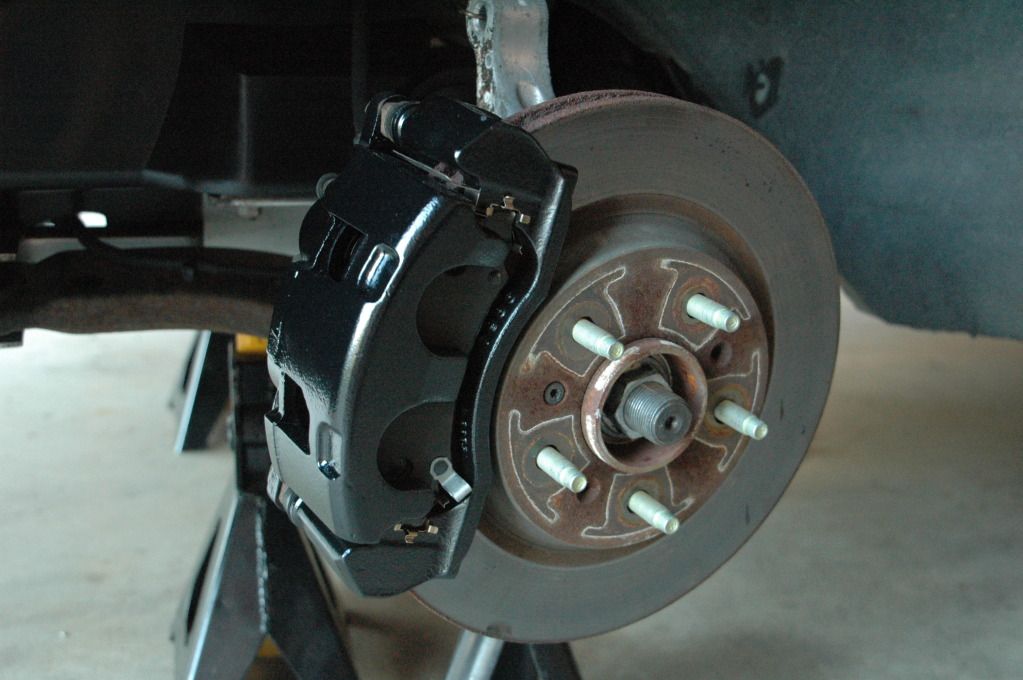
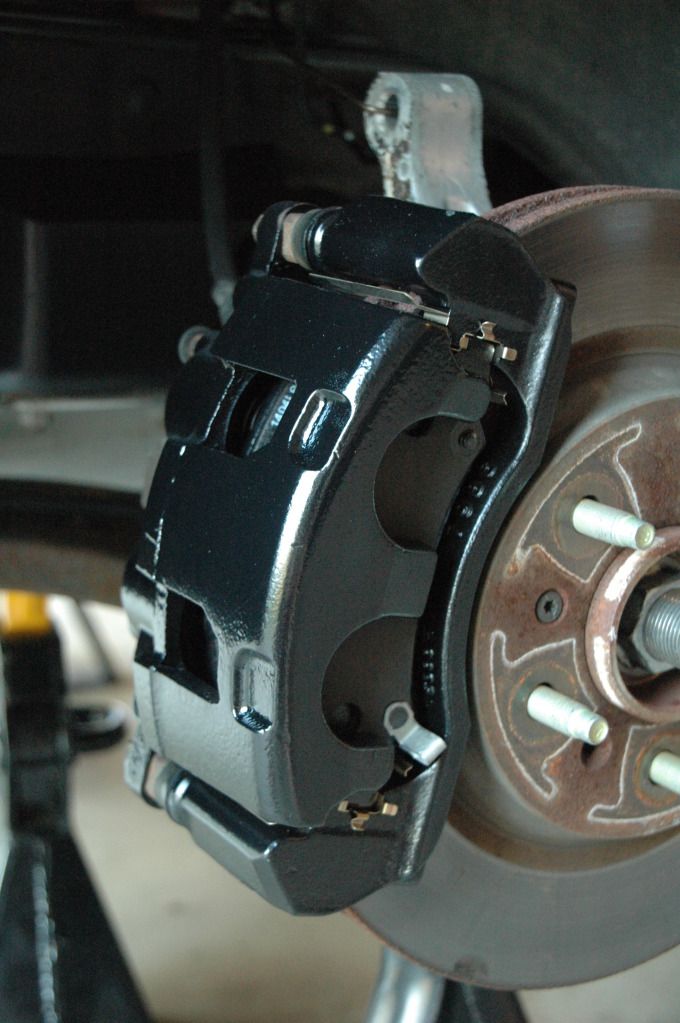
Installation has started! First off, I picked up my new set of brake pads earlier today after work, AC Delco performance pads. When I got home I got those mounted and remounted the calipers. For time being I just snugged the caliper and caliper bracket bolts enough until I get the strut assemblies mounted so I can get the necessary resistance when I torque them. I also got both of the new front strut assemblies put together tonight. Those include new strut mounts plus a few parts that were swapped over from the stock assemblies. Assembly of the struts went relatively well except for the strut post nut at the top which is a pain in the butt. Here's tonight's progress.
Bilstein HD's + SSC/CM lowering springs.
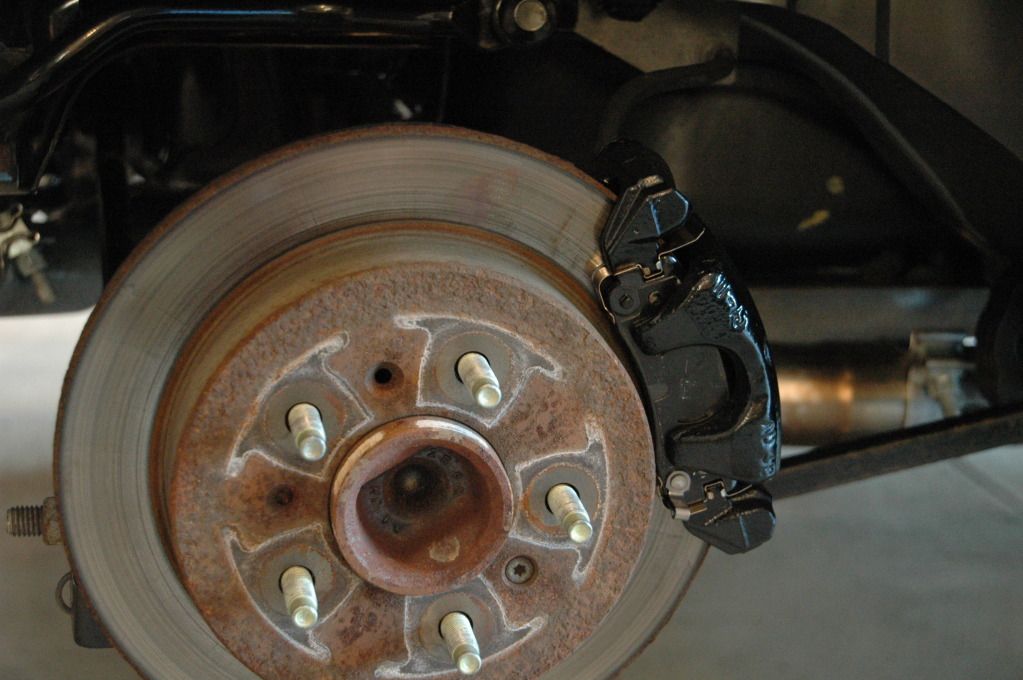
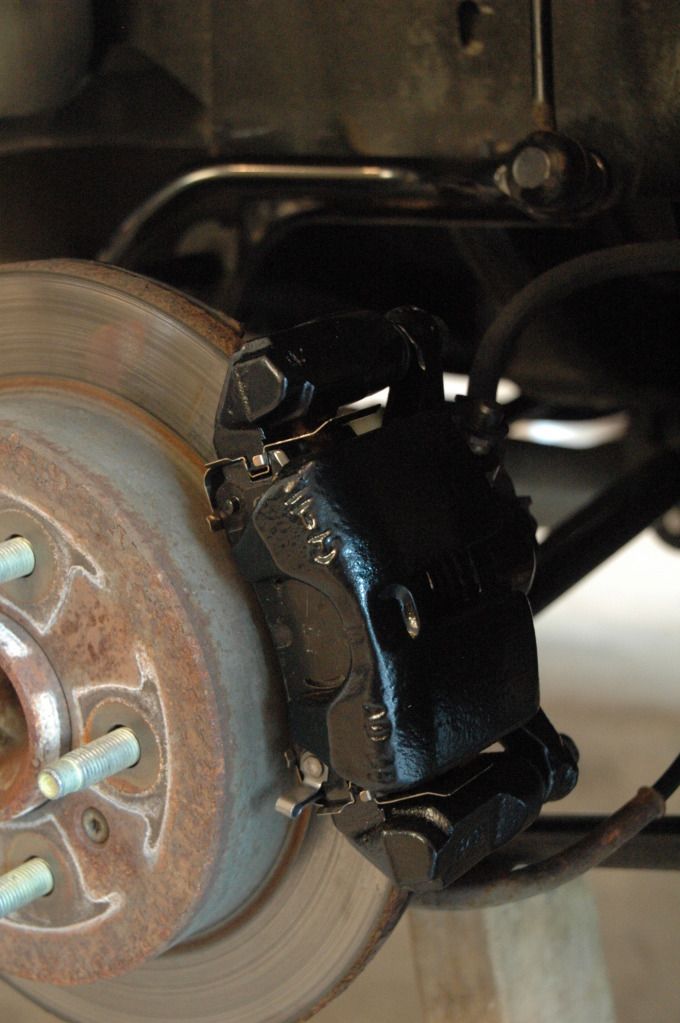
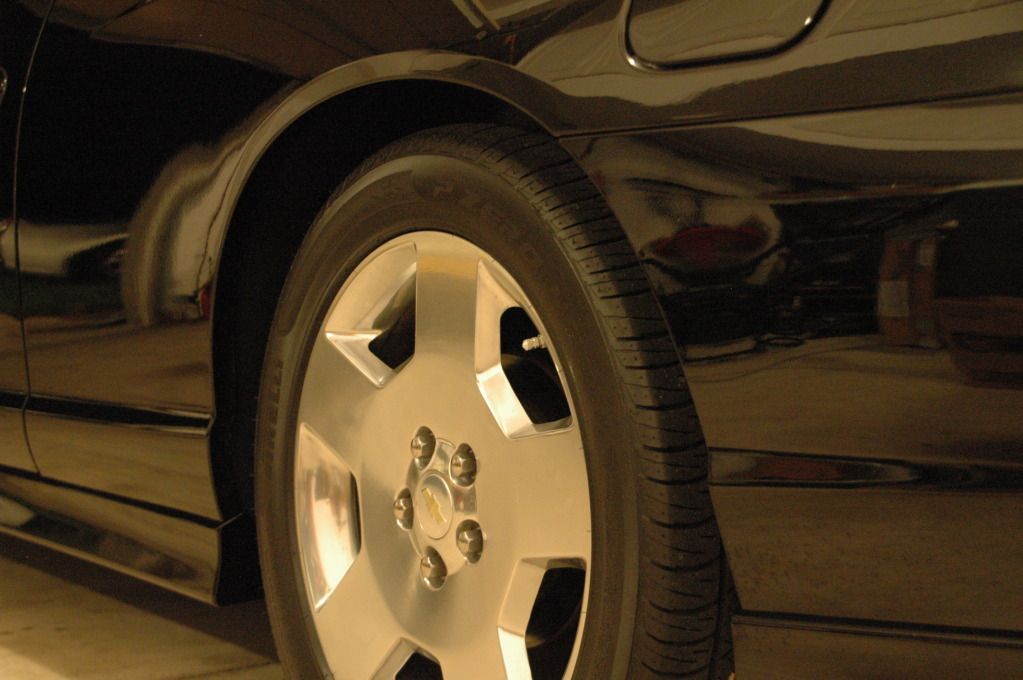
Front caliper brackets and calipers remounted with new AC Delco performance pads. Both front and rear calipers and caliper brackets got three light coats of Dupli-Color's black caliper paint. Doing that, it took about one and a half of their spray cans to get the four brackets and four calipers painted.
Rear caliper brackets and calipers remounted with new AC Delco performance pads.
Bilstein HD's + SSC/CM lowering springs.
Front caliper brackets and calipers remounted with new AC Delco performance pads. Both front and rear calipers and caliper brackets got three light coats of Dupli-Color's black caliper paint. Doing that, it took about one and a half of their spray cans to get the four brackets and four calipers painted.
Rear caliper brackets and calipers remounted with new AC Delco performance pads.
Last edited by 06mistreSS; 07-25-2012 at 07:25 AM.
#45
07-26-2012, 07:33 PM
Join Date: Aug 2011
Location: Ann Arbor, Michigan
Posts: 4,779
I know it's been a little while since I've posted with updates here. Like always, ran into a bit of a snag last night.
I went to install my new front strut assemblies last night. Before I explain, I bought my new upper strut mounts from Car Quest (which are actually KYB's repackaged) to try and save "some" money on this project. So, I go and position the passenger front assembly, was torquing the upper strut mount to body nuts, and stripped and stretched two of the threaded studs on the new upper mount (shown below). The nuts never even got to a tight point while torquing and actually got easier to turn which is when I knew something wasn't right. The studs never sheared off but the nut just pulled the studs longer and eventually stripped them. It took an impact wrench to get one of the two nuts back off.
I had basically the same issue when I did the struts on my 03, fronts were the culprit again. Although, in that case I completely sheared off one of the upper mount studs while torquing. Those were also Car Quest mounts and, at that time, I just took it back and exchanged it for a new one.
So, I've had problems with their mounts both times on each car now. I've come to the conclusion that their mounts are junk and am not dealing with it anymore. Taking all four back and demanding a refund. I went to the local Chevrolet dealer this morning and ordered a set of GM factory FE4 suspension strut mounts. Those will be in for pick-up tomorrow since the GM warehouse is local (one reason I love living in Michigan) so I shouldn't get set back that much. I'm ending up paying a total of $260 more for the four GM factory mounts, but I'd rather pay more for an original, factory quality product.
Anyways, I'm Hoping to finish up this project this weekend and have some after pics to show soon.
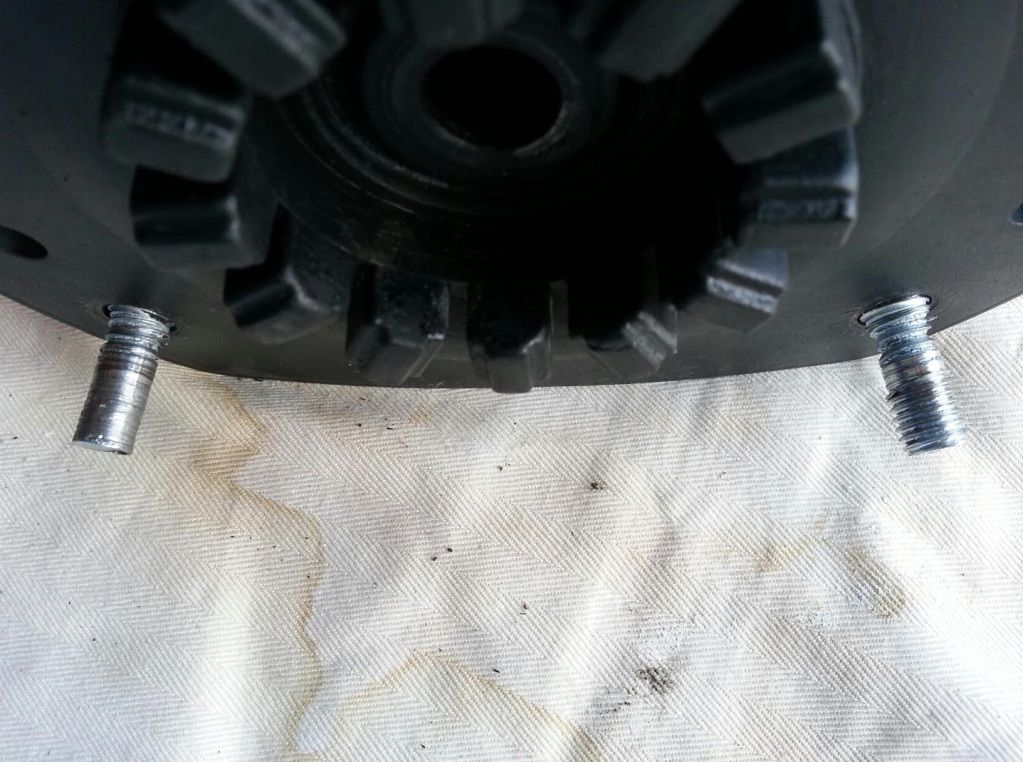


#48
07-27-2012, 09:09 AM

Damn that totally sucks with those mounts man 
good thing you went with some good ones this time, shows how much you love your monte i dont even think i spent $260 on my lowering setup 
 and you spent that on just the mounts haha
Its going to look badass when its lowered
good thing you went with some good ones this time, shows how much you love your monte
i dont even think i spent $260 on my lowering setup and you spent that on just the mounts haha Its going to look badass when its lowered
#49
07-27-2012, 10:36 PM
Join Date: Aug 2011
Location: Ann Arbor, Michigan
Posts: 4,779
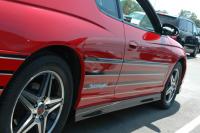
So, good news, I busted my butt and finished tonight! I actually haven't seen what the car looks like from a distance because it was completely dark outside when I rolled it out for a test drive, but up it definitely sits lower. I'll post the remaining progress and final pictures tomorrow, but for now here's a teaser shot.
The above shot was after about a one mile test drive to get everything initially seated. I'm going to the local Telegraph Cruise tomorrow so I figured I'd use that as a further initial seating or a "break-in" process. I can say I could feel the difference of the Bilstein's as soon as I rolled four feet forward and hit the garage floor lip to the driveway.
I'll follow up with a more detailed list but, for now, here's a list of the new parts I installed and other work that was done during this project.
-Bilstein HD Struts
-SSC/Canuck Motorsports lowering springs
-GM FE4 strut mounts
-AC Delco performance brake pads
-Painted brake caliper and caliper brackets black
-Tire rotation
Thanks everyone for the interest!
I'll take more "after" pictures of the car tomorrow and post the rest of the pictures tomorrow as well.
Last edited by 06mistreSS; 07-28-2012 at 07:27 AM.