6th Gen ('00-'05): How to install high sport kit
#21
 06-07-2013, 10:08 AM


Side GFX Install

<?xml:namespace prefix = o ns = "urn:schemas-microsoft-com <o:p></o:p>
This is the original side of the car before the GFX install
<o:p></o:p>
 <o:p></o:p>
<o:p></o:p>
<o:p></o:p>
The first thing that is done is to put several layers of masking tape on the rocker below the Monte Carlo emblem. This is to protect the paint as you push up and release the original plastic lower rocker.
<o:p></o:p>
 <o:p></o:p>
<o:p></o:p>
You also want to put several layers of masking tape on the front fender ahaed of the door. You won't need to protect the door since it will be open as you work.
<o:p></o:p>
<o:p></o:p>
<o:p></o:p>
 <o:p></o:p>
<o:p></o:p>
You will need to use a flat bladed screwdriver to release the clips that hold the rocker to the car. These are located under the car. As you release the clip, pull the rocker toward you so that they release. There are 8 of these on each side of the car.
<o:p></o:p>
 <o:p></o:p>
<o:p></o:p>
<o:p></o:p>
The Rocker off the car<o:p></o:p>
Once you release the gray clips on the bottom of the rocker, open the door, and start at the back of the car, and pull the rocker out from the bottom while pushing up on it. This will release the clips that are behind the rocker. This takes some force to get the first couple to release. But once the first one does the rest come out easy. With the rocker off, remove the clips that will be left in the car. You get all new ones in the kit so don’t worry about the ones that break.
<o:p></o:p>
<o:p></o:p>
<o:p></o:p>
<o:p></o:p>
 <o:p></o:p>
<o:p></o:p>
Here are the new clips that will be used to install the Side GFX.
<o:p></o:p>
<o:p></o:p>
 <o:p></o:p>
<o:p></o:p>
<o:p></o:p>
Here is a shot of the side GFX before being installed.
<o:p></o:p>
 <o:p></o:p>
<o:p></o:p>
<o:p></o:p>
Put the new clips in the slots provided in the side GFX.
<o:p></o:p>
 <o:p></o:p>
<o:p></o:p>
<o:p></o:p>
Line up you new side GFX with the car, Open the door, and start at the front, and just snap it on. Snap in the white clips that are behind the GFX first, and then the gray ones that are on the bottom. It’s that easy. Repeat these steps with the other side. This is the easiest part of the install.
<o:p></o:p>
<o:p></o:p><o:p></o:p>
<o:p></o:p>
Here is the side on the car. Looks good Huh!!!<o:p></o:p>
<o:p></o:p>
Last edited by KCFITZ78; 06-07-2013 at 10:15 AM.
#22
06-07-2013, 10:08 AM
Rear GFX install
 <?xml:namespace prefix = o ns = "urn:schemas-microsoft-com
 <o:p></o:p>
Here is the Rear GFX before the install.
<o:p></o:p>
<o:p></o:p>
 <o:p></o:p>
<o:p></o:p>
<?xml:namespace prefix = o ns = "urn:schemas-microsoft-comHere is the Rear GFX before the install.
<o:p></o:p>
<o:p></o:p>
<o:p></o:p><o:p></o:p>
<o:p></o:p>
The Rear GFX has 4 tabs on each side. Slots will be drilled and cut for these just like the 13 slots that were made for the front GFX.
<o:p></o:p>
 <o:p></o:p>
<o:p></o:p>
<o:p></o:p>
<o:p></o:p><o:p></o:p>
<o:p></o:p>
The Rear GFX is also held on by 7 metal plates that go across the back of the car. These fit under the large tabs in this picture.
<o:p></o:p>
 <o:p></o:p>
<o:p></o:p>
<o:p></o:p>
<o:p></o:p><o:p></o:p>
<o:p></o:p>
The install for the Rear GFX requires 3 templates. 1 self stick vinyl one for each side to mark the location for the 8 slots that are drilled and cut, and a paper one that goes across the back to mark the location for the 14 holes that are drilled for the metal pop rivets that hold on the 7 plates.
<o:p></o:p>
 <o:p></o:p>
<o:p></o:p>
<o:p></o:p>
<o:p></o:p><o:p></o:p>
<o:p></o:p>
Here is the rear hardware. Spring clips like the ones used on the front GFX, and metal plates that are held on by the metal pop rivets. Not shown are several plastic pop rivets that are used at the ends of the GFX where they wrap into the wheel well, and also under the back edge of the bumper cover.
<o:p></o:p>
 <o:p></o:p>
<o:p></o:p>
The self stick vinyl template is put on each side and 8 slots are drilled and cut in the same manor as was used on the front GFX install.
<o:p></o:p>
<o:p></o:p>
<o:p></o:p><o:p></o:p>
The self stick vinyl template is put on each side and 8 slots are drilled and cut in the same manor as was used on the front GFX install.
<o:p></o:p>
<o:p></o:p>
 <o:p></o:p>
<o:p></o:p>
<o:p></o:p>
The rear paper template is taped to the car in this picture. It is lined up in the middle with the cutout for the license plate light, then aligned with the groove that is already molded in the bumper cover. This locates the holes to be drilled for the rivets for the metal plates.
<o:p></o:p>
 <o:p></o:p>
<o:p></o:p>
<o:p></o:p>
<o:p></o:p><o:p></o:p>
<o:p></o:p>
Each metal plate on the rear is held in place by 2 metal rivets. You drill all 14 holes, and then remove the paper template.
<o:p></o:p>
 <o:p></o:p>
<o:p></o:p>
<o:p></o:p>
<o:p></o:p><o:p></o:p>
<o:p></o:p>
The metal plates only go on one way, so I marked them. If you put one on backwards, you’ll never get it off again so mark ‘em and be careful with this step.
<o:p></o:p>
 <o:p></o:p>
<o:p></o:p>
Here are 2 of the metal plates riveted in place. You can see that they sit a little below the molded line in the bumper cover. There are tabs on the GFX that are pinched between these plates and the bumper cover to hold it in place.<o:p></o:p>
<o:p></o:p>
Here are 2 of the metal plates riveted in place. You can see that they sit a little below the molded line in the bumper cover. There are tabs on the GFX that are pinched between these plates and the bumper cover to hold it in place.<o:p></o:p>
<o:p></o:p>
<o:p></o:p><o:p></o:p>
Here are 2 of the metal plates riveted in place. You can see that they sit a little below the molded line in the bumper cover. There are tabs on the GFX that are pinched between these plates and the bumper cover to hold it in place.<o:p></o:p>
<o:p></o:p>
Here are 2 of the metal plates riveted in place. You can see that they sit a little below the molded line in the bumper cover. There are tabs on the GFX that are pinched between these plates and the bumper cover to hold it in place.<o:p></o:p>
<o:p></o:p>
<o:p></o:p>
Here is a shot of all the metal plates riveted in place.
<o:p></o:p>
<o:p></o:p>
 <o:p></o:p>
<o:p></o:p>
Here is a shot of all the metal plates riveted in place.
<o:p></o:p>
<o:p></o:p>
<o:p></o:p><o:p></o:p>
<o:p></o:p>
And here is the Rear GFX installed. You slip the tabs between the metal plates and the bumper cover on the back, then the tabs on the sides go through the slots. The side ones are secured with the same type of spring clips that are used on the front. The back is held tight by 7 Plastic Pop rivets that go into the underside of the bumper. These keep the GFX from slipping out from under the metal plates.<o:p></o:p>
Now add some nice stainless exhaust tips and your done!!!!!<o:p></o:p>
Not too Bad Huh !!!!!!! and you saved yourself some bucks.
<o:p></o:p>
<o:p></o:p>
 <o:p></o:p>
<o:p></o:p>
And here’s what we have when we're done!!!!!!<o:p></o:p>
I also added a set of High Sport Wheels, Changed the Monte Carlo Scripts to silver to match the GFX, and a red � inch stripe just above the GFX’s to set the whole thing off.
<o:p></o:p>
<o:p></o:p>
 <o:p></o:p>
<o:p></o:p>
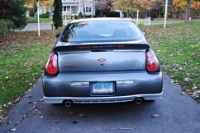
Just as a contrast here is what I started with.<o:p></o:p>
Now add some nice stainless exhaust tips and your done!!!!!<o:p></o:p>
Not too Bad Huh !!!!!!! and you saved yourself some bucks.
<o:p></o:p>
<o:p></o:p>
<o:p></o:p><o:p></o:p>
And here’s what we have when we're done!!!!!!<o:p></o:p>
I also added a set of High Sport Wheels, Changed the Monte Carlo Scripts to silver to match the GFX, and a red � inch stripe just above the GFX’s to set the whole thing off.
<o:p></o:p>
<o:p></o:p>
<o:p></o:p><o:p></o:p>
Just as a contrast here is what I started with.<o:p></o:p>
Last edited by KCFITZ78; 06-07-2013 at 10:16 AM.


#24
06-07-2013, 12:46 PM
I have also searched for the template but there are none. I have yet to intsall my used GFX. I bought mine off a guy that wrecked his car and he cut the rear bumper off it so that I would have the hole location for the brackets.<?xml:namespace prefix = o ns = "urn:schemas-microsoft-com fficeffice" /><o:p></o:p>
<o:p></o:p>
As for the front GFX slots, they are vertically positioned buy being cut into the lip/groove of the bumpers. See the pic below.<o:p></o:p>
<o:p></o:p>

As for the horizontal position of the slots, I am going to take a long piece of electrical wire and run it around the perimeter of the front GFX lip and mark the width of the tab on the wire. The center tab of the GFX will be the center of the bumper nose. I will use the wire to transfer the slot/tab cutouts to the bumper. See the pic below showing a slot being located dead center in the lip/ groove of the bumper nose.
 <o:p></o:p>
fficeffice" /><o:p></o:p><o:p></o:p>
As for the front GFX slots, they are vertically positioned buy being cut into the lip/groove of the bumpers. See the pic below.<o:p></o:p>
<o:p></o:p>
As for the horizontal position of the slots, I am going to take a long piece of electrical wire and run it around the perimeter of the front GFX lip and mark the width of the tab on the wire. The center tab of the GFX will be the center of the bumper nose. I will use the wire to transfer the slot/tab cutouts to the bumper. See the pic below showing a slot being located dead center in the lip/ groove of the bumper nose.
<o:p></o:p>
#26
06-07-2013, 01:04 PM
I also have a dremel like tool (Black and Decker RTX Rotary Tool) but it tends to catch the material and kicks back and goes off on its own. I will try to cut a couple slots at diferent RPM's on the wrecked bumper and see how it goes. Otherwise I will take the long way with the drill. Rather have straight cuts.
I still have yet to plastic weld some tabs and sand/prime and have them painted.
I still have yet to plastic weld some tabs and sand/prime and have them painted.
#27
06-07-2013, 01:24 PM

KCFITZ78, you should post your explanation in a separate thread in the 6th generation's How-To section! It's extremely helpful because many members, myself included, have asked for assistance with the high-sport kit install before.
#29
06-07-2013, 02:42 PM
I was hoping when I posted this insruction as a reply to TMoney's question, that the person that created this write-up would be a member to this forum. I hate to take credit for someone elses work.