Door panel removal


#17
 06-14-2010, 10:49 PM

i usually only take out the one plug, that give your plenty of room to do what is needed in there. just rotate the panel and vway la. at the shop i watched them take out all the switches[buttons and all] , then i took it back the next day cause none of my buttons worked. lol nothing was broke just out of place.
oh ya put a shirt or blanket under the corner not to scratch the plastic.
oh ya put a shirt or blanket under the corner not to scratch the plastic.


#19
07-03-2010, 05:26 PM


1, 2 & 3 are phillips. #3 failed to alert me of its presence and I had a bugger of a time before I just laid down on the ground to look up into the loose panel and saw it.
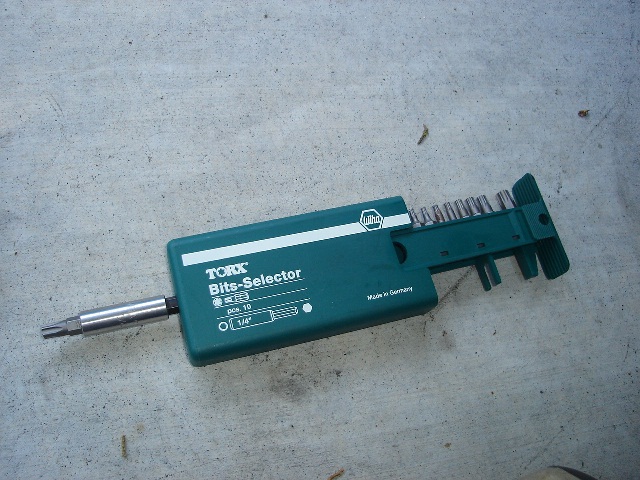
4 & 5 are T30 Torx

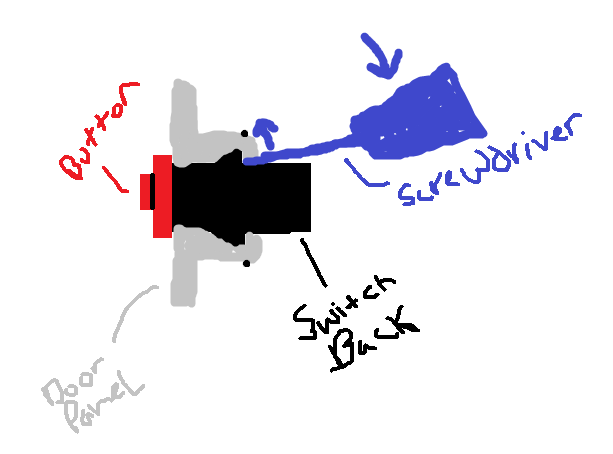
The door handle & lock switch panel. Easily pry from front. There's tabs in the back.

Tabs
The latch for the power lock button is on the hidden side of the socket, FYI. I pried the switch off of the panel, it slides out from the back.
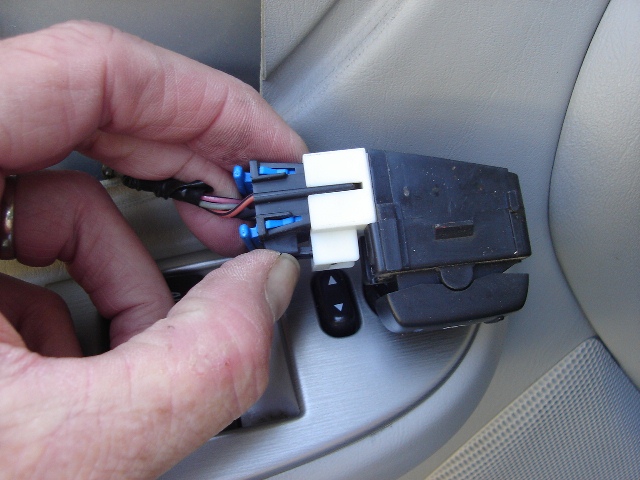
Lock switch

Sneaky screw #3

The Torx kit. I love Wiha tools
This one was more difficult, the spring steel tabs were snapped in a fashion that prying would not release it. That and I totally missed screw #3 which would keep the panel from ever coming off. Note that the brushed metal trim does not snap off, though it gives the appearance that it does.

I let it lay and worked it from the inside of the panel while it was off of the door. There's enough slack in the wiring. Mak330 says to put something down to protect the bottom edges while working on it, good advice.

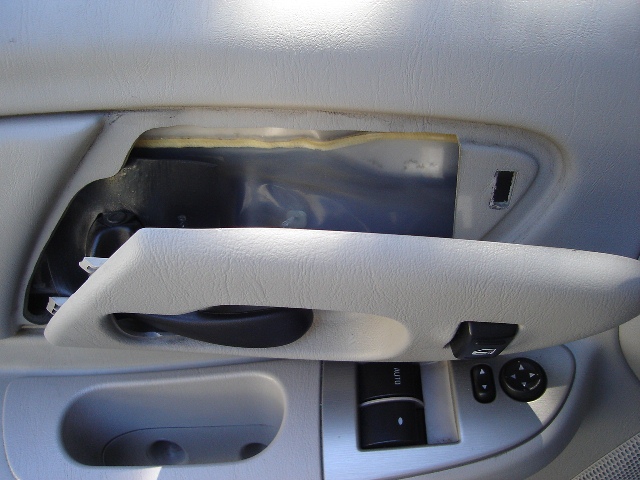
Looking down as if from the top of the window. The top edge of the panel hangs in several of these clips. After removing the 3 phillips screws, the 2 torx screws and the door handle trim I slowly unsnapped the panel from the lower left corner then continued along the bottom and up the sides. Swing it out a bit and pull up.
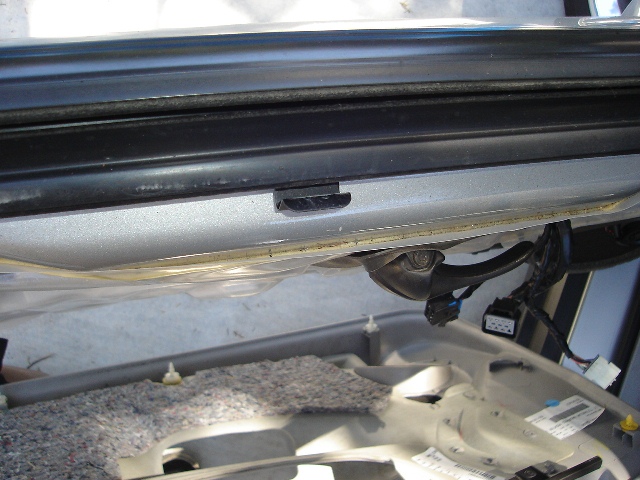
The bottom & sides are snapped in. Note that the long panel back of the door handle and the speaker grille are glued & melted on and do not snap off from the inside. Bummer, I wanted to clean the speaker grilles.

Here's why I am here - one nut on the mirror attachment was loose. Made the mirror shake and jitter. There's a sponge piece that adds insulation in the cavity over the mirror nuts. There's no glue on it.

In all respect, I could have just undid screws 1-5 and pop the panel off to reach the mirror nuts. But curiosity made me want to learn more. Thanks for the hints.
4 & 5 are T30 Torx
The door handle & lock switch panel. Easily pry from front. There's tabs in the back.
Tabs
The latch for the power lock button is on the hidden side of the socket, FYI. I pried the switch off of the panel, it slides out from the back.
Lock switch
Sneaky screw #3
The Torx kit. I love Wiha tools
This one was more difficult, the spring steel tabs were snapped in a fashion that prying would not release it. That and I totally missed screw #3 which would keep the panel from ever coming off. Note that the brushed metal trim does not snap off, though it gives the appearance that it does.
I let it lay and worked it from the inside of the panel while it was off of the door. There's enough slack in the wiring. Mak330 says to put something down to protect the bottom edges while working on it, good advice.
Looking down as if from the top of the window. The top edge of the panel hangs in several of these clips. After removing the 3 phillips screws, the 2 torx screws and the door handle trim I slowly unsnapped the panel from the lower left corner then continued along the bottom and up the sides. Swing it out a bit and pull up.
The bottom & sides are snapped in. Note that the long panel back of the door handle and the speaker grille are glued & melted on and do not snap off from the inside. Bummer, I wanted to clean the speaker grilles.
Here's why I am here - one nut on the mirror attachment was loose. Made the mirror shake and jitter. There's a sponge piece that adds insulation in the cavity over the mirror nuts. There's no glue on it.
In all respect, I could have just undid screws 1-5 and pop the panel off to reach the mirror nuts. But curiosity made me want to learn more. Thanks for the hints.
Last edited by Barovelli; 07-04-2010 at 12:39 PM.
#20
07-07-2010, 05:36 PM


Thanks for the pictures and advice! I've got a bum mirror switch and will probably look into it myself and knowing what you faced will help. If you don't mind though - is it possible to get the panel for the window and mirror switches out just by removing 3,4 and 5 and carefully prying? (I read that you couldn't but the mystery #3 screw might have been your culprit)
TIA!
TIA!