All in the name of working Air Conditioning!
#31
 04-28-2012, 09:10 PM


Join Date: Apr 2010
Location: Mentor, Ohio
Posts: 12,217
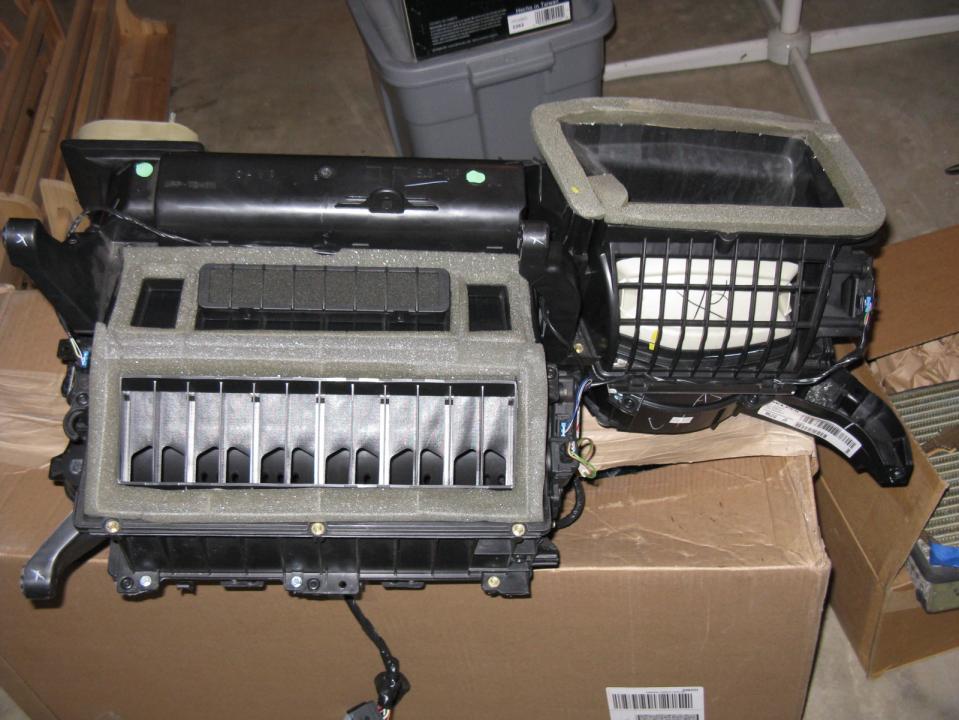
HVAC module back together. Next task, put BACK into Monte!!! Ladies and Gentlemen, this is the GOOD phase, re-assembly!
BTW - For those who can see it, there are two types of screws (factory brass looking ones and other silver-ish ones I had to add to compensate for not having the heat stakes anymore).
BTW - For those who can see it, there are two types of screws (factory brass looking ones and other silver-ish ones I had to add to compensate for not having the heat stakes anymore).


#35
04-29-2012, 11:33 AM
Join Date: Apr 2010
Location: Mentor, Ohio
Posts: 12,217
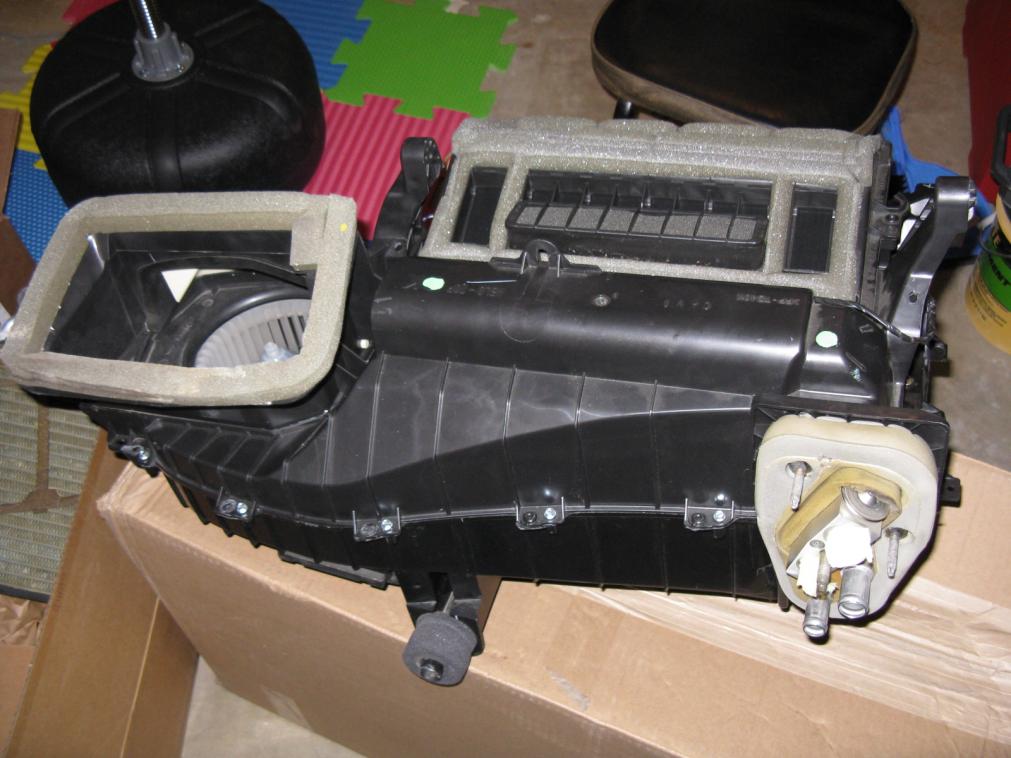
I'm hoping it fixes this problem two and that I never have to see this much of the HVAC module again!!
BTW - I noticed on of the flappers for the dual climate control was rather "stiff" if you tried to adjust it by hand, but the other one was SUPER easy. Since I had this apart, I found out why it was so stiff. part of it was rubbing against the housing. I took some sand paper and VERY lightly sanded it until it felt like it moved as easy as the other. I also cleaned the shafts/hinge points for the flappers and applied a very thin tough of Vaseline (for lack of a better lubricant). I did all that to try and ward off potential failing actuators. Sadly, I did not grab pictures of that area (I just now thought about it).
Anycase, I am going to change and head out to begin putting the Monte BACK together!
#36
04-29-2012, 04:54 PM
Join Date: Apr 2010
Location: Mentor, Ohio
Posts: 12,217
Well, on delay. Tried to seat the HVAC module into the car and it's a fight to get things lined up. One of the studs I had to epoxy (broke on removal) broke again! Tuesday, I will have a friend who's done this before give me a hand.
Also, I want to shoot ACDelco. I bought the Evap core seal kit. The evap core connects to a thermal expansion module and has 2 tubes going into it with 2 different size connections. The ACDelco seal kit contains two of ONE size seal (which would fit both sides of the thermal expansion module). UGH! SO now I need another item (I'm going to have my dad stop at the dealership, as I drove to 3 parts stores and NO ONE had it).
Also, I want to shoot ACDelco. I bought the Evap core seal kit. The evap core connects to a thermal expansion module and has 2 tubes going into it with 2 different size connections. The ACDelco seal kit contains two of ONE size seal (which would fit both sides of the thermal expansion module). UGH! SO now I need another item (I'm going to have my dad stop at the dealership, as I drove to 3 parts stores and NO ONE had it).
#37
05-01-2012, 08:14 PM
Join Date: Apr 2010
Location: Mentor, Ohio
Posts: 12,217
Thanks to the help of my GM Guru and his son, the HVAC module is seated BACK into the Monte!! Truly amazing, they came over and first try seated the silly thing, all I did was watch from the engine side of the firewall to see if the bolts were lining up. They made it look so easy, I kinda feel bad that I called the big guns out on this one!
Anycase, the good news, dash re-assembly to continue later this week!
Anycase, the good news, dash re-assembly to continue later this week!

#40
05-02-2012, 08:10 PM
Join Date: Apr 2010
Location: Mentor, Ohio
Posts: 12,217
Well, the Monte is slowly moving along. Aluminum dash cross brace is seated and a hand full of bolts and wiring are in place (I think it's about half way done with this step). Sadly, any pics would be a little anti-climactic since they are dis-assembly in reverse.