
Repair Guide: How to change your brakes and rotor.


Thread Starter


Joined: Dec 2009
Posts: 186
From: Great White North

How to change your brakes and rotors - Full Steps (non-referal step by step)
---------------------------------------------------------------------------------------------------
Greetings,
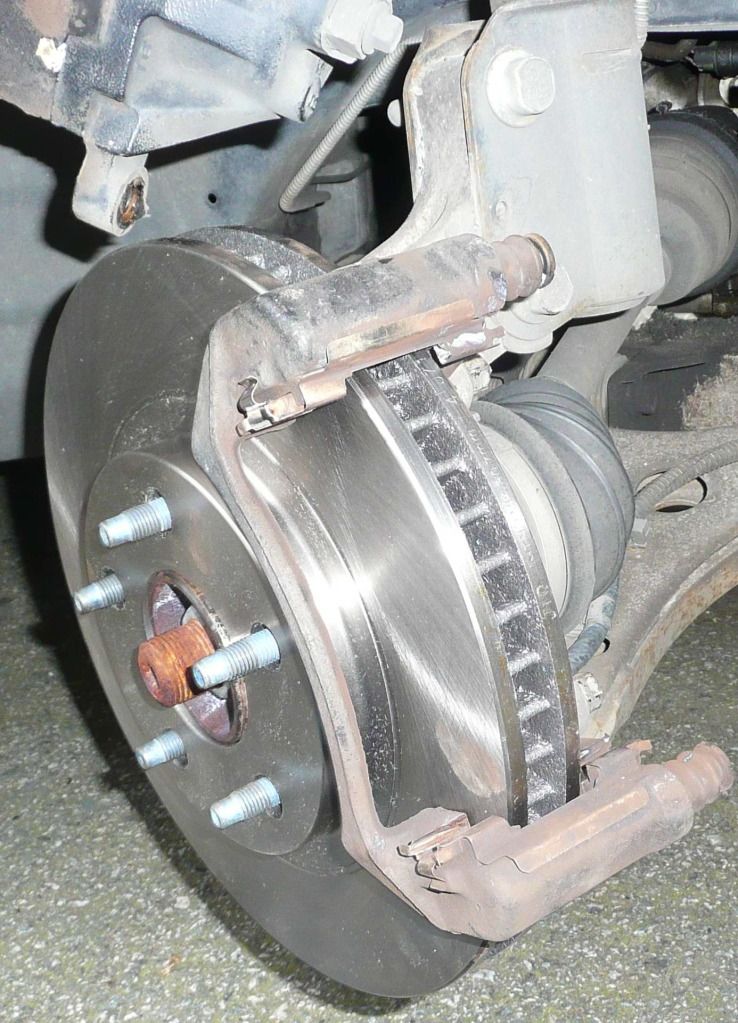
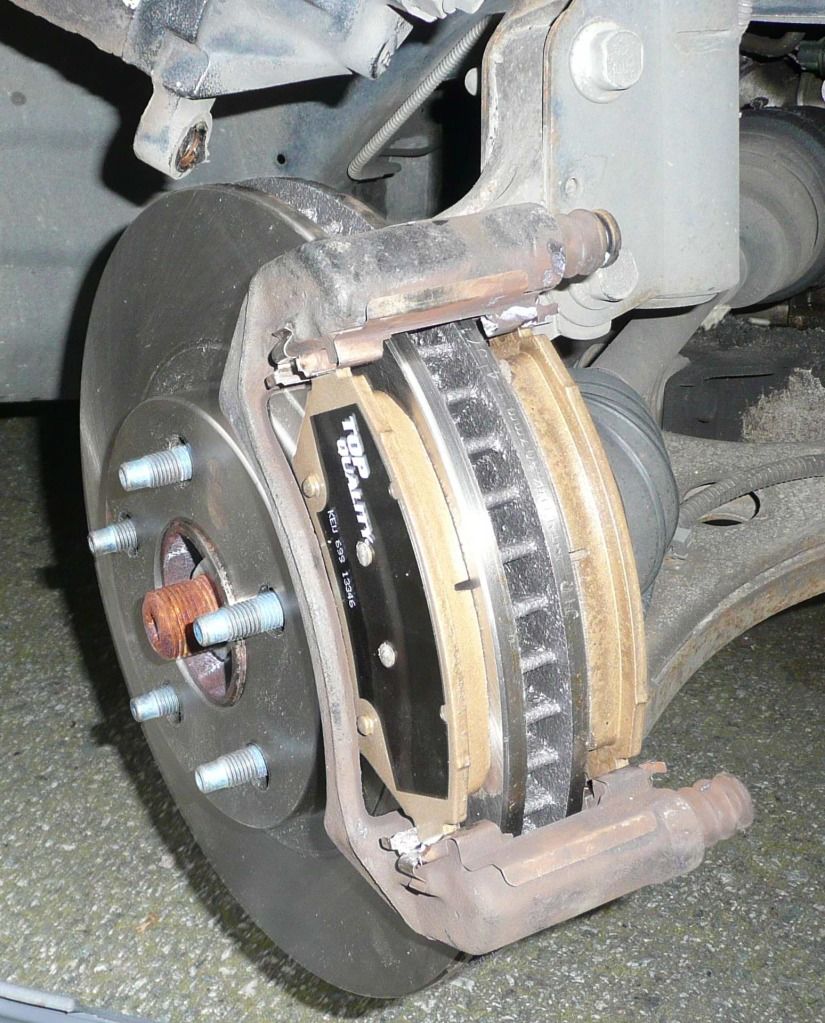
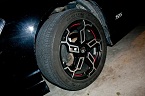
Do your brake pads look like this?
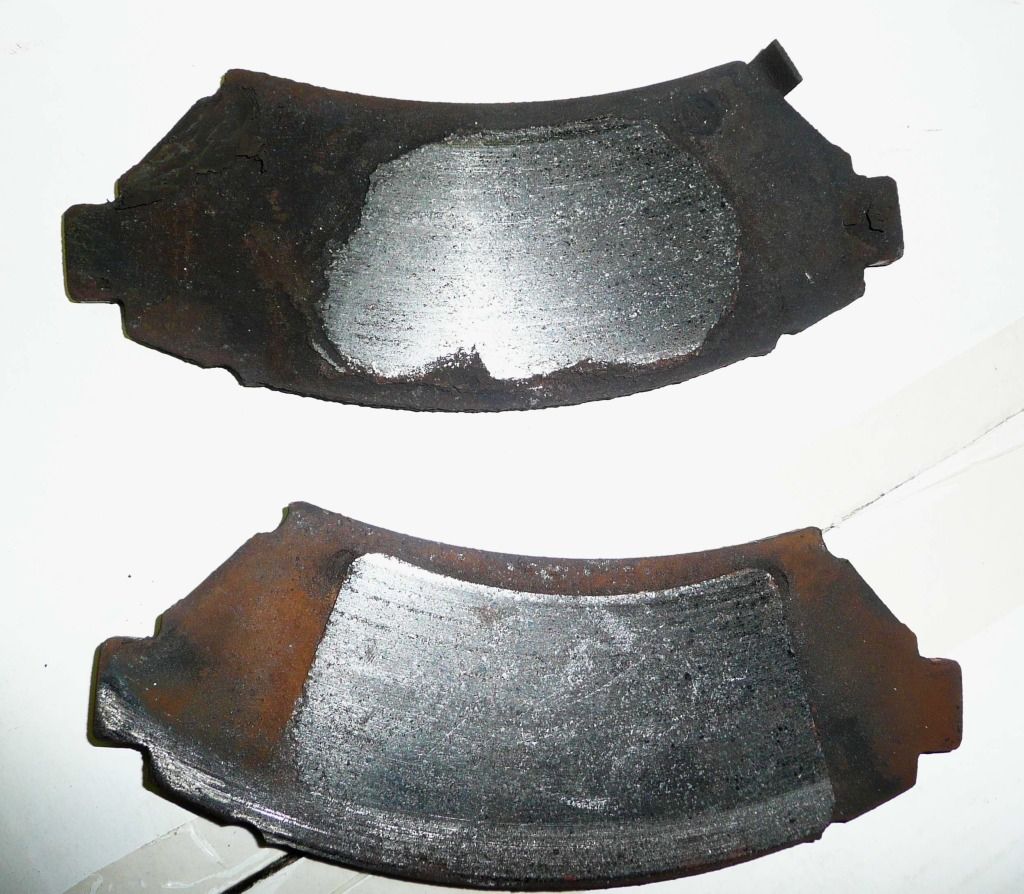
Yeah, I know. Pretty bad. I had NO idea mine were that low until I heard the metal on metal grinding between the pad metal backing and the rotor.
Here is what you require:
1 - Jack
2 - Torque Wrench
3 - Extension
4 - 19mm socket
5 - Breaker Bar Tire Iron
6 - New Pads and Rotors
7 - Blocks
8 - Jack Stands
9 - 15mm socket
10 - Tire Iron
11- Bungee cord
12 - C-clamp.
Procedure
1. E brake on!
2. Wheel blocks at the back tires. 2x4 will work fine but go big if you can
3. Position jack and get it set (it's a lot less frustrating to do this first. Once your start going, you don't want to wait for the jack to be worked up).
4. Remove bolt cover and loosen lug nuts (do NOT remove them) with a breaker bar, extension and socket or use the tire iron. Do NOT use your torque wrench.
5. jack up and put in jack stand(s)
6. Remove wheel
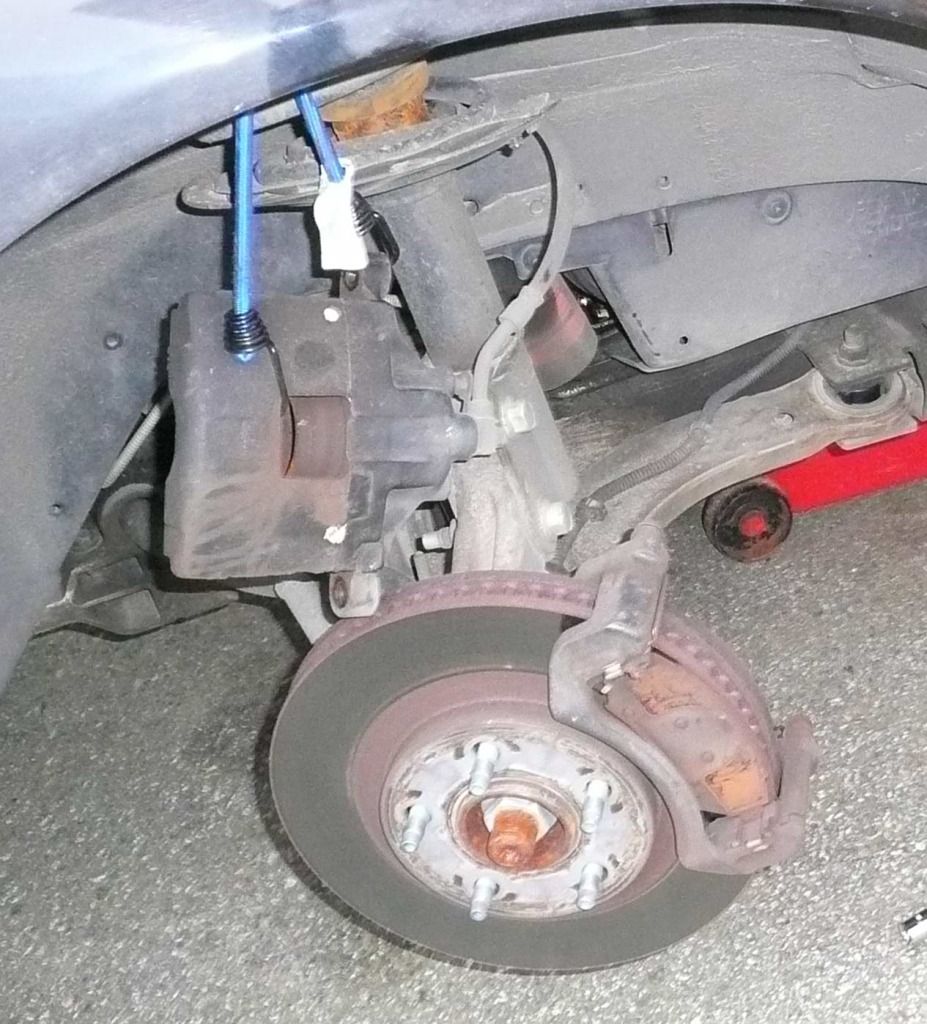
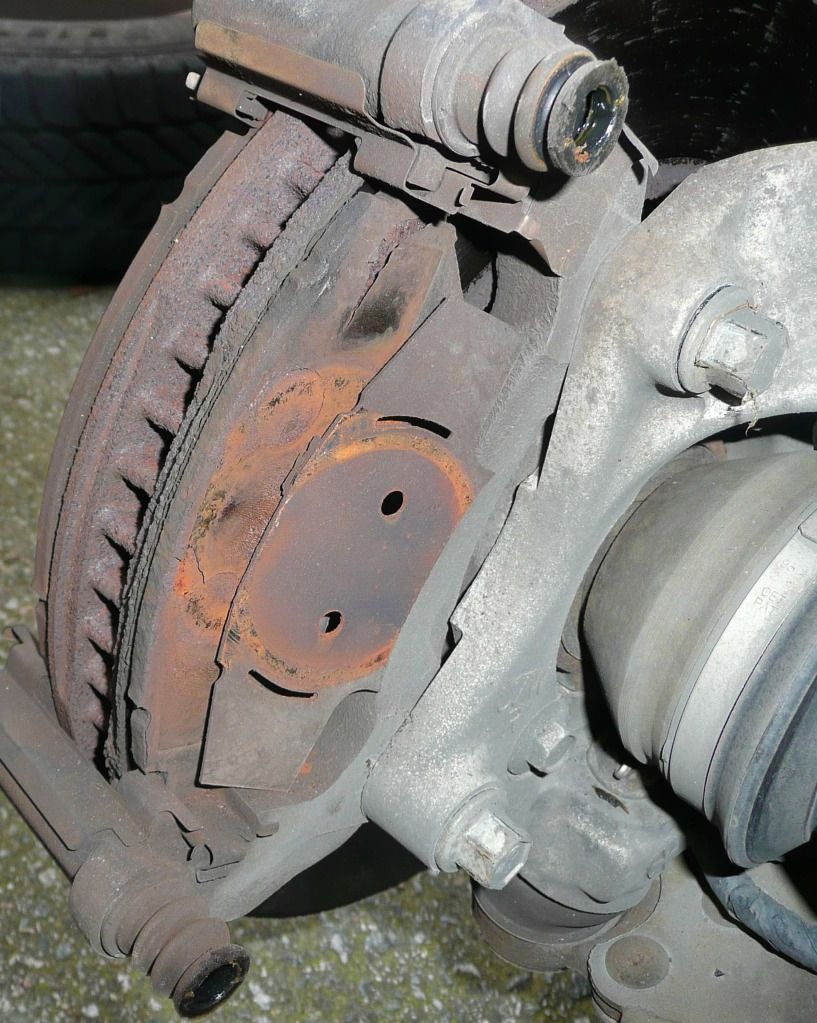
7. Here you will see the caliper, the caliper bracket, your rotor and your pads. Take your 15mm socket and breaker bar and remove the two outer bolts (top and bottom). You can identify which two these bolts are by the rubber boots. Mine were on at around 150lbs/foot. You want to use a breaker bar here. Place the pin bolts aside in a clean area.
8. wriggle the caliper off of the caliper bracket and hang it from the bungee cord which you should wrap around the top of your spring suspension. The caliper will be a little snug so move it left to right first to slightly depress the caliper piston. Do NOT use a screwdriver to do this. Do NOT just let the caliper hang from the brake line. This will damage it and you will have turned an easy job to a very hard job.
9. Remove the inner two bolts that hold the caliper mounting bracket and pull the bracket off. Your pads will likely fall out. Place aside.
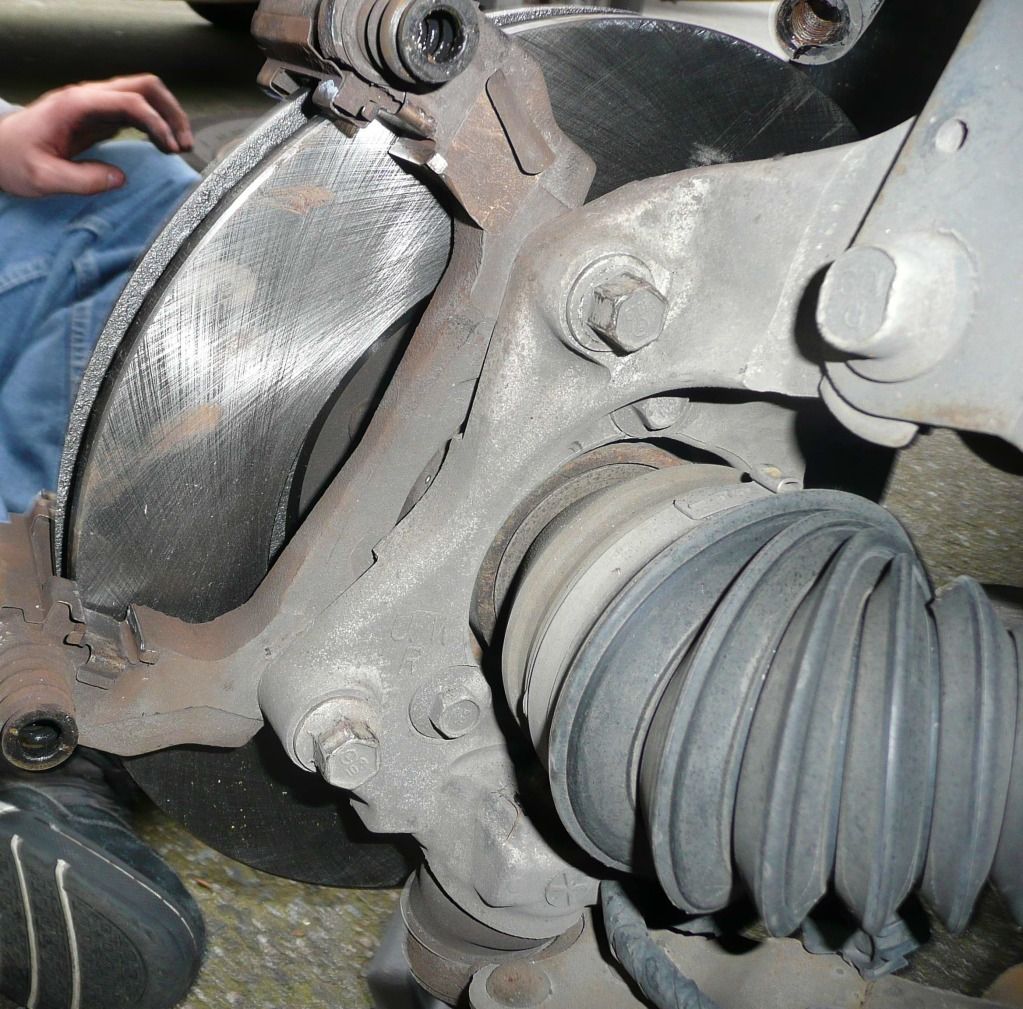
10. Your rotor is now free! Pull it off.
11. You want to clean the hub. Wipe the hub and surrounding areas with a damp cloth. Do not use WD40 here. Just wet cloth or alcohol or even brake cleaner. The hub should be nearly shiny. I like to take a SMALL amount of grease and lube around the hub, then wipe off with a towel. This is my way of keeping corrosion down.
12. Clean the top and bottom brake pad shims (or mounts where the pads sit top and bottom on the caliper bracket). I use alcohol here, then lube, then wipe and re-lube and wipe. You do not want any extra grease here that will fall onto the rotor and cause some pretty major braking problems. You want your pads to be able to slide, that's all.
13. Clean your new rotor with alcohol or brake clean. Put your new rotor on. Some people will use an emery cloth to scuff them up. I don't. Most rotors cross honed and do not need this. You will get a nice break in during the bedding in process (see below).
14. Re-mount the caliper bracket. Some people like to put their pads in before they put the bracket on. I've never had a problem putting them in after. I would suggest putting the bolts in a couple threads then install your pads.
15. Before you install your pads, make sure they are CLEAN! Install your pads. They only go in one way so jiggle them in. You may notice that two of the pads in the set have middle tabs. Those are your noise makers when the pads get low to let you know how low they are. You want those pads on the inside, trailing edge of the disc (UNLESS otherwise stated on your documentation that may have come with the pads).
Tighten the caliper mounting bracket. I use a torque setting of 100 and add a hand crack after. This is about 130. I believe the specs call for 132. I do not add anti-seize.
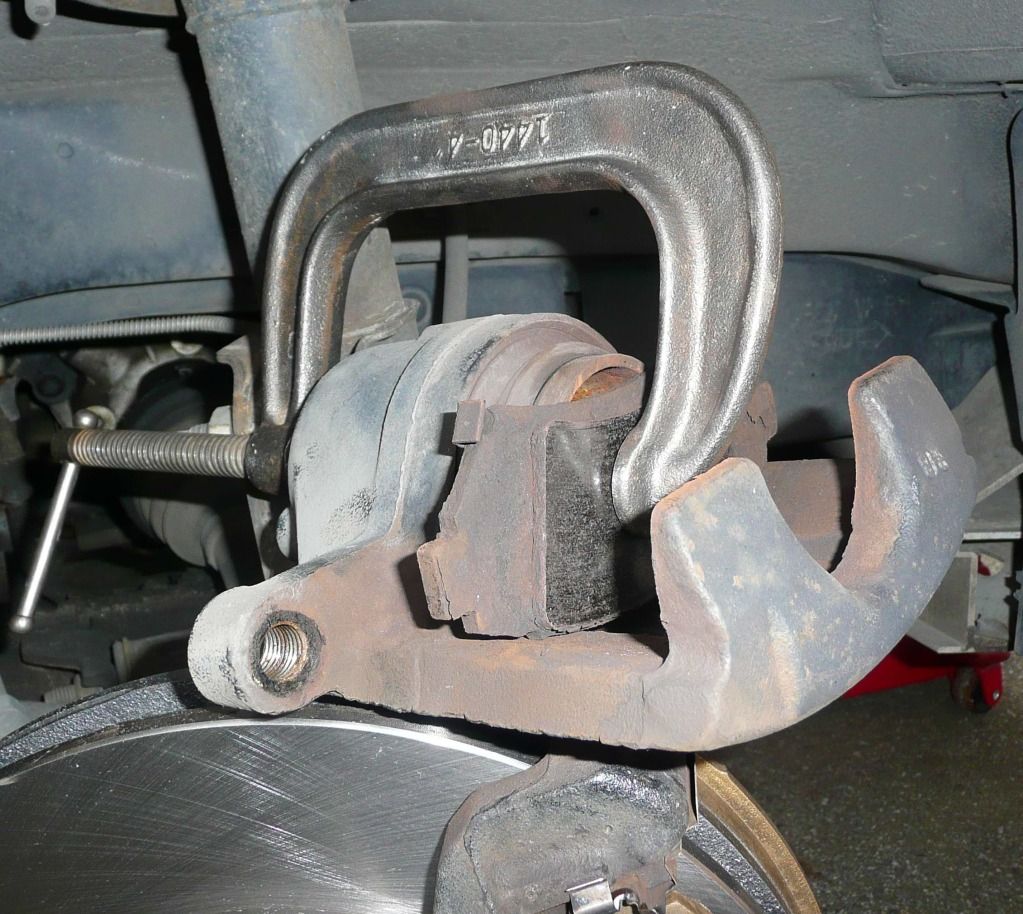
16. Do not ignore any part of this step. Open your hood and loosen (do not remove) the brake fluid cap. Leave your hood open. Take one of your old pads and a C-clamp big enough to fit over your caliper. You need to depress the caliper piston back in. Do this VERY slowly or you will have a big brake fluid mess. Crank on the c-clamp a quarter turn slowly and wait until it is loose. Then, crank another quarter turn or so and wait. Do this until the caliper is completely depressed. Remove the c-clamp and old brake pad.
17. Install your caliper as it was before. Make sure there is NO debris on the pin bolts. You may want to re-lube them with wheel grease. NOT TOO MUCH or they will not go in. It's sealed inside and there is no room for anything extra in the pin holes. Tighten these to 100 plus a hand crack.
18. Put the brake fluid cap back on!!!!!!!!! I like to open my door and SLOWLY tap on the brakes until they are hard. This way I know they are working. Then, open the cap again and make sure the fluid is still full. If you had no spillage, you should be fine.
19. Put on new wheel
20. Put lug nuts back on hand tight plus a quarter turn. You don't want the wheel loose but you don't want any play when you lower the vehicle.
21. Remove jack stands and lower the vehicle.
22. Set your torque wrench to 100lbs/ft (yep, it's that high).
Lug Nut Tightening. See photo below
23. Torque the first lug nut using the extension and socket.
24. Go across from that nut and tighten that one.
25. Go across back to the first nut and tighten the one beside it.
26. Keep this going until you are done.
27. Replace lug nut cover.
WAIT, you are not done yet!!!!!!!!!!!!!!!!
28. Start your car and pump very slowly on the brake pedal. You should feel it start to firm up. If not, check your brake fluid and make sure your cap is on tight.
Bedding In the Brakes
-------------------------
29. This is the fun part. First, you want to warm up your brakes. Accelerate your vehicle to 60km/h and moderately brake until about 10km/h. Do this 6 times. This will warm up your brakes for the next step.
30. Accelerate your vehicle to 100km/h and brake HARD without locking the brakes or engaging the ABS down to 10km/h or so. Do this 4 or 5 times. After, you will not want to come to a complete stop with your brakes. In an ideal world, you would finish your last hard brake and drift into your driveway without touching the brakes and parking, again without touching the brakes. Neutral is your friend here. Park for hours. Let your brakes cool COMPLETELY.
What this does is adds a layer of the brake pad onto the rotor. This makes for a perfect mating surface which will increase braking performance AND extend the life of your brakes.
---------------------------------------------------------------------------------------------------
Greetings,
Do your brake pads look like this?
Yeah, I know. Pretty bad. I had NO idea mine were that low until I heard the metal on metal grinding between the pad metal backing and the rotor.
Here is what you require:
1 - Jack
2 - Torque Wrench
3 - Extension
4 - 19mm socket
5 - Breaker Bar Tire Iron
6 - New Pads and Rotors
7 - Blocks
8 - Jack Stands
9 - 15mm socket
10 - Tire Iron
11- Bungee cord
12 - C-clamp.
Procedure
1. E brake on!
2. Wheel blocks at the back tires. 2x4 will work fine but go big if you can
3. Position jack and get it set (it's a lot less frustrating to do this first. Once your start going, you don't want to wait for the jack to be worked up).
4. Remove bolt cover and loosen lug nuts (do NOT remove them) with a breaker bar, extension and socket or use the tire iron. Do NOT use your torque wrench.
5. jack up and put in jack stand(s)
6. Remove wheel
7. Here you will see the caliper, the caliper bracket, your rotor and your pads. Take your 15mm socket and breaker bar and remove the two outer bolts (top and bottom). You can identify which two these bolts are by the rubber boots. Mine were on at around 150lbs/foot. You want to use a breaker bar here. Place the pin bolts aside in a clean area.
8. wriggle the caliper off of the caliper bracket and hang it from the bungee cord which you should wrap around the top of your spring suspension. The caliper will be a little snug so move it left to right first to slightly depress the caliper piston. Do NOT use a screwdriver to do this. Do NOT just let the caliper hang from the brake line. This will damage it and you will have turned an easy job to a very hard job.
9. Remove the inner two bolts that hold the caliper mounting bracket and pull the bracket off. Your pads will likely fall out. Place aside.
10. Your rotor is now free! Pull it off.
11. You want to clean the hub. Wipe the hub and surrounding areas with a damp cloth. Do not use WD40 here. Just wet cloth or alcohol or even brake cleaner. The hub should be nearly shiny. I like to take a SMALL amount of grease and lube around the hub, then wipe off with a towel. This is my way of keeping corrosion down.
12. Clean the top and bottom brake pad shims (or mounts where the pads sit top and bottom on the caliper bracket). I use alcohol here, then lube, then wipe and re-lube and wipe. You do not want any extra grease here that will fall onto the rotor and cause some pretty major braking problems. You want your pads to be able to slide, that's all.
13. Clean your new rotor with alcohol or brake clean. Put your new rotor on. Some people will use an emery cloth to scuff them up. I don't. Most rotors cross honed and do not need this. You will get a nice break in during the bedding in process (see below).
14. Re-mount the caliper bracket. Some people like to put their pads in before they put the bracket on. I've never had a problem putting them in after. I would suggest putting the bolts in a couple threads then install your pads.
15. Before you install your pads, make sure they are CLEAN! Install your pads. They only go in one way so jiggle them in. You may notice that two of the pads in the set have middle tabs. Those are your noise makers when the pads get low to let you know how low they are. You want those pads on the inside, trailing edge of the disc (UNLESS otherwise stated on your documentation that may have come with the pads).
Tighten the caliper mounting bracket. I use a torque setting of 100 and add a hand crack after. This is about 130. I believe the specs call for 132. I do not add anti-seize.
16. Do not ignore any part of this step. Open your hood and loosen (do not remove) the brake fluid cap. Leave your hood open. Take one of your old pads and a C-clamp big enough to fit over your caliper. You need to depress the caliper piston back in. Do this VERY slowly or you will have a big brake fluid mess. Crank on the c-clamp a quarter turn slowly and wait until it is loose. Then, crank another quarter turn or so and wait. Do this until the caliper is completely depressed. Remove the c-clamp and old brake pad.
17. Install your caliper as it was before. Make sure there is NO debris on the pin bolts. You may want to re-lube them with wheel grease. NOT TOO MUCH or they will not go in. It's sealed inside and there is no room for anything extra in the pin holes. Tighten these to 100 plus a hand crack.
18. Put the brake fluid cap back on!!!!!!!!! I like to open my door and SLOWLY tap on the brakes until they are hard. This way I know they are working. Then, open the cap again and make sure the fluid is still full. If you had no spillage, you should be fine.
19. Put on new wheel
20. Put lug nuts back on hand tight plus a quarter turn. You don't want the wheel loose but you don't want any play when you lower the vehicle.
21. Remove jack stands and lower the vehicle.
22. Set your torque wrench to 100lbs/ft (yep, it's that high).
Lug Nut Tightening. See photo below
23. Torque the first lug nut using the extension and socket.
24. Go across from that nut and tighten that one.
25. Go across back to the first nut and tighten the one beside it.
26. Keep this going until you are done.
27. Replace lug nut cover.
WAIT, you are not done yet!!!!!!!!!!!!!!!!
28. Start your car and pump very slowly on the brake pedal. You should feel it start to firm up. If not, check your brake fluid and make sure your cap is on tight.
Bedding In the Brakes
-------------------------
29. This is the fun part. First, you want to warm up your brakes. Accelerate your vehicle to 60km/h and moderately brake until about 10km/h. Do this 6 times. This will warm up your brakes for the next step.
30. Accelerate your vehicle to 100km/h and brake HARD without locking the brakes or engaging the ABS down to 10km/h or so. Do this 4 or 5 times. After, you will not want to come to a complete stop with your brakes. In an ideal world, you would finish your last hard brake and drift into your driveway without touching the brakes and parking, again without touching the brakes. Neutral is your friend here. Park for hours. Let your brakes cool COMPLETELY.
What this does is adds a layer of the brake pad onto the rotor. This makes for a perfect mating surface which will increase braking performance AND extend the life of your brakes.
Last edited by Shandley; Apr 13, 2012 at 09:42 PM.


Monte Of The Month -- August 2014

Joined: Sep 2008
Posts: 25,145
From: Southeast PA
Good write-up 
The only thing I like to do is before I remove anything, I like to shoot everything down with some brake cleaner, and then continue to clean as I go like you said.
The only thing I like to do is before I remove anything, I like to shoot everything down with some brake cleaner, and then continue to clean as I go like you said.

Joined: Feb 2010
Posts: 30
From: Longview TX
And a great right-up thanks for the wonderful effort. 
I was wondering if it is really OK to back flush the anti-lock system while depressing the brake piston or should we just let it bleed into a jar and refill the Master cylinder reservoir? Thanks again, Great Job
I was wondering if it is really OK to back flush the anti-lock system while depressing the brake piston or should we just let it bleed into a jar and refill the Master cylinder reservoir? Thanks again, Great Job


oh you guys can change the brakes easy,and save money!
Monte Of The Month -- August 2014
Joined: Sep 2008
Posts: 25,145
From: Southeast PA
This is one of those things that is pretty hard to screw up.
There are basics that everyone shouldn't have to pay a shop to do. Rotate Tires, Change Brakes and Rotors, Change Oil, Flush Coolant, Change Alternator, Change Belt, Change Battery, Change Air Filter, Plugs and Wires.
All of those require just a basic set of hand-tools and a jack/stands.
There are basics that everyone shouldn't have to pay a shop to do. Rotate Tires, Change Brakes and Rotors, Change Oil, Flush Coolant, Change Alternator, Change Belt, Change Battery, Change Air Filter, Plugs and Wires.
All of those require just a basic set of hand-tools and a jack/stands.


Joined: Apr 2010
Posts: 12,608
From: Mentor, Ohio
I tend to use the C-Clamp to compress the caliper BEFORE removing any bolts. This way it all comes apart very easily.
Also, I have learned, per the shop book you need to apply GM Threadlocker to the bolts that hold the caliper bracket to the spindle. From what I have found, Red LocTite should be the same as the GM Thread locker (FYI, it's on my bolts now and I have proven, it will break with hand tools after it's curing time).
Also, I have learned, per the shop book you need to apply GM Threadlocker to the bolts that hold the caliper bracket to the spindle. From what I have found, Red LocTite should be the same as the GM Thread locker (FYI, it's on my bolts now and I have proven, it will break with hand tools after it's curing time).