
7th Gen ('06-'07): MistreSS Headlight Project

Thread Starter
|
Monte Of The Month -- November 2012
Monte Of The Month -- August 2015
Monte Of The Month -- August 2015


Joined: Aug 2011
Posts: 4,793
From: Ann Arbor, Michigan

I started working on my headlights today and I moved the initial thread over to here for the work portion.
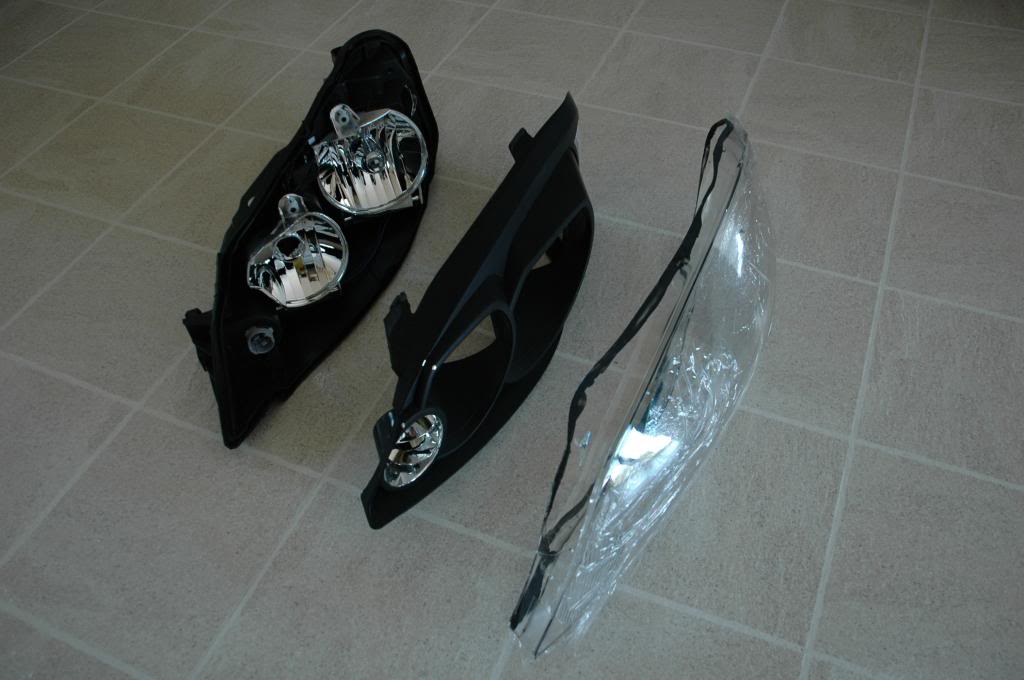
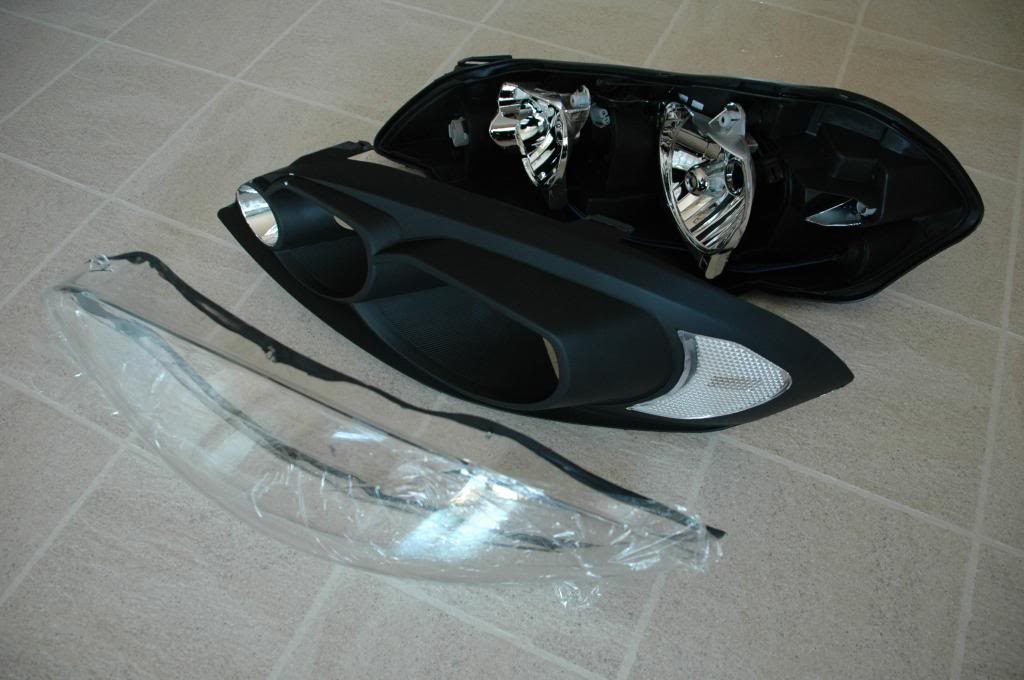
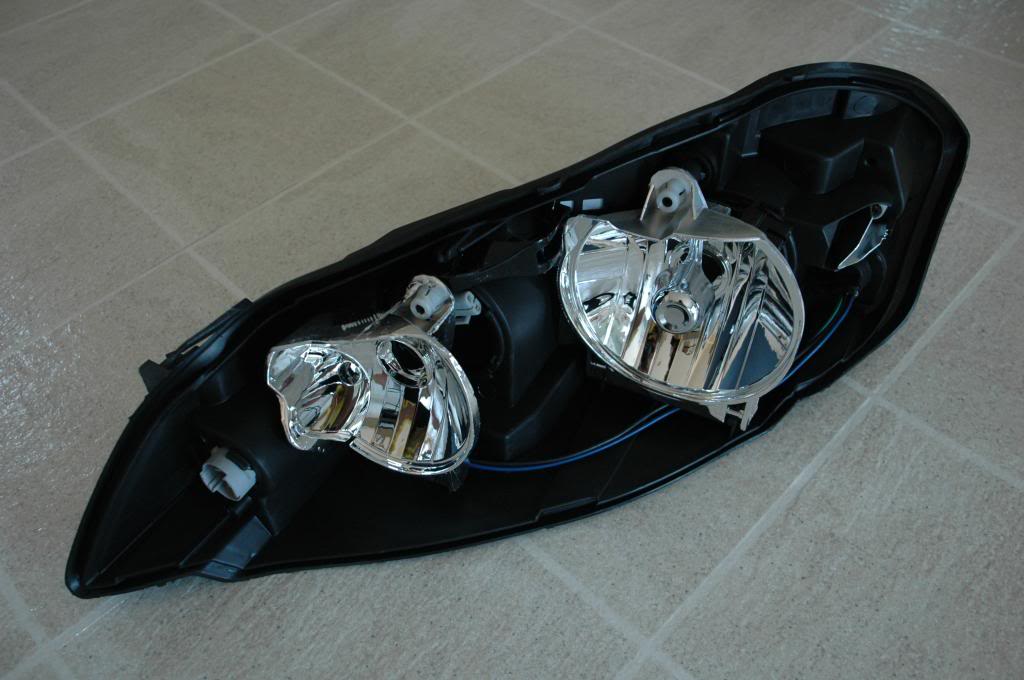
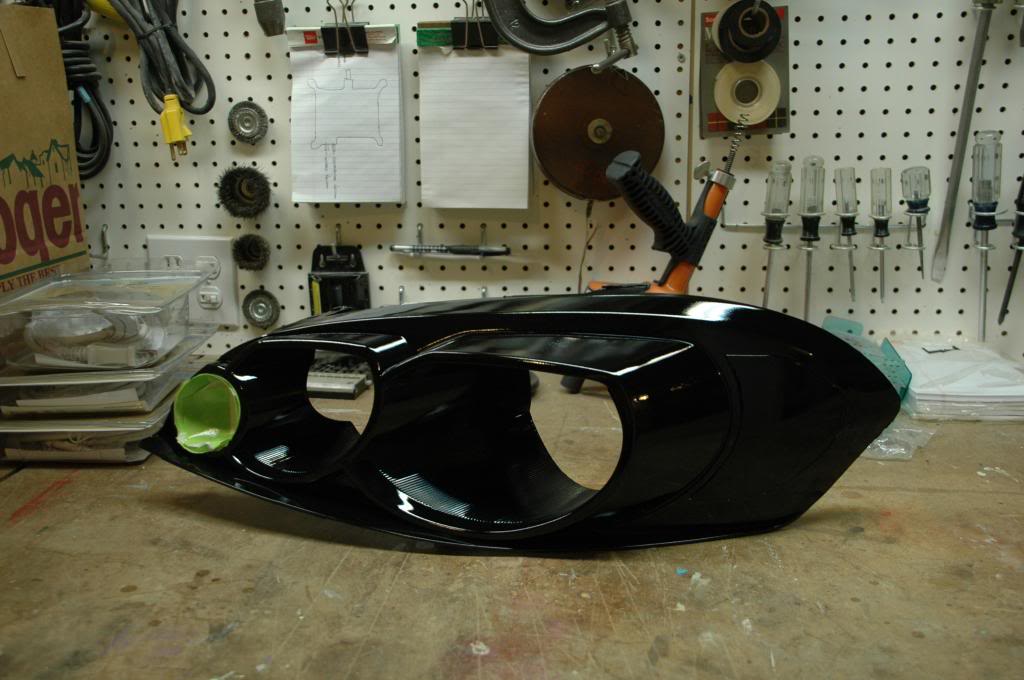
The driver side is now apart. I tried to see if it was possible to take the lens off without heating it but that wasn't working, so I baked the assembly in the oven at 250 degrees for 6 minutes. After heating, I started pulling the lens at the turn signal tip and worked my way around from there, lifting on the tabs as I went around, and it worked off pretty easily. The sealant all came off with the lens. I took a razor blade and carefully cut off the excess sealant from the lens. The bezel is press fitted inside the lens, and the sealant had it secured, so I had to also cut around the bezel tabs to free it from the lens. I think it took me about 1.5-2 hours total to get the assembly apart, cleaned up and where I have it now. Removing the excess sealant and removing the bezel from the lens took the majority of my time. I think I'm going to work on one headlight at a time instead of trying to do both simultaneously.
I have to run to the store and grab some painters tape to mask around the side marker for smoking it. I also have to touch up a few small spots of black on the bezel before I lay clear down but I should have some progress on the bezel itself later today.
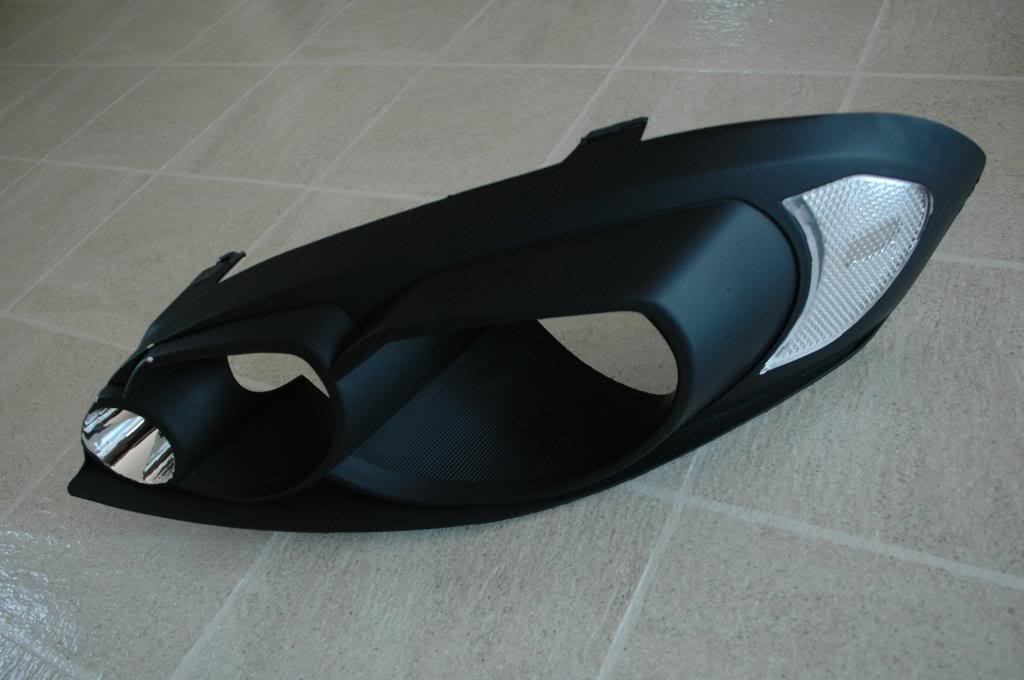
Here's some pics and a few exploded views of the assembly apart.

The driver side is now apart. I tried to see if it was possible to take the lens off without heating it but that wasn't working, so I baked the assembly in the oven at 250 degrees for 6 minutes. After heating, I started pulling the lens at the turn signal tip and worked my way around from there, lifting on the tabs as I went around, and it worked off pretty easily. The sealant all came off with the lens. I took a razor blade and carefully cut off the excess sealant from the lens. The bezel is press fitted inside the lens, and the sealant had it secured, so I had to also cut around the bezel tabs to free it from the lens. I think it took me about 1.5-2 hours total to get the assembly apart, cleaned up and where I have it now. Removing the excess sealant and removing the bezel from the lens took the majority of my time. I think I'm going to work on one headlight at a time instead of trying to do both simultaneously.
I have to run to the store and grab some painters tape to mask around the side marker for smoking it. I also have to touch up a few small spots of black on the bezel before I lay clear down but I should have some progress on the bezel itself later today.
Here's some pics and a few exploded views of the assembly apart.
Last edited by 06mistreSS; Mar 29, 2013 at 05:50 PM.


Thread Starter
|
Monte Of The Month -- November 2012
Monte Of The Month -- August 2015
Monte Of The Month -- August 2015
Joined: Aug 2011
Posts: 4,793
From: Ann Arbor, Michigan
Thanks Justin. I'm clearing the bezel to get it a gloss black.
I'm now working on both pairs as I had to resort to my second pair. I went to smoke the side marker on the first pair and was pulling the tape off and some of the black from the bezel came off with it, exposing the chrome finish. Then, I didn't like how the smoke looked on the bezel. I knew that was going to be more of a test than anything so I'm not really surprised, but I had to do it to see. So I left that and went to the second pair and opened one up and have that bezel ready for clear. I'm leaving the side marker clear on this second pair but still clearing the bezel.
After contemplating on what to do with the first pair, I shot a coat of black paint over the side marker and the exposed area the tape took the finish off of and am working on sanding that down right now. So with this pair, I'm doing a black painted side marker and am clearing the bezel.
When I'm finished I'll see what pair I like the most.

looking forward to the end result. good to know they came open fairly easy. I will be doing the same here after awhile so I will follow your method. Will look awesome when you are done
Thread Starter
|
Monte Of The Month -- November 2012
Monte Of The Month -- August 2015
Monte Of The Month -- August 2015
Joined: Aug 2011
Posts: 4,793
From: Ann Arbor, Michigan
Thanks Zach.
So here they are. I got two coats of clear on both bezels. I'll fine sand and buff these out as needed after they cure. I'll probably move into opening up and working on the two passenger side assemblies tomorrow or Sunday, whenever I have the time.
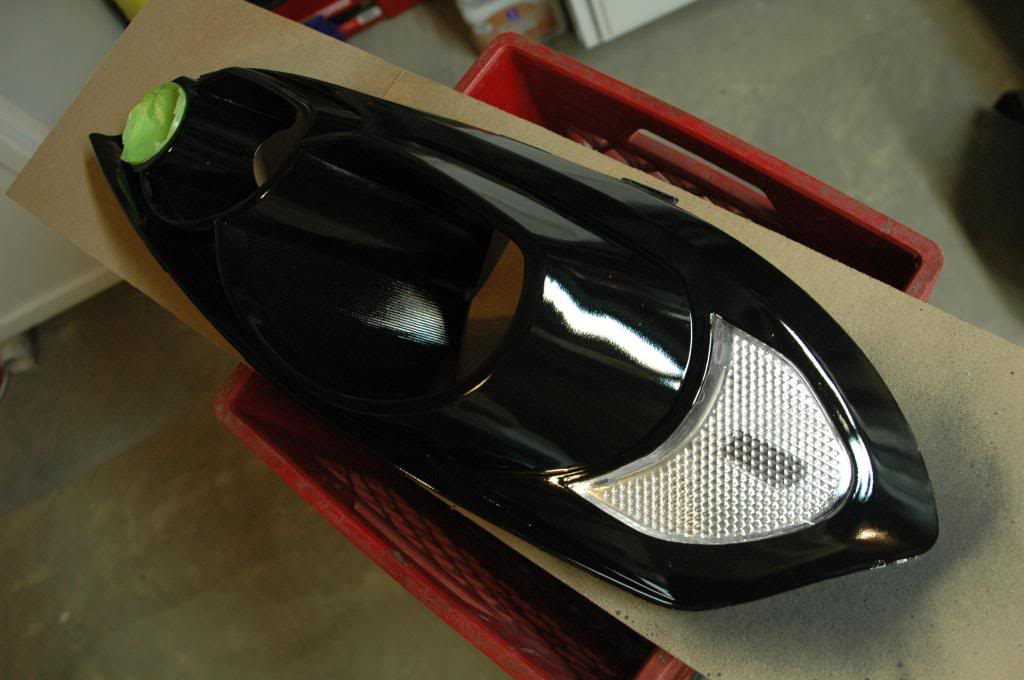
Here's the first pair which went to being a blacked out side marker after I tried smoking it. Didn't care for the smoked look as the Niteshade gave the side marker a funky blueish hue. After a while I decided to just black over the side marker and this is the result. I actually kind of like this but I'll make up my mind when I see the finished product.
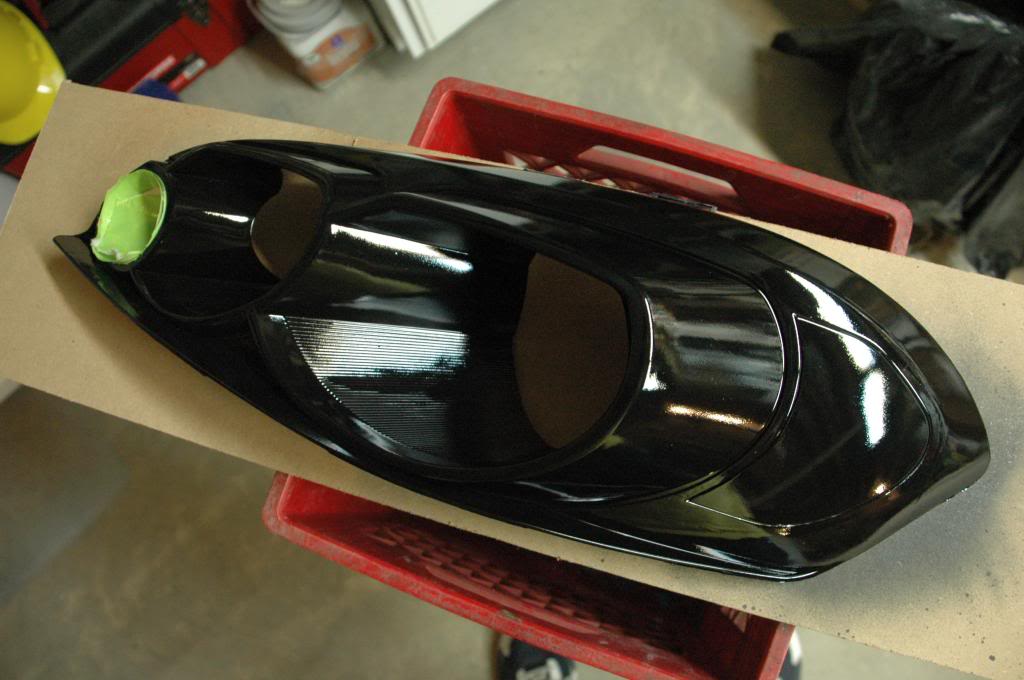
And the second pair with the clear side marker.
So here they are. I got two coats of clear on both bezels. I'll fine sand and buff these out as needed after they cure. I'll probably move into opening up and working on the two passenger side assemblies tomorrow or Sunday, whenever I have the time.
Here's the first pair which went to being a blacked out side marker after I tried smoking it. Didn't care for the smoked look as the Niteshade gave the side marker a funky blueish hue. After a while I decided to just black over the side marker and this is the result. I actually kind of like this but I'll make up my mind when I see the finished product.
And the second pair with the clear side marker.
Last edited by 06mistreSS; Mar 30, 2013 at 08:23 PM.


Thread Starter
|
Monte Of The Month -- November 2012
Monte Of The Month -- August 2015
Monte Of The Month -- August 2015
Joined: Aug 2011
Posts: 4,793
From: Ann Arbor, Michigan
Thanks everyone!
Yeah it does feel a bit weird to tear into a brand new pair of headlights.
Regarding the lens seal, I checked before opening them and the seal looked good but, on closer inspection, there was definitely some small breaks in it, especially along the bottom edge. Resealing them myself should do the trick. I bought a roll of butyl rubber glue, used primarily for windshield sealing, from TRS that's recommended for headlight retrofits. Great reviews on that stuff.