
Permanent fix for moisture in tail lights?


Thread Starter
|
Monte Of The Month -- August 2012


Joined: Apr 2011
Posts: 6,074
From: Seattle
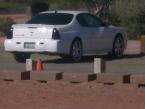
Anyone have any tips on how to eliminate moisture in the tail lights of my '03 Monte Carlo SS? I read that it was a problem with the bulbs sealing properly, so I aquired new washers from the dealer. Prior to installing them I dried out the housings with a hair dryer, then applied a thin coat of dielectric grease to both sides of the washers. The bulbs are a nice snug fit in the housings, so I don't think any moisture is getting past them. As I was preparing to reinstall the tail lights I wondered if perhaps the moisture was getting in at the seams around the edge of the housing, so I ran a bead of strip caulking around both housings. No sign of moisture for a couple of days so I thought I had the problem resolved, but now that the humidity is back up I noticed this morning that they have moisture in them again.  I suppose I could drop the coin for a pair of aftermarket tail lights, but I'd like to retain the originals if at all possible. Any assistance will be greatly appreciated.
I suppose I could drop the coin for a pair of aftermarket tail lights, but I'd like to retain the originals if at all possible. Any assistance will be greatly appreciated.


Joined: Dec 2010
Posts: 94
I had the same problem with mine,the drivers side was worse than the passengers side. I purchased a pair of brand new aftermarket copies off e bay for $150 a pair...installed them and after a week they also started to collect water inside the lens. I sent them back and purchased a nice pair of carbon fiber LED tail lights and have had them for 2 months with no issues but of course the LED lights have no outside plastic lens to worry about.


Joined: Apr 2010
Posts: 12,609
From: Mentor, Ohio

We put after market tail lights on my wife's '01 Mustang and almost IMMEDIATELY had moisture problems. I found the casting for the twist lock bulb housing were horrible, the fix for this was simple (and to this day is working fine).
1 - Go to the arts and crafts store. Buy a single sheet if that thin foam material (comes in 8.5x11).
2 - Remove one of the factory rubber/latex, whatever material washer/seal from the bulb socket.
3 - Use that seal as a template on the sheet you got from the craft store. Cut out a new ring for each bulb.
4 - Re-install the original factory washer you removed in step #2. Now add on top of that washer one of the rings you cut out from the foam sheet. Install one foam ring WITH the factory seal, re-install bulbs and tail lights.
Has been working GREAT!
Now, on the Mustang, the after market tail lights, yeah, they suck. No matter what I do, they get moisture in them. As a method to combat that, I found a low spot in the housing where the moisture pools up and drilled a tiny, unseen drain hole. It helps, but doesn't "fix" the problem.
Hopefully this info I did with the Mustang helps out others with similiar problems (as I'm sure many of the problems no matter the make of car are probably similiar causes).


Joined: Mar 2011
Posts: 303
From: Pennsylvania

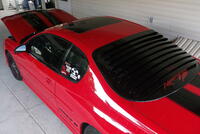
Pretty sure this is because they cause a "greenhouse" effect with them being so large and all, mine do it, but don't notice any actual moisture collect in the bottom?? But I also have vent shades on them, so the problem isn't so pronounced as when I first got the Monte!
Mike
Mike
Thread Starter
|
Monte Of The Month -- August 2012
Joined: Apr 2011
Posts: 6,074
From: Seattle
Thanks to both of you for the input.

Joined: Mar 2011
Posts: 303
From: Pennsylvania
OK, here is also a possible fix, might just try this myself!!
How To Remove & Stop Headlight or Tail Light Water Condensation - Pictures Illustrated Automotive Repair Guide
Mike
How To Remove & Stop Headlight or Tail Light Water Condensation - Pictures Illustrated Automotive Repair Guide
Mike
Monte Of The Month -- May 2012
Monte Of The Year 2012
Monte Of The Month -- February 2017
Monte Of The Year 2012
Monte Of The Month -- February 2017


Joined: Jan 2008
Posts: 4,948
From: Mountains of Utah
My headlights outer lens was actually separating from the housing body. So I removed the unit, cleaned the seam where the lense and housing come together. Next took a bar clamp with soft cloth covering the lense and compressed the lense almost all the way back to the housing. Then used "Liquid Nails: Clear Seal" 50 year rated and stays Crystal Clear", used the nozzle and applied a nice bead into the seam. Next I gently further compressed the bar clamp till the lense was seated. Tooled the sealant flat and let dry overnight. It's been almost 6 months now and no more moisture. Might not hurt to inspect your lense to see if it is separating from the housing body.