
First Wash and Wax of the year. (Pic Heavy)


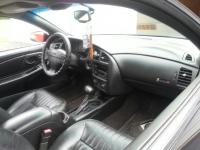
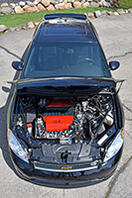
I finally got around to cleaning up the Monte today. Hopefully I can get it out tomorrow. I was forced to wax it inside in the garage because it started raining. So Pics are a little close up from the space. Looks pretty good I do have to say I was pretty happy with how good it looked just after a wash. My buff job is holding up really nice.
Wash


Wash


 I really like them too. Not yet. I have the second pair still sitting in my living room
  I was going to put them on tonight but decided I will keep these on for awhile til the wire wiggles loose again.....although I have noticed the high beam on the drivers side points right at the ground...idk if that can be fixed when I take it apart or not...guess you would know maybe?

Looking clean man! I'm still waiting to afford the tags and oil and a filter until I can get mine on the road. Until then I'll enjoy my Stealth. Plus it'll give it a little more time for a few more rains to wash away the salt from the roads.
I hear you. I just got my registration renewal for tags the other day...$301.50...ouch. I couldnt wait any longer to drive it with all the nice weather lately. The roads around des moines aren't too bad as far as salt goes or I would have kept mine inside
Monte Of The Month -- November 2012
Monte Of The Month -- August 2015
Monte Of The Month -- August 2015


Joined: Aug 2011
Posts: 4,793
From: Ann Arbor, Michigan

thanks I really like them too. Not yet. I have the second pair still sitting in my living room I was going to put them on tonight but decided I will keep these on for awhile til the wire wiggles loose again.....although I have noticed the high beam on the drivers side points right at the ground...idk if that can be fixed when I take it apart or not...guess you would know maybe?
I really like them too. Not yet. I have the second pair still sitting in my living room I was going to put them on tonight but decided I will keep these on for awhile til the wire wiggles loose again.....although I have noticed the high beam on the drivers side points right at the ground...idk if that can be fixed when I take it apart or not...guess you would know maybe?I would recommend running a bead of sealant around the lens where it meets the housing, just to be safe. Out of the box, mine looked good but on closer inspection it had some small gaps here and there, mostly along the bottom edge. More apparent when I took them apart. I used that butyl rubber glue on reinstall but also ran a bead of black silicone around just to be sure it was fully sealed. Also make sure the back of the connectors are completely filled with sealant.
Yeah, you have to adjust the aim of the reflector which is done with the hex screw (points upward) on the back of the housing.
I would recommend running a bead of sealant around the lens where it meets the housing, just to be safe. Out of the box, mine looked good but on closer inspection it had some small gaps here and there, mostly along the bottom edge. More apparent when I took them apart. I used that butyl rubber glue on reinstall but also ran a bead of black silicone around just to be sure it was fully sealed. Also make sure the back of the connectors are completely filled with sealant.
I would recommend running a bead of sealant around the lens where it meets the housing, just to be safe. Out of the box, mine looked good but on closer inspection it had some small gaps here and there, mostly along the bottom edge. More apparent when I took them apart. I used that butyl rubber glue on reinstall but also ran a bead of black silicone around just to be sure it was fully sealed. Also make sure the back of the connectors are completely filled with sealant.
I plan on taking these ones apart that are on the car at some point. The other set that is brand new I will probably run the sealant on because I dont plan on tear two sets apart if all goes well
Monte Of The Month -- November 2012
Monte Of The Month -- August 2015
Monte Of The Month -- August 2015
Joined: Aug 2011
Posts: 4,793
From: Ann Arbor, Michigan
The one screw operates both reflectors together. There's an arm that connects the high beam reflector to the low beam reflector.


