
Evil Axles

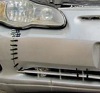


drivers side axle went bad, decided to replace both to eb safe, cant get either out. The drivers side tore off and all i have is the cup hanging out of the tranny, pass side is intact, but its not budging either. I've tried quick jerks, pry bars, hammers, i cant get either of these out of the trans. What the hell is going on?


drivers side axle went bad, decided to replace both to eb safe, cant get either out. The drivers side tore off and all i have is the cup hanging out of the tranny, pass side is intact, but its not budging either. I've tried quick jerks, pry bars, hammers, i cant get either of these out of the trans. What the hell is going on?


Joined: Apr 2010
Posts: 12,608
From: Mentor, Ohio

The shop book normally calls for getting behind the axle and using a drift and a hammera few taps and out.
I had the same situation with my old '94 Grand Am. I used a thick and long flat head screw driver, put the flat head as close to the center the "cup" and a couple good whacks with the hammer and it popped out pretty easily.
I had the same situation with my old '94 Grand Am. I used a thick and long flat head screw driver, put the flat head as close to the center the "cup" and a couple good whacks with the hammer and it popped out pretty easily.

Hi Matt,
What size Crowbar are you using? Mine is about 3 ft long. The angle I stuck it was towards the front and middle, about 2oclock. Once I got the bar between the cup and the Trans the cup popped out! This was on the passenger side. I never looked at the drivers side cause it was fine. There is a sensor or connector just forward of the cup. That's were I placed the bar for leverage. Wish I had taken pics, but I was So frustrated, as I'm sure you are.
I think the length of the bar and the angle you place it are key. I didn't have to use the hammer cause the length of the bar provided the pressure needed. And you may want to push the cup into the Trans as far as it will go So there is some travel before the lock washer on the spindle of the cup hits it's stop. Hope this helps!
Last edited by JC Colon; Nov 24, 2013 at 10:38 AM.
Hi Matt,
What size Crowbar are you using? Mine is about 3 ft long. The angle I stuck it was towards the front and middle, about 2oclock. Once I got the bar between the cup and the Trans the cup popped out! This was on the passenger side. I never looked at the drivers side cause it was fine. There is a sensor or connector just forward of the cup. That's were I placed the bar for leverage. Wish I had taken pics, but I was So frustrated, as I'm sure you are.
I think the length of the bar and the angle you place it are key. I didn't have to use the hammer cause the length of the bar provided the pressure needed. And you may want to push the cup into the Trans as far as it will go So there is some travel before the lock washer on the spindle of the cup hits it's stop. Hope this helps!
What size Crowbar are you using? Mine is about 3 ft long. The angle I stuck it was towards the front and middle, about 2oclock. Once I got the bar between the cup and the Trans the cup popped out! This was on the passenger side. I never looked at the drivers side cause it was fine. There is a sensor or connector just forward of the cup. That's were I placed the bar for leverage. Wish I had taken pics, but I was So frustrated, as I'm sure you are.
I think the length of the bar and the angle you place it are key. I didn't have to use the hammer cause the length of the bar provided the pressure needed. And you may want to push the cup into the Trans as far as it will go So there is some travel before the lock washer on the spindle of the cup hits it's stop. Hope this helps!
I think i might go rent of these if that doesnt work.
http://www.tracystruesoaps.com/tutor...cvpass/09b.jpg
Last edited by Overdose666; Nov 24, 2013 at 02:09 PM.
Slide hammer saved the day, i guess the pry bar was pushing the axles at a weird angle and binding up the ring? Idk, i rented a slide hammer and cv axle remover for it and they came out pretty easy, had a little issue getting it on the driver side axle but once i got it all was good. Thanks for the help guys!
Last edited by Overdose666; Nov 24, 2013 at 03:15 PM.

Not for long! Found a lot of things wrong with the suspension while i was digging around, bad tie rod ends on both sides, bad sway bar bushings, bad control arm bushings, i might have a bad ball joint. It's definately a smoother ride now and i can hit the gas without any horrifying vibrations or shaking, but I still have a while to go.
Anyways I'll be starting a new job here pretty soon so I'll be able to give my monte a bit more attention, anything else i should check on or add to the list before i get all those parts?
Anyways I'll be starting a new job here pretty soon so I'll be able to give my monte a bit more attention, anything else i should check on or add to the list before i get all those parts?
Last edited by Overdose666; Nov 24, 2013 at 08:14 PM.
Joined: Apr 2010
Posts: 12,608
From: Mentor, Ohio
If you have a bad control arm bushing AND a ball joint, if they are on the same control arm, it might be easier to replace the control arm all together.
You can upgrade your end links to Energy Suspension poly end links.
I assume your tie rods are stock? I would suggest Moog tie rods with the grease fittings. They also have the same dimensions as the stock ones, this means when you take the stock ones off, count the turns, then put the new ones on, counting the same turns (also, try not to move the torque nut, gives you a good "stop" point). Also, have a propane torch handy when removing the old tie rod. The nut holding it to the steering knuckle is a pistol. Heat the nut up, since it's not a castle nut, it has a nylon keeper, if you melt the nylon out, makes the job a LOT easier. You will also want to heat the body of the tie rod up and then let it cool to help brake it's aged bond to the inner tie rod.
Hope that helps a little as you spec out your next steps.