
Repair Guide: Replacing Heater Hose Fittings


Ok so this is my first write-up, hopefully its not confusing lol 
so my heater hose fittings were starting to fail and leak. so i decided to replace them, this is the second time i did this so it was pretty simple, here goes
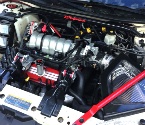
STEP 1. this is where we begin

STEP 2. remove your engine cover

STEP 3. disconnect battery (8mm socket) and i removed strut tower brace just to have more working space (four 13mm nuts, 2 on each side)

STEP 4. Remove coolant reservoir (two 10mm nuts on top, also disconnect hose and cap it off if necessary)

STEP 5. loosen and remove serpentine belt by loosening tensioner pulley (15mm deep socket)

STEP 6. Remove your alternator and bracket (three 15mm bolts on alternator) the bracket is held on by a 15mm nut on one end and a 10mm bolt on the other end, disconnect harness and remove positive cable (10mm nut)

STEP 7. Disconnect heater hoses, inlet and outlet, (using pump pliers to compress clamps) cap off if necessary and set aside

STEP 8. remove the belt tensioner assembly (three 15mm bolts, one is hidden on the bottom left side) Also this is a good time to check your power steering fluid

this is the assembly once removed, the ends of the fittings broke off on mine because of how brittle and weak they were, i took some needle-nose pliers and carefully removed each broken end from the water pump inlet and under intake inlet


new fittings put on

now to put everything back together just follow the steps in reverse order and make sure to top off and bleed the coolant system
HOPE THIS HELPS SOMEBODY OUT THERE TRYING TO REPLACE THEIR HEATER HOSE FITTINGS
so my heater hose fittings were starting to fail and leak. so i decided to replace them, this is the second time i did this so it was pretty simple, here goes
STEP 1. this is where we begin
STEP 2. remove your engine cover
STEP 3. disconnect battery (8mm socket) and i removed strut tower brace just to have more working space
(four 13mm nuts, 2 on each side) STEP 4. Remove coolant reservoir (two 10mm nuts on top, also disconnect hose and cap it off if necessary)
STEP 5. loosen and remove serpentine belt by loosening tensioner pulley (15mm deep socket)
STEP 6. Remove your alternator and bracket (three 15mm bolts on alternator) the bracket is held on by a 15mm nut on one end and a 10mm bolt on the other end, disconnect harness and remove positive cable (10mm nut)
STEP 7. Disconnect heater hoses, inlet and outlet, (using pump pliers to compress clamps) cap off if necessary and set aside
STEP 8. remove the belt tensioner assembly (three 15mm bolts, one is hidden on the bottom left side) Also this is a good time to check your power steering fluid
this is the assembly once removed, the ends of the fittings broke off on mine because of how brittle and weak they were, i took some needle-nose pliers and carefully removed each broken end from the water pump inlet and under intake inlet
new fittings put on
now to put everything back together just follow the steps in reverse order and make sure to top off and bleed the coolant system
HOPE THIS HELPS SOMEBODY OUT THERE TRYING TO REPLACE THEIR HEATER HOSE FITTINGS


Thread
Thread Starter
Forum
Replies
Last Post
6th Gen ('00-'05): Heater hose fitting!
brendan127
Engine/Transmission/Performance Adders
3
May 12, 2012 10:39 PM
Franks 03SS
Engine/Transmission/Performance Adders
2
Sep 5, 2011 12:41 PM
01, carlo, connectors, coolant, disconnecting, ends, engine, fitting, fittings, heater, hose, installing, located, monte, montecarlo, replace