
Mod Guide: How to: 5th gen a/m headunit, speakers and amp


Ok well I though I would post a little writeup for the 5th gen guys or anyone who can find it useful. As some of you may know I just installed an aftermarket headunit, new speakers and a 4 channel amp in my monte. Here is what you need and how to go about installing it.
I will start out by saying I am not an audio pro and any info I am giving must not be taken as the best info and I take no responsibility for any damage caused by taking my advice or following my directions
Things you need:
-New headunit with at least 2 RCA pre outs
-Installation kit (double to single din adapter, wiring adapter)
-Soldering iron and solder
-Shrink tubing
-Electrical tape
-Wire cutters/strippers
-Heat gun or hairdryer
-Speakers (5 1/4" for doors and 6x9" for rear deck)
-Speaker wire (The wiring I used was somewhere between 12 and 14 gauge but 16 should work)
-4 channel amp
-Amp installation kit
-4 gauge power wire (20ft)
-4 gauge ground wire (3ft)
-Ring terminals for power and ground wire
-2 RCA cables (17ft)
-Turn on lead (18 gauge)
-Zip ties
-Basic hand tools
-Screwdrivers (Regular and phillips)
-7mm, 8mm, 10mm, 13mm and 15mm sockets and ratchet w/ 3" extention
-Clip removal tool
-Allen wrenches
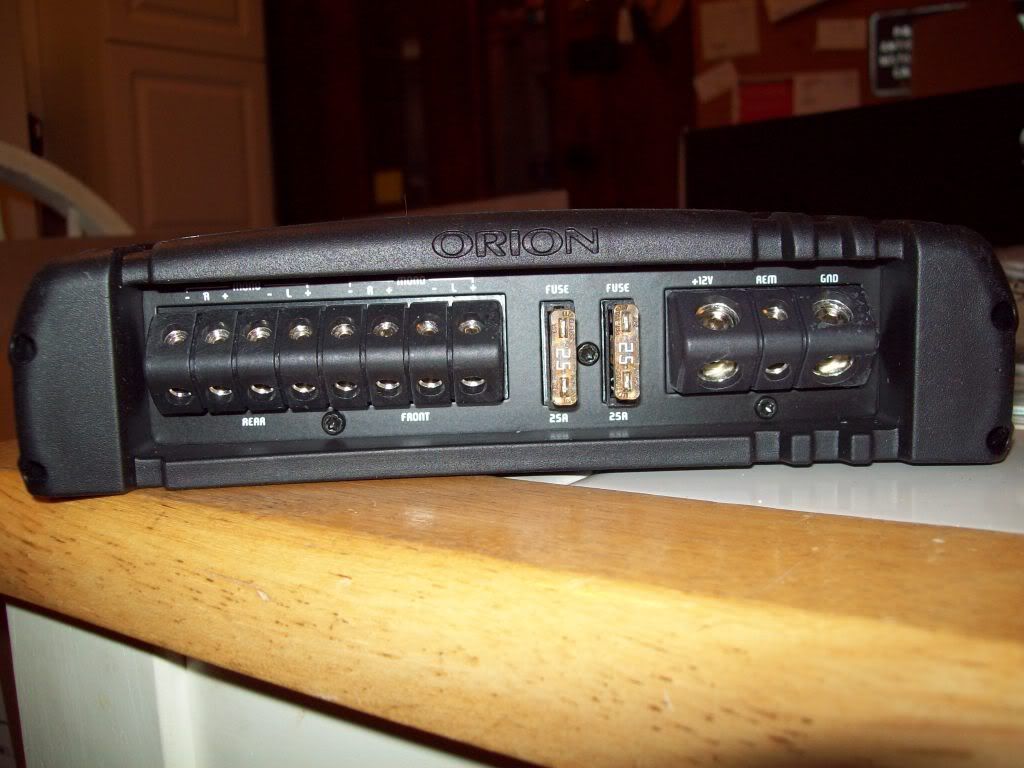
Before you even think of buying anything, do your research. Talk to someone who knows their stuff and can steer you in the right direction in what to buy. You will want an amp that can power your speakers without overpowering them and causing damage. I started by talking to someone at sonicelectronix and told them what I wanted. They recommended an amp for me and I matched my speakers to the RMS output of the amp running on 4 channels at 4 ohms. I got a class ab 4 channel amp with 60w RMS x4 output. I then looked at speakers that were close to or over that RMS rating just to be safe. I took that into account as well as product reviews and price. I ended up with speakers rated at 65w RMS up front and 70w RMS in the back.
For the headunit I made sure to find one with 2 or more sets of RCA pre outs since you will need to run two RCA cables from the headunit to the amp.
Ok lets get started. I removed alot of my interior and set it aside so I could get full access to run all the wiring.
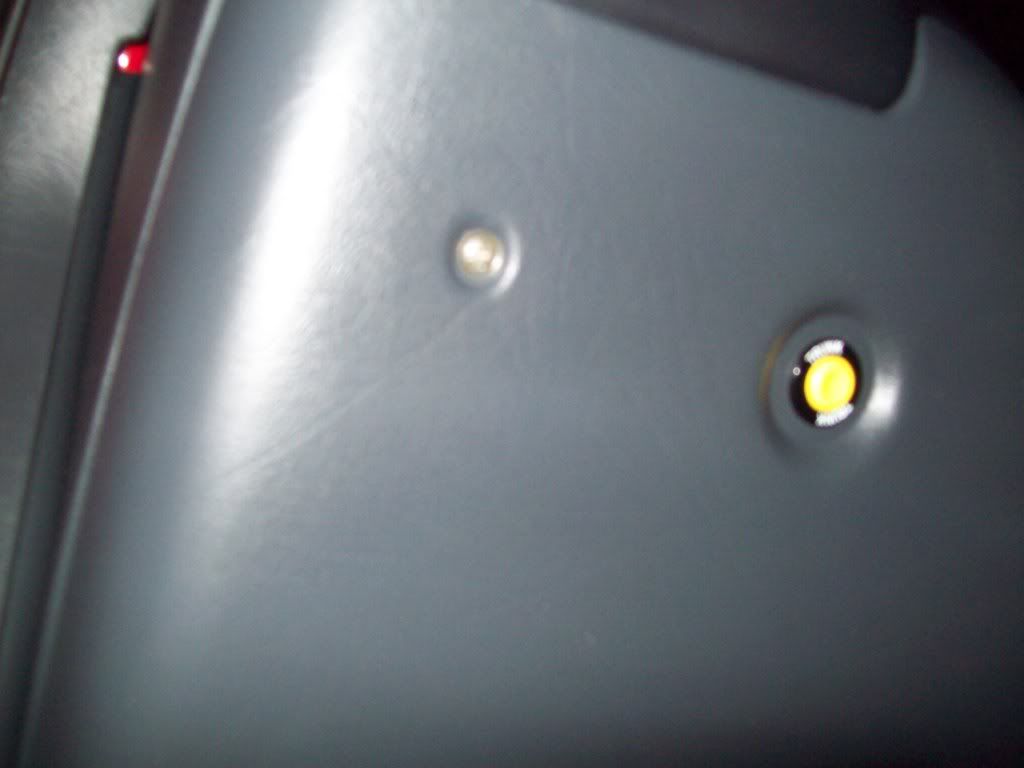
Lets begin with the easiest, your dash. On both sides under the dash, there are felt panels that close off the bottom of the dash. They are held in by two push in plastic clips on each side. Remove them and then pull out the panels.
Remove the knee panel from below the steering collumn. There are two screws up top you will need to remove and two phillips headed plastic clips that need removed down low.
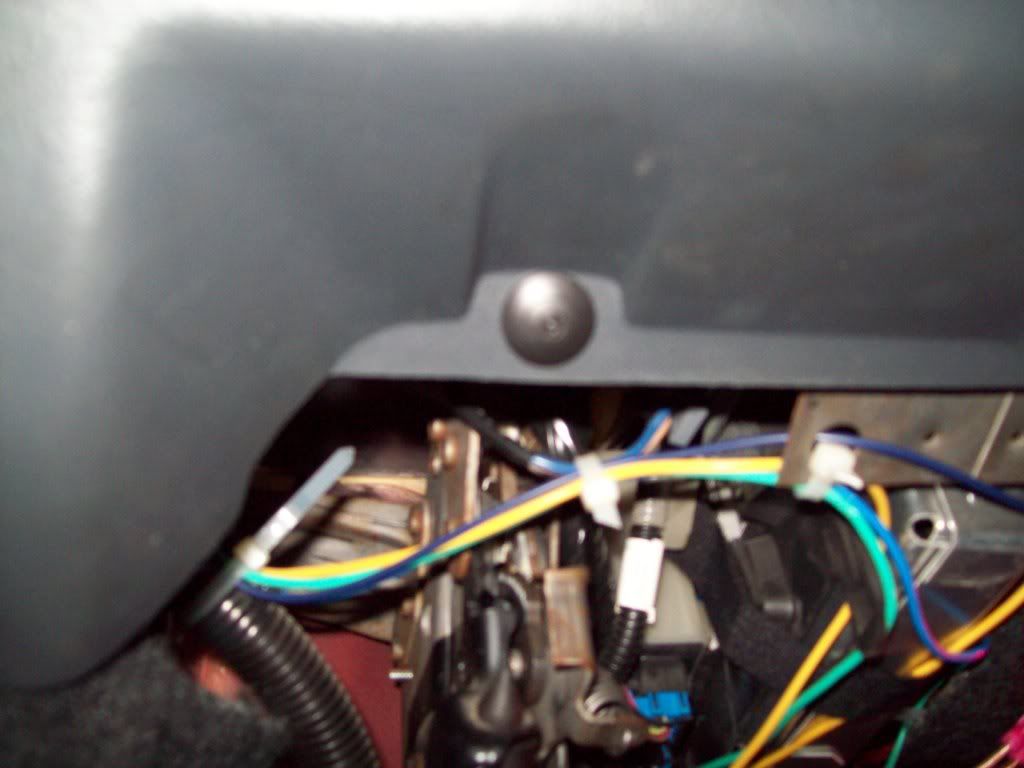
Then just pull out the panel and sit it aside. Next, remove the gauge bezel by lowering your wheel all the way down and pulling off the panel with gentle even force around the edges. Once it is unclipped pull it away from the dash gently and raise it upward to remove it. Set it aside. Remove your stock radio by removing the (2) 7mm screws that hold it in. Once they are removed, slide it out and remove the plug on the back.
Now move onto your door panels. Here is a writeup I did a while ago that goes into extreme detail of how to remove them.
Guide: How to: 5th gen door panel removal - Monte Carlo Forum - Monte Carlo Enthusiast Forums
Remove your front speakers by removing the (4) 7mm screws that hold them in. Once they are out, unplug them and tuck the plug somewhere where it wont hang down or rattle. I stuffed it between the door panel and the moisture barrier where it was nice and secure. It will be disconnected from power so you dont have to cover the end if you dont want to.

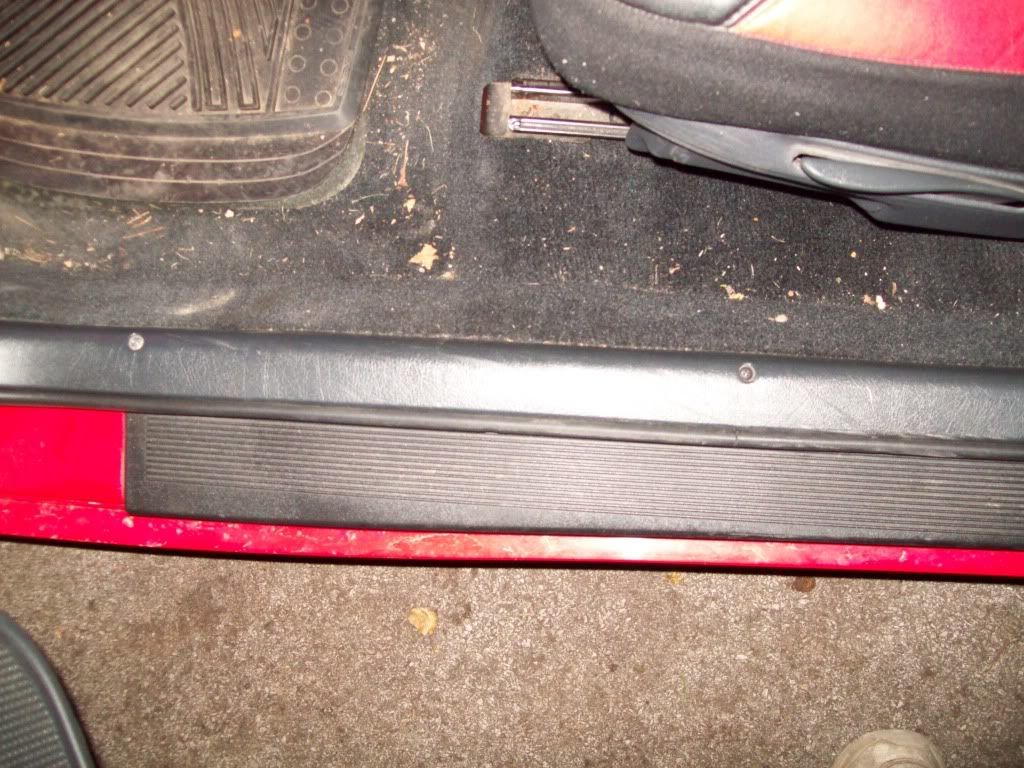
OK next remove the step plates at the door opening. They come out with 3 phillips head screws.
Time to remove the back seat. Start by removing the seat bottom. It comes out with (2) 13mm bolts on the front of the seat. Slide it out and pull the seatbelts through the slots in the seat bottom. Now remove the (3) 10mm bolts along the bottom of the seat back.
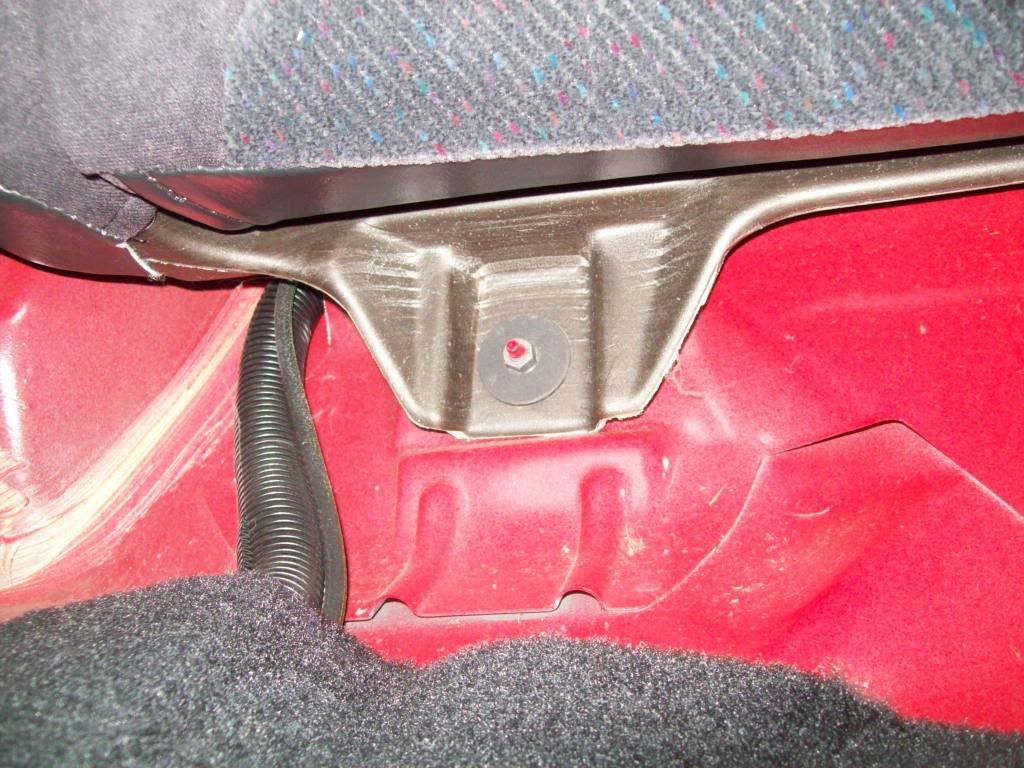
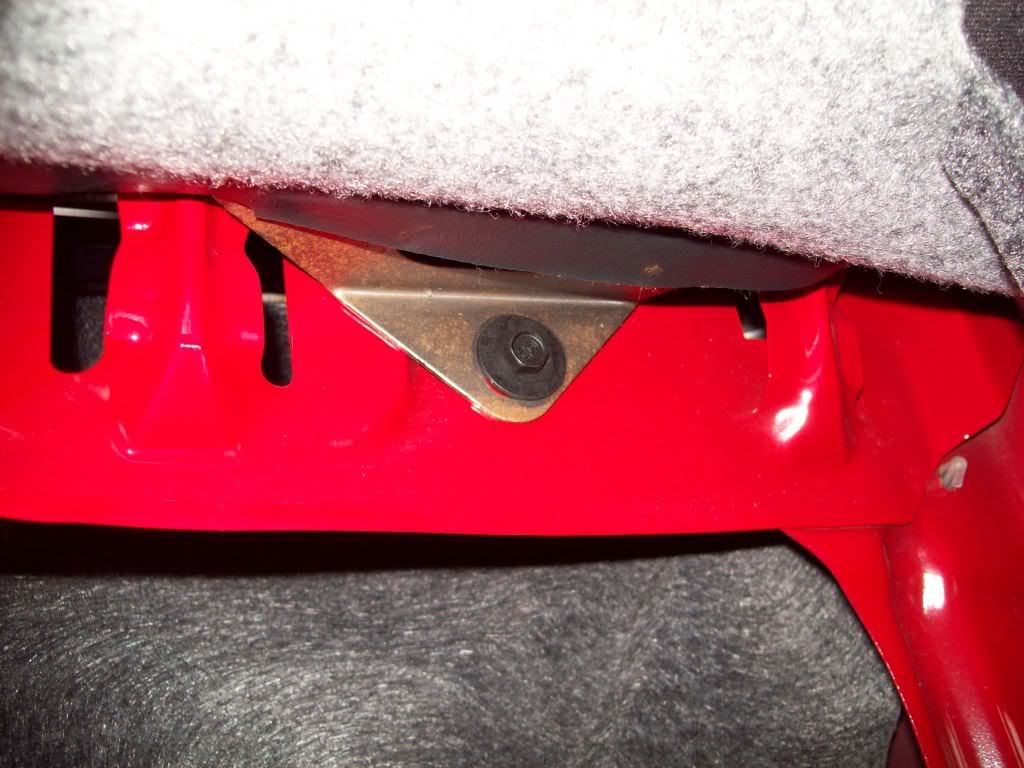
Now fold down the seatback and unclip the cloth from the sheetmetal around the opening that goes into the trunk. Under that there are (2) 10mm bolts you will need to remove.
Pull the seat back out and set it aside.
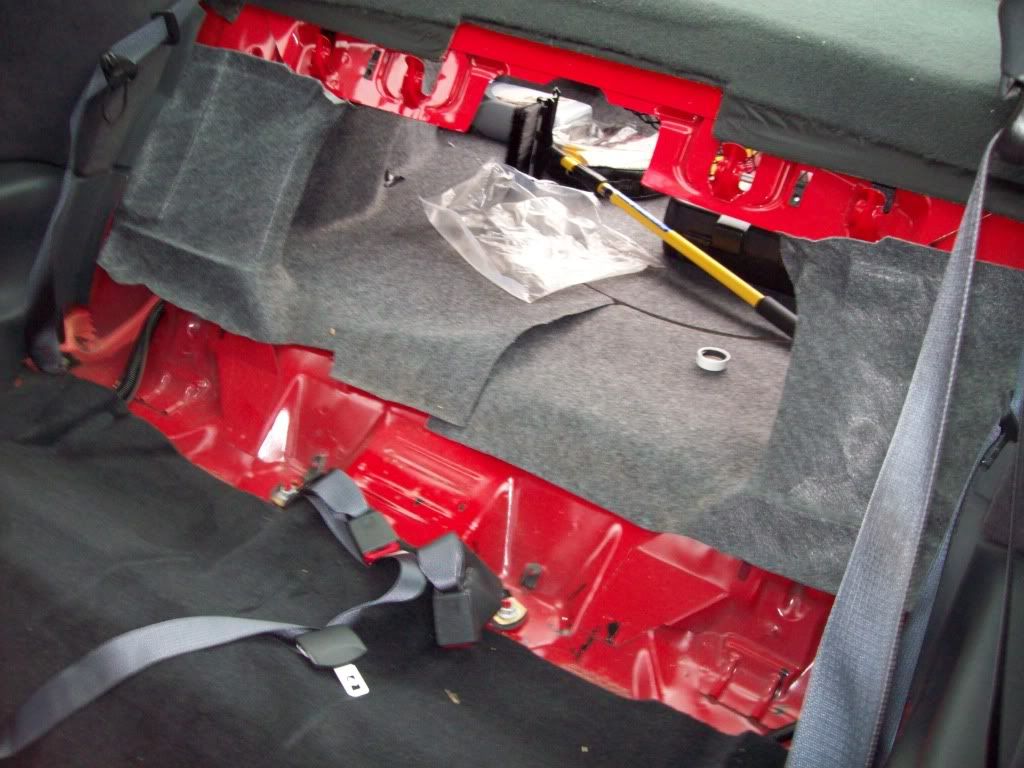
Now you will need to remove the rear deck panel. Pull the seatbelts out of the slots on each side of the panel and slide the panel out. Sit it aside.
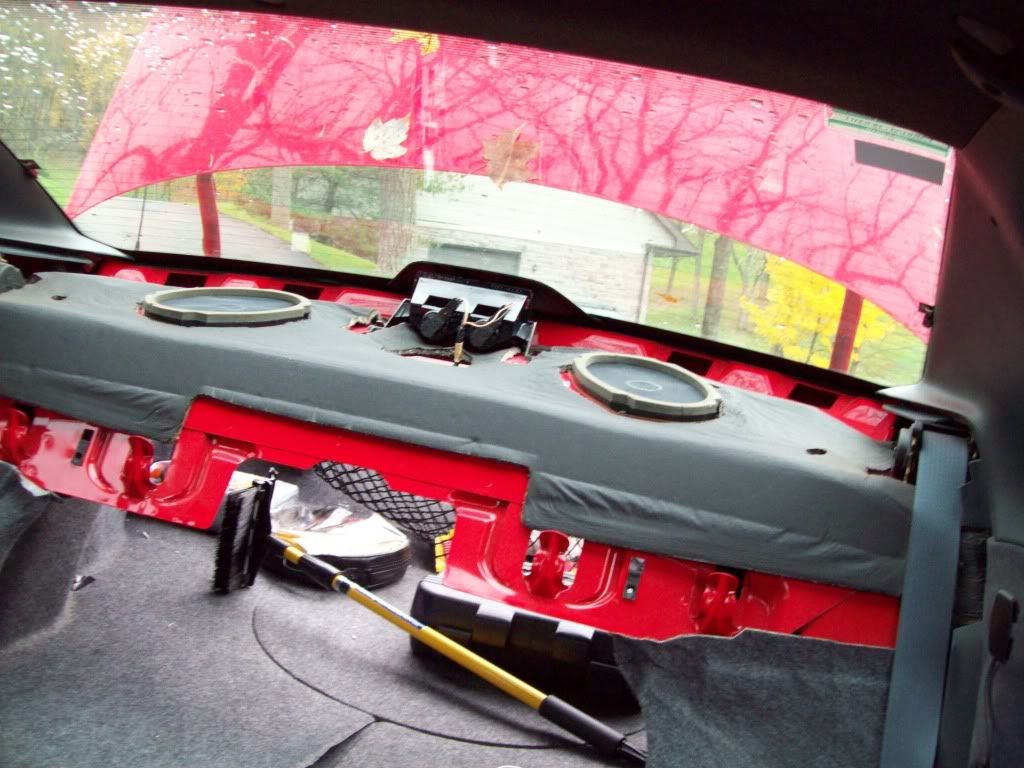
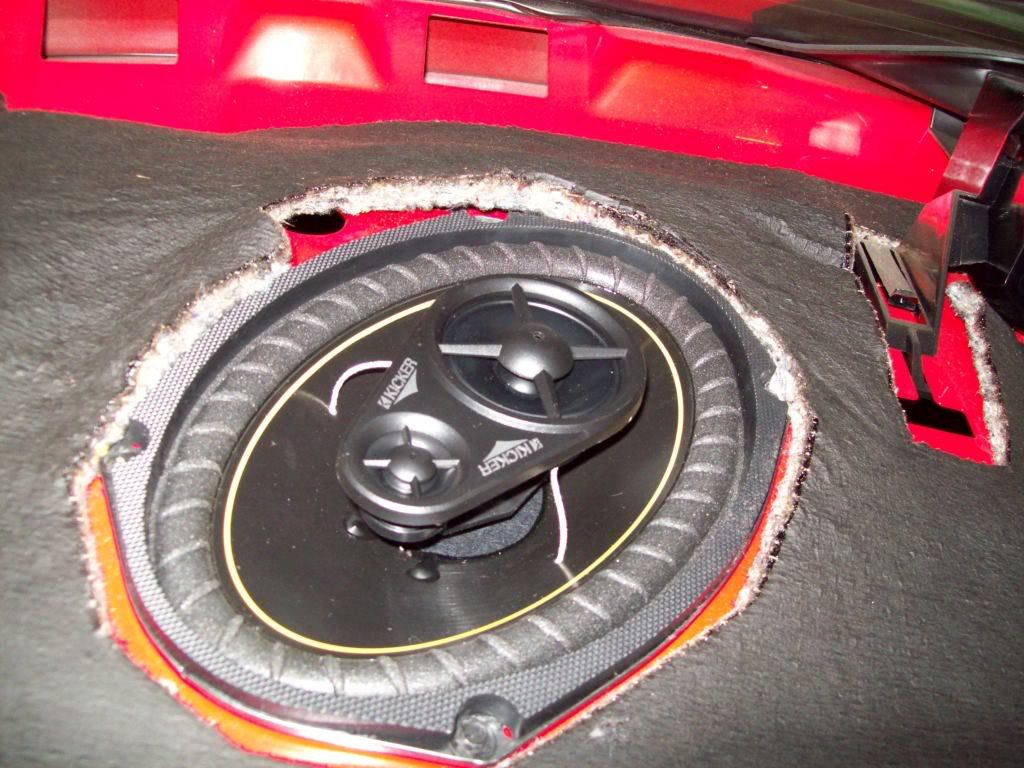
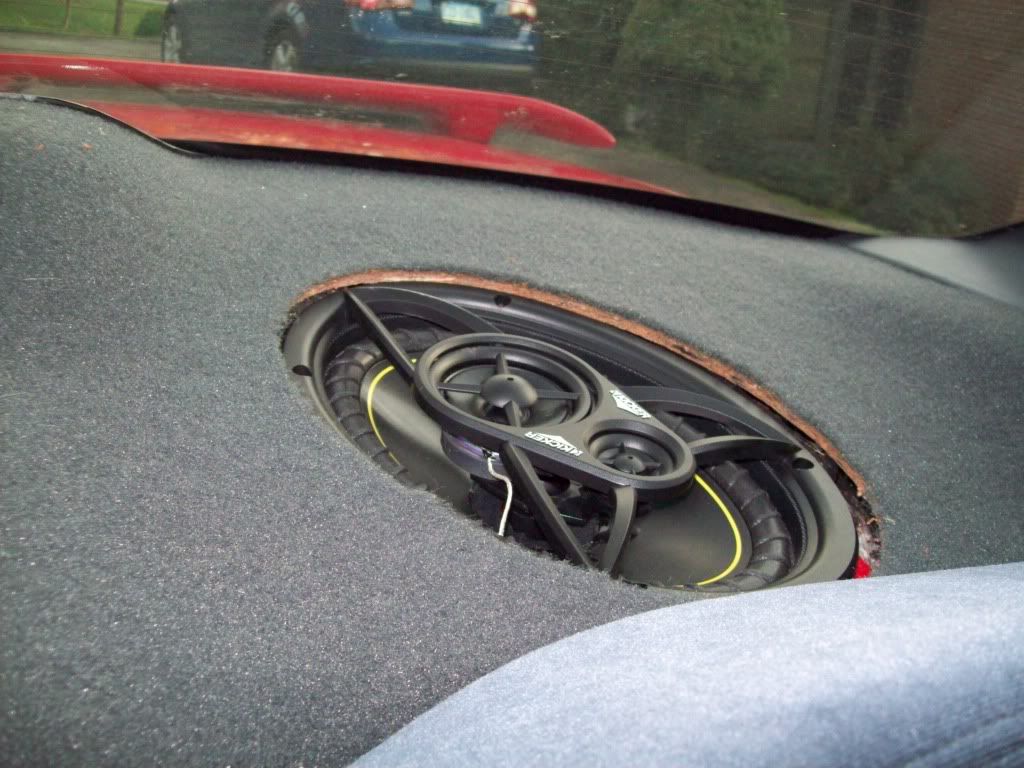
Remove the rear speakers like you did the fronts. Remove the (4) 7mm bolts that hold each speaker in. Unplug them and pull them out. You can put in your new rear speakers now if you want. You can just use the screws that held in the old ones if you arent using the cover, but you want to use the speaker cover, you will need to use the screws that come with the speakers. Also, if you want to use the covers, you will need to cut holes in the rear deck panel for the speakers. I put the rear deck panel in with the speakers out and traced the hole onto the panel from inside the trunk with a piece of chalk. I then cut the hole out with a utility knife. You may need to cut the hole a little bigger to get it to fit over the speakers.
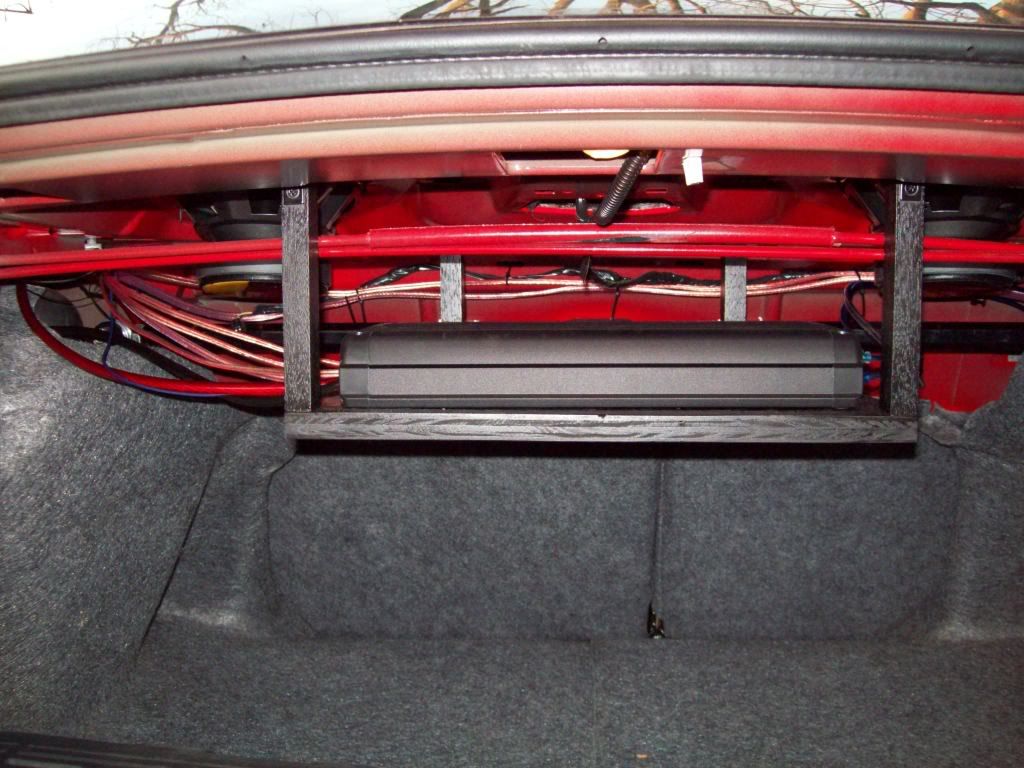
Well once you have everything removed you can begin installing your amp and running your wires. You will need to find a place to securely mount your amp. I made a shelf out of plywood that I mounted under the rear deck but there are other places you can mount it.
Once your amp is mounted you will need to begin running the wires to and from it. I began with the speaker wires. Since the back of the rear speakers are right in the trunk, you wont have to run the wires for them very far. Your speaker wires should be coupled, one wire for positive and one for negative. Your amp will have a positive and negative terminal for each speaker and each speaker will have a positive and negative terminal.
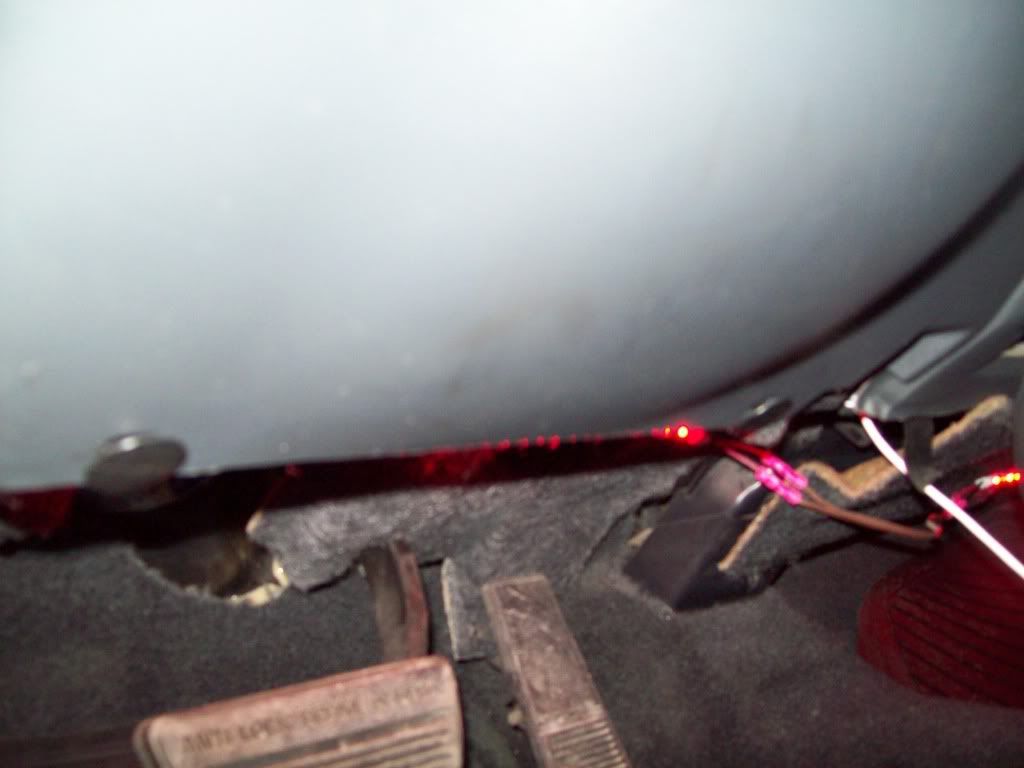
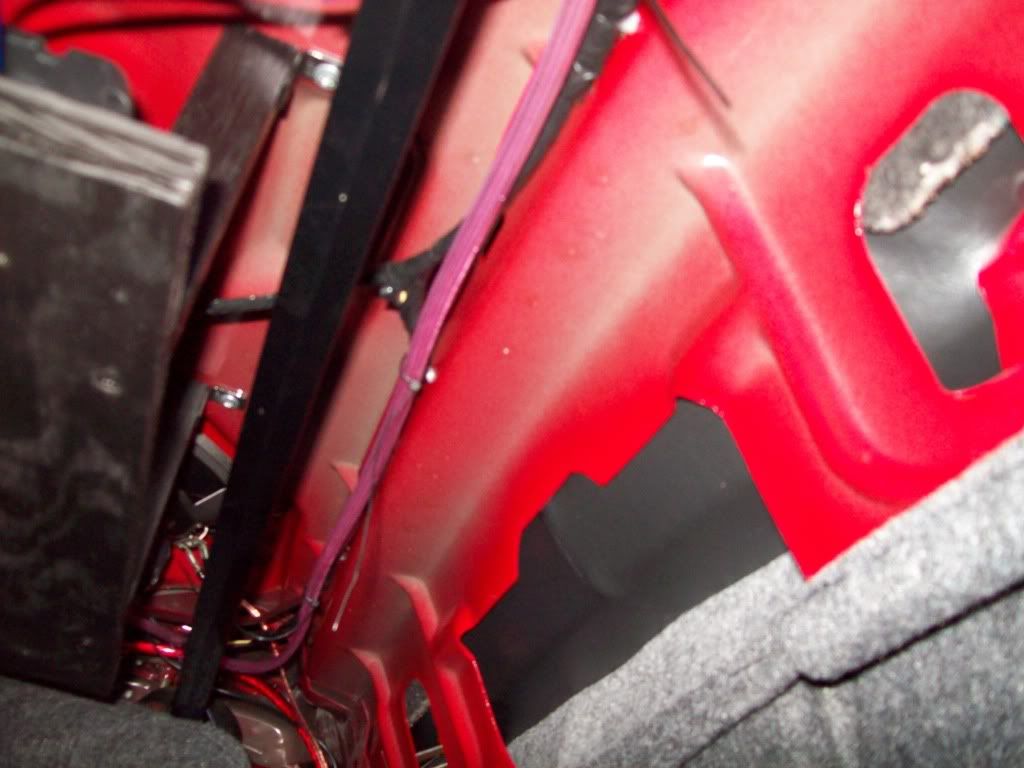
You will need to match the terminals on the amp to the corresponding speaker. You will want to measure out how much wire you need for each speaker and cut the wires to length. I just mocked up where I wanted to run them so I had the most accurate length. I ran the wires to my door speakers from the door, through the flexible loom in the jamb into the cabin. From there, I ran the wire along the door opening under the carpet. That is why you removed the step plate at the door opening, because the wiring will be concealed under there. Run the wire back and tuck it under the trim panels beside the back seat. You can just pull the bottom of the panel out and tuck the wires in. Once you have them tucked under there, you will need to run the wires into the trunk. There is a hole you can use at each side of the cabin. There are already wires running through there so they arent hard to find.
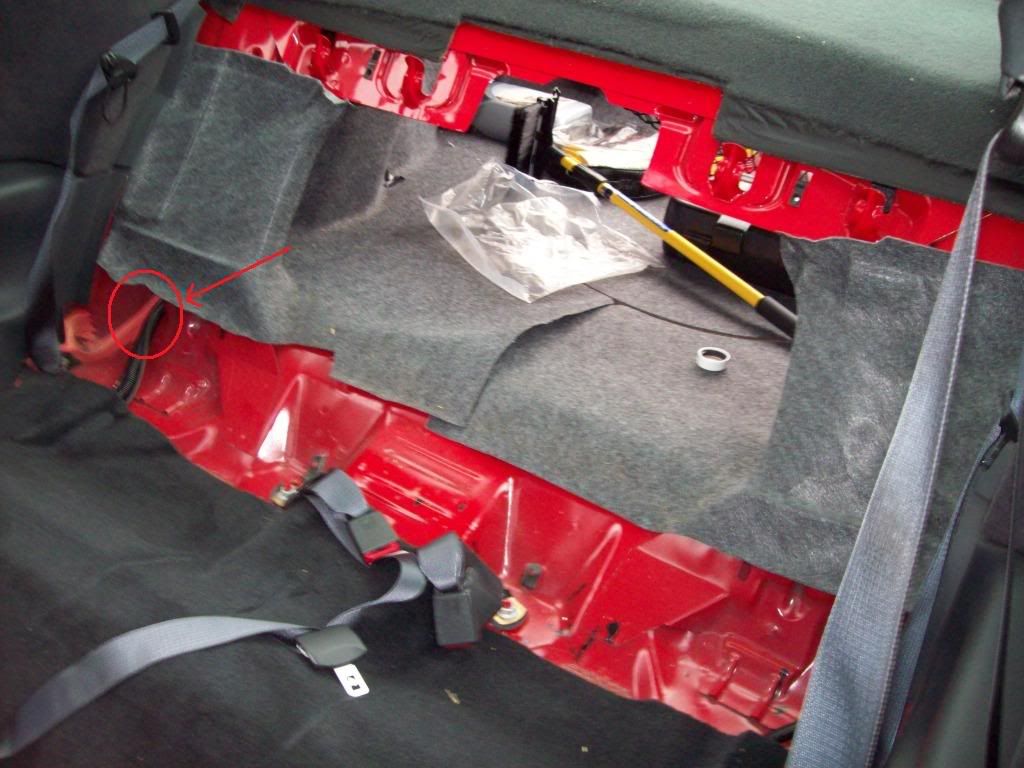
From there you can just follow the routing of the other wires that were run through that hole. Its the neatest way to run them and you can just ziptie the speaker wires right to the other wires(But dont do that yet because you have to take the wires out to solder the terminals on the ends). It makes it soooo much easier.
Get the wires as close to the end of the amp as possible before actually running them to the amp, just to keep things neat looking. You dont want a big length of wire hanging to the amp. It will look ugly. Once you have the wires mocked up and cut to length, remove them from the car.
Now get the terminal clips that came with your speakers.
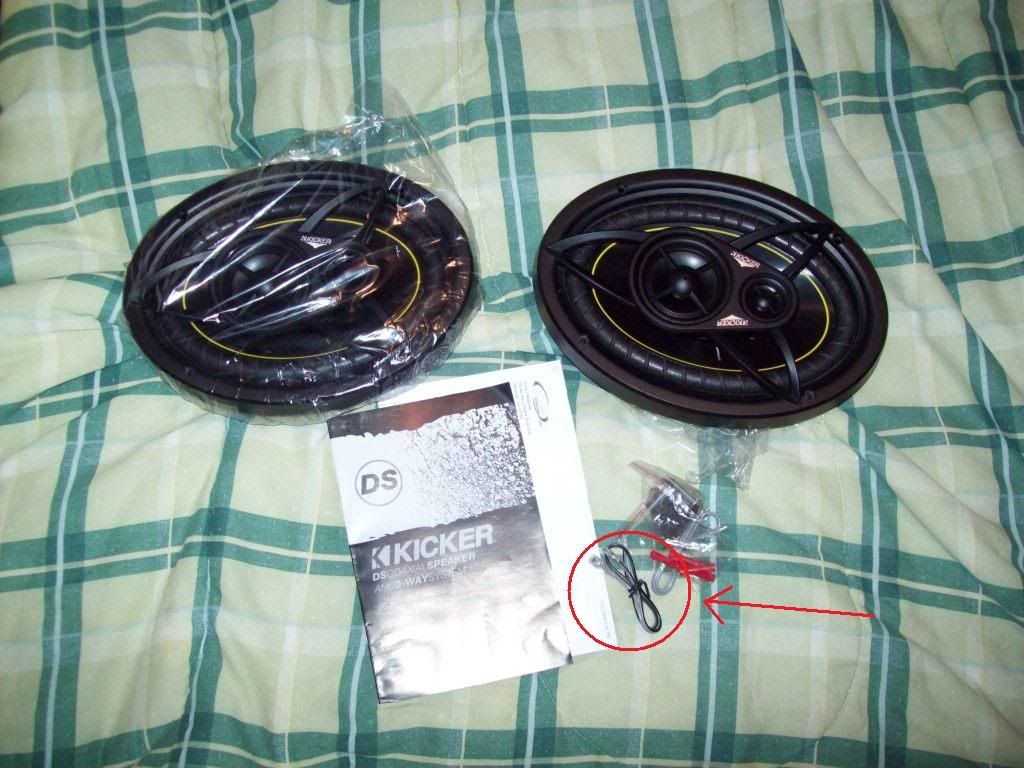
They are attached to some very wimpy looking lengths of wire. I just removed the terminal clips from that wiring and soldered them onto my new speaker wire. Attach them just like they were attached to the old wire and then add some solder to give it a good connection. Wrap some electrical tape around the base of the clip so only the head of the clip is exposed. Be sure to attach the clip for the positive terminal to the positive wire and the clip for the negative terminal to the negative wire. On the other end of your speaker wire, strip about 1/2" of the insulation off the wire and make a nice, neat ball with the wire sticking out. This will give the therminal set screws on the amp more material to bit into so the wire doesnt pull out of the terminals. Do this for every wire and then go ahead and re-run the speaker wires just how you had them before. You can go ahead and connect the wires to the terminals on the amp by putting the balled wire into the hole and tightening down the set screw.
Once you have the wires back in the car, ziptie them down nice and neat anywhere that you can find something to ziptie the wire to. It will keep everything neat and secure as well.
Now you can reinstall the door speakers just like you took the old ones out. Be sure to connect the wires to the terminals before you bolt them in.
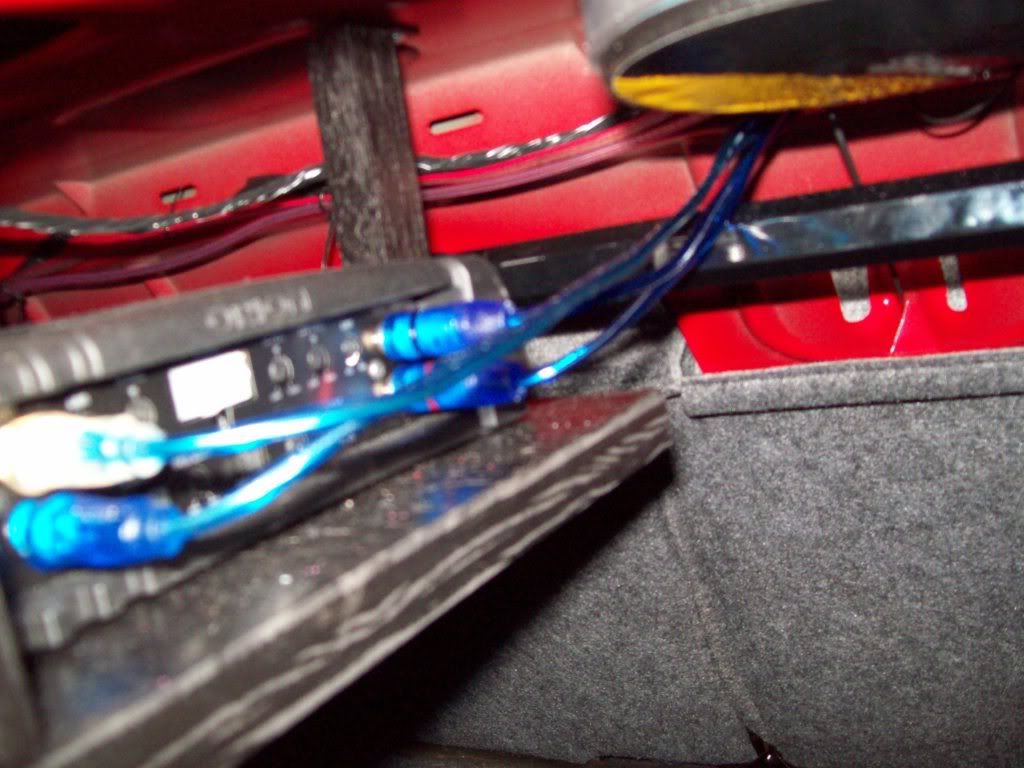
Get your RCA cables now. You should have two of them. Run them down through the hole in the dash where the radio was. Pull them all the way through until you have only a couple of inches left sticking out of the radio hole. I ran my RCA cables along the bottom of the dash on the passenger side. There is a wire loom there already that you can ziptie your cables too. Once you run it under the dash, run it down the kickpanel area under the carpet, then under the carpet along the door opening. Run them all the way back through the hole going into the trunk where the other wires run. From there run them neatly to your amp and tuck them away. Ziptie the RCA cables down like you did your speaker wires. Then plug the cables into the RCA jacks on the amp.
Be sure you know which RCA cable goes to the front channel and which goes to the back, so you plug them in correctly on your headunit.
I will start out by saying I am not an audio pro and any info I am giving must not be taken as the best info and I take no responsibility for any damage caused by taking my advice or following my directions
Things you need:
-New headunit with at least 2 RCA pre outs
-Installation kit (double to single din adapter, wiring adapter)
-Soldering iron and solder
-Shrink tubing
-Electrical tape
-Wire cutters/strippers
-Heat gun or hairdryer
-Speakers (5 1/4" for doors and 6x9" for rear deck)
-Speaker wire (The wiring I used was somewhere between 12 and 14 gauge but 16 should work)
-4 channel amp
-Amp installation kit
-4 gauge power wire (20ft)
-4 gauge ground wire (3ft)
-Ring terminals for power and ground wire
-2 RCA cables (17ft)
-Turn on lead (18 gauge)
-Zip ties
-Basic hand tools
-Screwdrivers (Regular and phillips)
-7mm, 8mm, 10mm, 13mm and 15mm sockets and ratchet w/ 3" extention
-Clip removal tool
-Allen wrenches
Before you even think of buying anything, do your research. Talk to someone who knows their stuff and can steer you in the right direction in what to buy. You will want an amp that can power your speakers without overpowering them and causing damage. I started by talking to someone at sonicelectronix and told them what I wanted. They recommended an amp for me and I matched my speakers to the RMS output of the amp running on 4 channels at 4 ohms. I got a class ab 4 channel amp with 60w RMS x4 output. I then looked at speakers that were close to or over that RMS rating just to be safe. I took that into account as well as product reviews and price. I ended up with speakers rated at 65w RMS up front and 70w RMS in the back.
For the headunit I made sure to find one with 2 or more sets of RCA pre outs since you will need to run two RCA cables from the headunit to the amp.
Ok lets get started. I removed alot of my interior and set it aside so I could get full access to run all the wiring.
Lets begin with the easiest, your dash. On both sides under the dash, there are felt panels that close off the bottom of the dash. They are held in by two push in plastic clips on each side. Remove them and then pull out the panels.
Remove the knee panel from below the steering collumn. There are two screws up top you will need to remove and two phillips headed plastic clips that need removed down low.
Then just pull out the panel and sit it aside. Next, remove the gauge bezel by lowering your wheel all the way down and pulling off the panel with gentle even force around the edges. Once it is unclipped pull it away from the dash gently and raise it upward to remove it. Set it aside. Remove your stock radio by removing the (2) 7mm screws that hold it in. Once they are removed, slide it out and remove the plug on the back.
Now move onto your door panels. Here is a writeup I did a while ago that goes into extreme detail of how to remove them.
Guide: How to: 5th gen door panel removal - Monte Carlo Forum - Monte Carlo Enthusiast Forums
Remove your front speakers by removing the (4) 7mm screws that hold them in. Once they are out, unplug them and tuck the plug somewhere where it wont hang down or rattle. I stuffed it between the door panel and the moisture barrier where it was nice and secure. It will be disconnected from power so you dont have to cover the end if you dont want to.
OK next remove the step plates at the door opening. They come out with 3 phillips head screws.
Time to remove the back seat. Start by removing the seat bottom. It comes out with (2) 13mm bolts on the front of the seat. Slide it out and pull the seatbelts through the slots in the seat bottom. Now remove the (3) 10mm bolts along the bottom of the seat back.
Now fold down the seatback and unclip the cloth from the sheetmetal around the opening that goes into the trunk. Under that there are (2) 10mm bolts you will need to remove.
Pull the seat back out and set it aside.
Now you will need to remove the rear deck panel. Pull the seatbelts out of the slots on each side of the panel and slide the panel out. Sit it aside.
Remove the rear speakers like you did the fronts. Remove the (4) 7mm bolts that hold each speaker in. Unplug them and pull them out. You can put in your new rear speakers now if you want. You can just use the screws that held in the old ones if you arent using the cover, but you want to use the speaker cover, you will need to use the screws that come with the speakers. Also, if you want to use the covers, you will need to cut holes in the rear deck panel for the speakers. I put the rear deck panel in with the speakers out and traced the hole onto the panel from inside the trunk with a piece of chalk. I then cut the hole out with a utility knife. You may need to cut the hole a little bigger to get it to fit over the speakers.
Well once you have everything removed you can begin installing your amp and running your wires. You will need to find a place to securely mount your amp. I made a shelf out of plywood that I mounted under the rear deck but there are other places you can mount it.
Once your amp is mounted you will need to begin running the wires to and from it. I began with the speaker wires. Since the back of the rear speakers are right in the trunk, you wont have to run the wires for them very far. Your speaker wires should be coupled, one wire for positive and one for negative. Your amp will have a positive and negative terminal for each speaker and each speaker will have a positive and negative terminal.
You will need to match the terminals on the amp to the corresponding speaker. You will want to measure out how much wire you need for each speaker and cut the wires to length. I just mocked up where I wanted to run them so I had the most accurate length. I ran the wires to my door speakers from the door, through the flexible loom in the jamb into the cabin. From there, I ran the wire along the door opening under the carpet. That is why you removed the step plate at the door opening, because the wiring will be concealed under there. Run the wire back and tuck it under the trim panels beside the back seat. You can just pull the bottom of the panel out and tuck the wires in. Once you have them tucked under there, you will need to run the wires into the trunk. There is a hole you can use at each side of the cabin. There are already wires running through there so they arent hard to find.
From there you can just follow the routing of the other wires that were run through that hole. Its the neatest way to run them and you can just ziptie the speaker wires right to the other wires(But dont do that yet because you have to take the wires out to solder the terminals on the ends). It makes it soooo much easier.
Get the wires as close to the end of the amp as possible before actually running them to the amp, just to keep things neat looking. You dont want a big length of wire hanging to the amp. It will look ugly. Once you have the wires mocked up and cut to length, remove them from the car.
Now get the terminal clips that came with your speakers.
They are attached to some very wimpy looking lengths of wire. I just removed the terminal clips from that wiring and soldered them onto my new speaker wire. Attach them just like they were attached to the old wire and then add some solder to give it a good connection. Wrap some electrical tape around the base of the clip so only the head of the clip is exposed. Be sure to attach the clip for the positive terminal to the positive wire and the clip for the negative terminal to the negative wire. On the other end of your speaker wire, strip about 1/2" of the insulation off the wire and make a nice, neat ball with the wire sticking out. This will give the therminal set screws on the amp more material to bit into so the wire doesnt pull out of the terminals. Do this for every wire and then go ahead and re-run the speaker wires just how you had them before. You can go ahead and connect the wires to the terminals on the amp by putting the balled wire into the hole and tightening down the set screw.
Once you have the wires back in the car, ziptie them down nice and neat anywhere that you can find something to ziptie the wire to. It will keep everything neat and secure as well.
Now you can reinstall the door speakers just like you took the old ones out. Be sure to connect the wires to the terminals before you bolt them in.
Get your RCA cables now. You should have two of them. Run them down through the hole in the dash where the radio was. Pull them all the way through until you have only a couple of inches left sticking out of the radio hole. I ran my RCA cables along the bottom of the dash on the passenger side. There is a wire loom there already that you can ziptie your cables too. Once you run it under the dash, run it down the kickpanel area under the carpet, then under the carpet along the door opening. Run them all the way back through the hole going into the trunk where the other wires run. From there run them neatly to your amp and tuck them away. Ziptie the RCA cables down like you did your speaker wires. Then plug the cables into the RCA jacks on the amp.
Be sure you know which RCA cable goes to the front channel and which goes to the back, so you plug them in correctly on your headunit.
Last edited by mrl390; Nov 7, 2009 at 10:44 PM.
I had to make this two post so I could fit all the images, lol.
You will need to run the power and ground wires for your amp. The best place I found to run the ground cable is to the rear strut tower studs. Measure out your ground cable and cut it to length. Strip about 1/2" off of both sides. One end will go to the terminal on the amp and the other end will go to the strut tower stud.
Your installation kit should have some ring terminals in it. Get one that will fit down over the stud. I had to ream mine out to get it to fit. You want to crimp/solder the terminal to the other end of the ground wire. Make sure one more time that the wire fits, then set it aside. DO NOT leave it attached. It will be the very last part of the system you want to install.
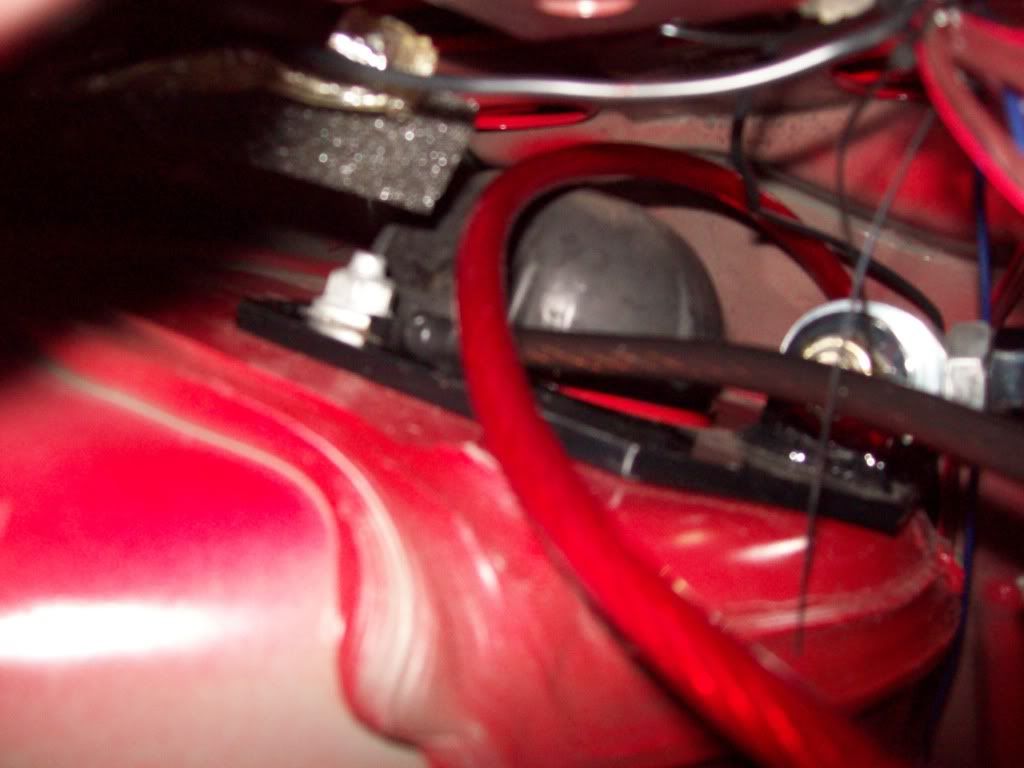
Your power wire for the amp will be alot trickier to run since it will have to go through the firewall. First things first, find a grommet to run the power wire through. I used a grommet that was next to the brake booster.
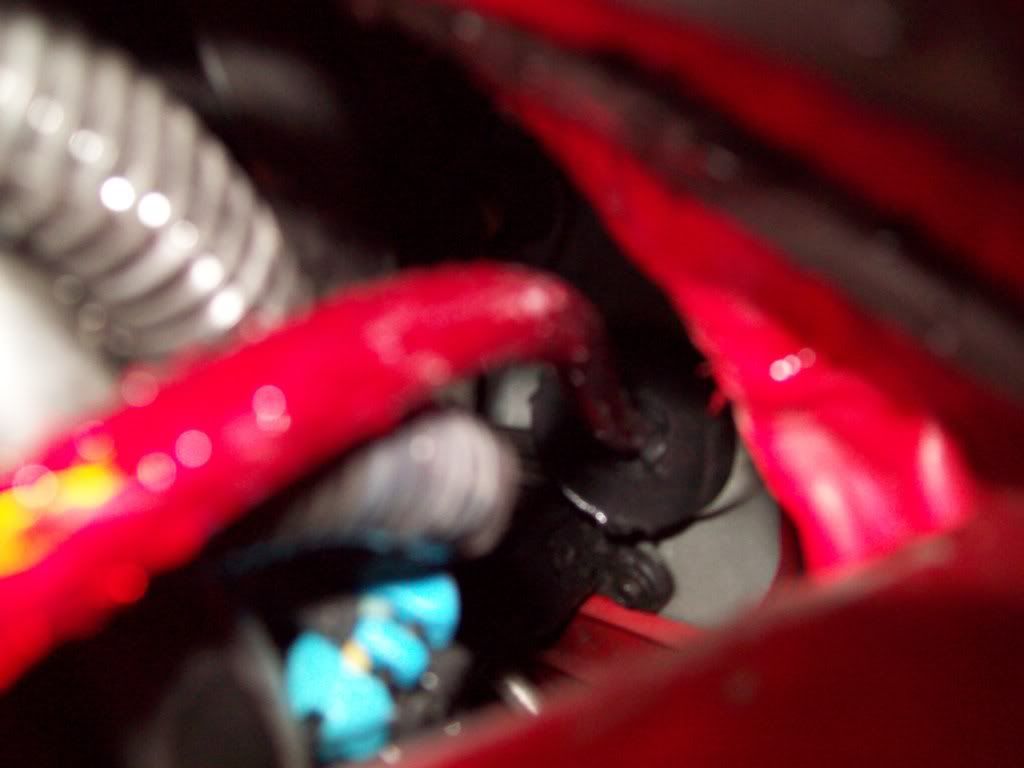
Its somewhat easy to access on the engine side of the firewall but its near impossible to get to on the cabin side. I pulled the carpet and the sound deadener back out of the way as best as I could. Then I used a dial rod to push the grommet through into the cabin from the engine side. The grommet fell down into the car and then after wiggling some wires it fell onto the floor. Run your power wire through the open hole in the firewall. Run the wire down the drivers side of the car. I ran mine into the front corner of the cabin and then down the door opening under the carpet. The bolt holding the seatbelt to the floor by the front seat also holes down the carpet by the door opening. Run your power wire under the carpet, under the bolt or you wont be able to get the plastic panel by your door opening back on. Run your wire back to the amp the same way you ran your RCA cables, except obviously your RCA cables are on the other side of the car. You will need to strip 1/2" off the end of the wire going to the amp so you can attach it to the terminal, but dont attach it yet. Now, starting at the amp, wire tie your power wire down, working your way toward the front of the car. Once it is secured inside, move to the engine bay side. Poke a hole in the grommet to run the power wire through. Slide the grommet down onto the wire all the way back to its hole. I used the same dial rod I pushed the grommet out with to push it back into its hole. Once the grommet is in, run your power wire neatly to the battery. Figure out where you want it to run and where you want to tie it down, then cut the wire to length, giving yourself about 3-4" extra slack. Figure out where you want to run your fuse for the power wire. I mounted mine to the bottom of the diagonal brace on the drivers side.
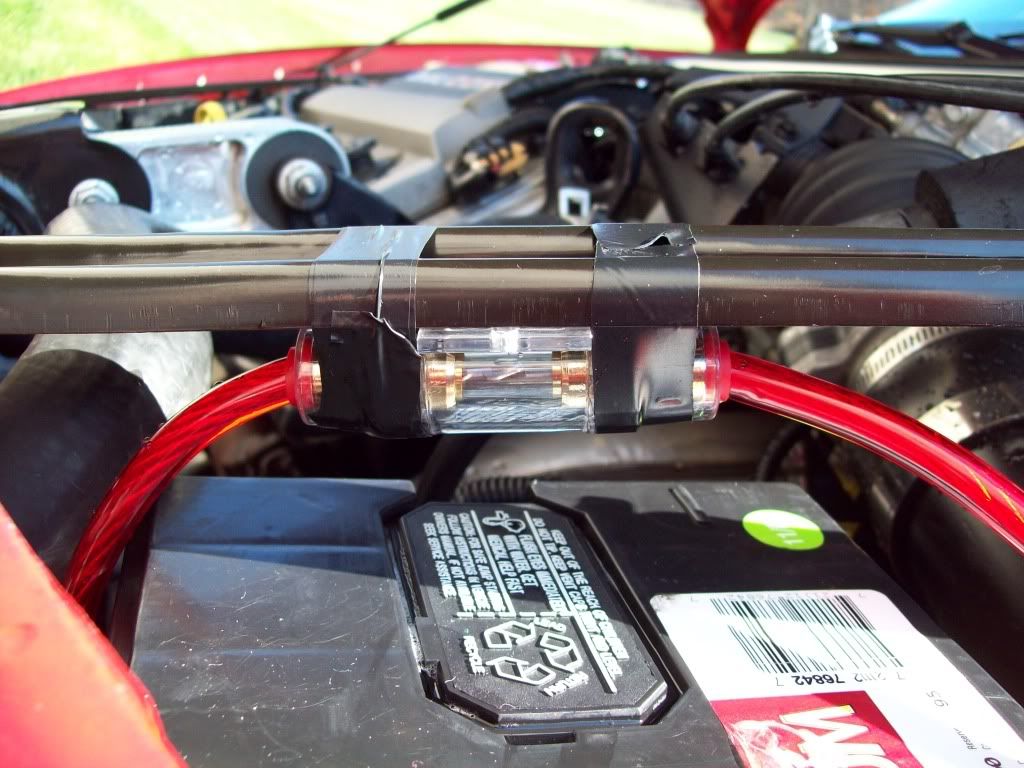
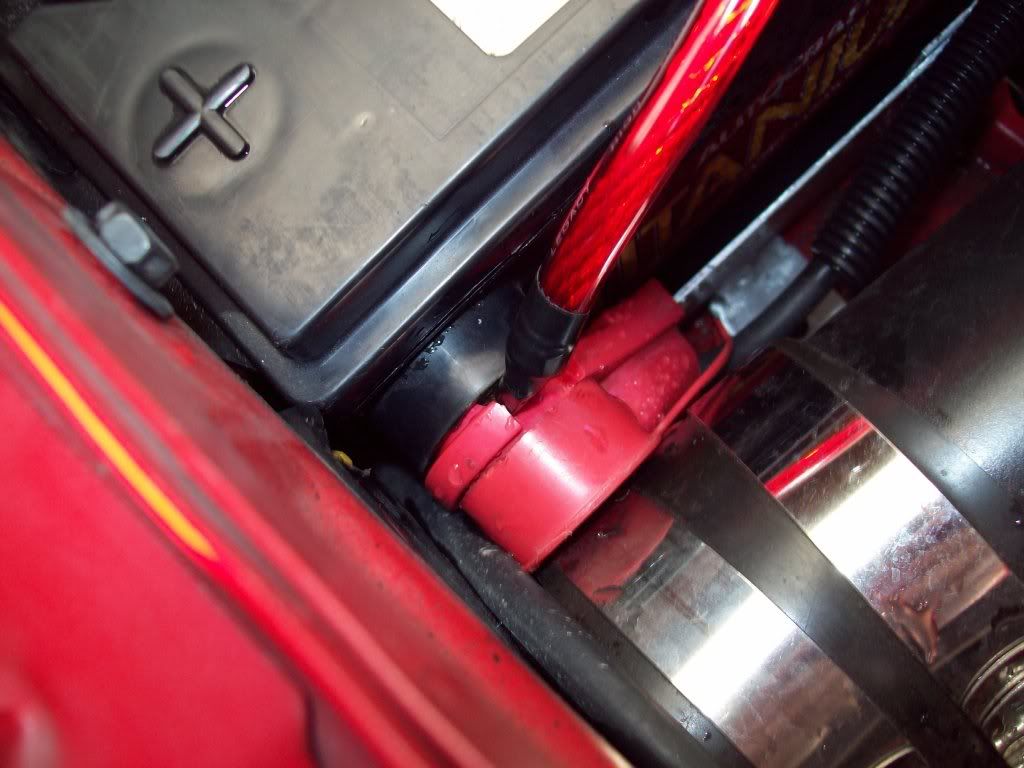
Cut your power wire where your fuse will be. You can strip 1/2" off the end of the wire still attached to the car. Now, take the small piece you just cut off and strip 1/2" off both ends. On one end you will need to crimp/solder a ring terminal like you did the ground cable. This terminal will go to the positive terminal on the battery. At this point, if you havent already disconnected the battery, do it now, both negative and positive. I removed my battery completely to give myself some room. You will need to take a notch out of the rubber boot on the positive battery cable so the base of the ring terminal will fit. I just used a utility knife and shaved little by little until the ring terminal could fit.
Now, take your fuse and attach it in between the power cable and the piece of cable you just put the ring terminal on. Then secure your fuse and reinstall your battery but dont attach the battery cables.
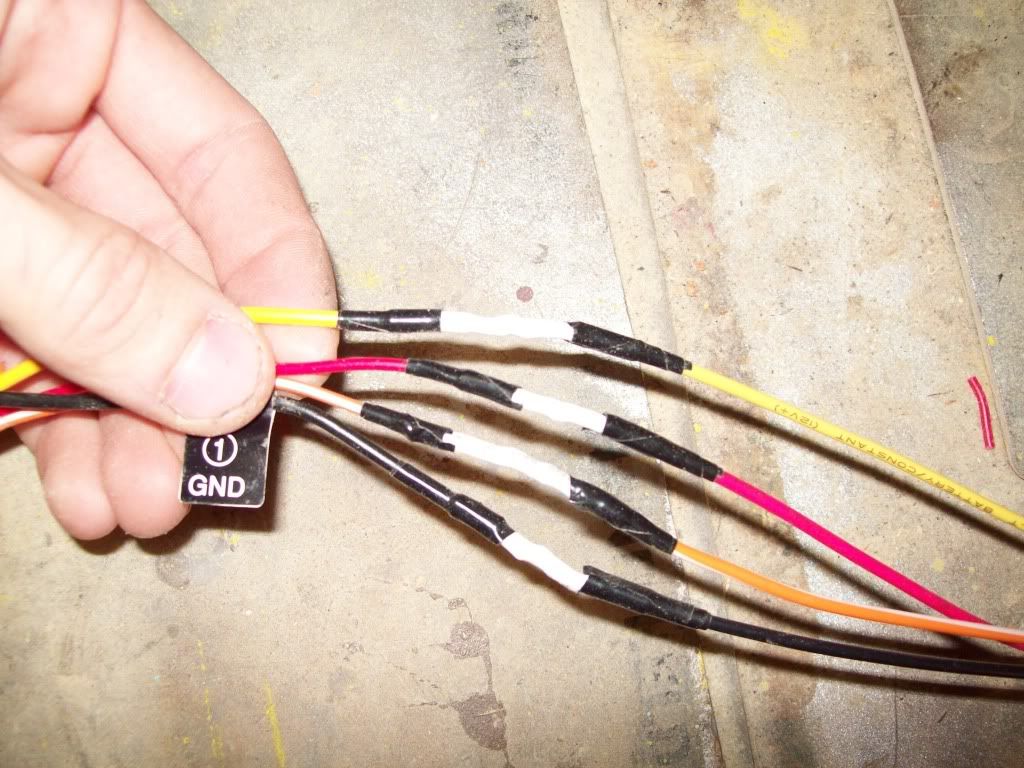
You can now move onto the headunit wiring itself. Its pretty straight foreward. Your adapter should come with a sheet that says what all the wires are, and your headunit should have a similar sheet for the headunit wiring. If the wires dont come pre stripped, you will need to strip them yourself. You wont be using the speaker wires from the headunit so leave them along. Put a piece of electrical tape over the ends of the speaker wires and any unused wires.
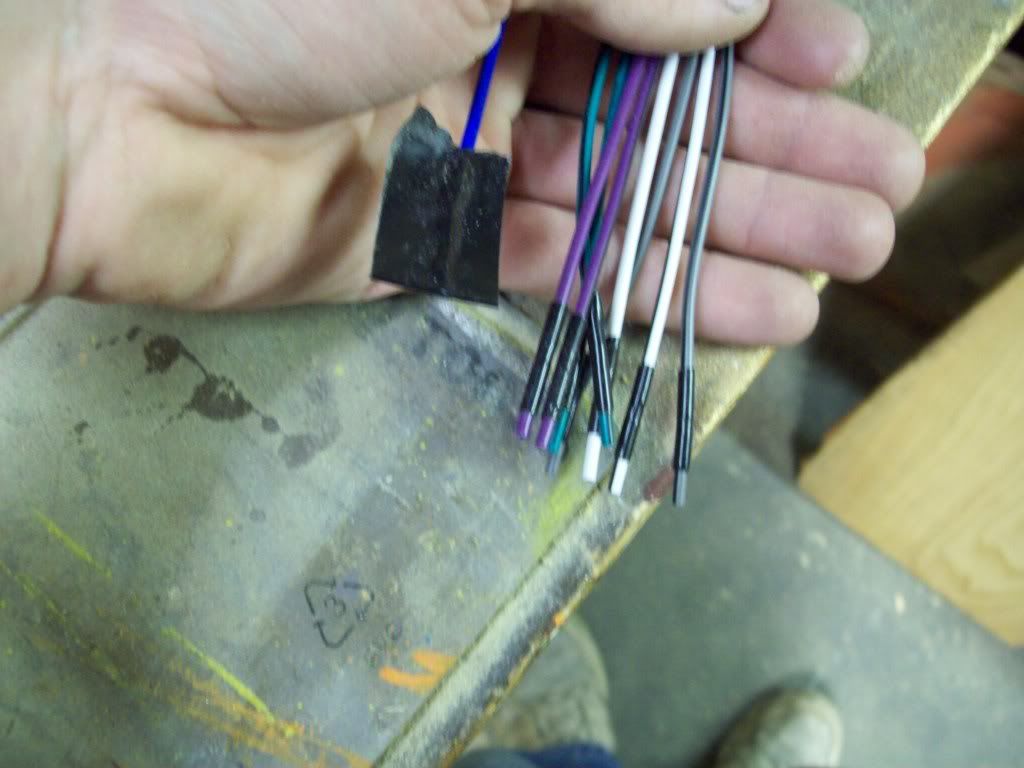
To connect the wires together, twist them together and solder them in place.

Be sure to slide a piece of shrink tube on one of the wires before you connect them. After the are soldered, slide the shrink tube over the joint and shrink it with a heat gun or hairdryer. Then wrap a piece of electrical tape on both sides of the tubing.
For the amp turn on lead, your installation kit should have come with some 18 gauge wire. Just solder one end of it to the wire labeled amp turn on, coming from the headunit. Once you have the wires attached, go ahead and plug the harness into your car. Run the amp turn on lead down behind the dash and back to the amp. I ran mine on the side with the power cable.
You will need to put in the radio adapter now so the new headunit will fit in the dash. It is just held in with the same two screws that held in the stock radio. Now get your headunit and plug the RCA cables, radio antenna cable and wiring harness into it. Slide the headunit into the dash so it snaps securely into the adapter. Put the faceplate on the radio and you are done installing the headunit.
At this point, everything you took out of the interior of your car (gauge bezel, knee panel, dash closeout panels, door panels, door opening step plates, rear deck cover and rear seat) can all be put back in. You are done on the inside of the car.
Now you can also connect the positive battery cable and the amp power cable to the battery. Then connect the amp side of the power cable to the terminal on the amp. Reinstall the ground cable you made earlier.
Now you have to reconnect the negative battery cable. Thats it, your system is now completely installed and you have a completed power ciruit running to it. Go back one more time and be sure all the wires to the amp are securely connected. Also make sure your power and ground cables are securely connected as well as your fuse.
Also, make sure the gains on your amplifier are turned down all the way and your crossovers are set correctly, or at least at a safe level. I set the high pass for the front and adjusted it to around 100-125Hz. I set the crossover to full for the rear speakers. This is where you want to do some research. If you are unsure how to set the crossovers for your setup, do some searching on the web or ask a few different people like I did. I hit up a few different forums and I also got myself an audio book to help out a little.
Now, turn your key to accessory and start up the system. The very first thing you should do is make sure the volume is turned all the way down. Then, adjust your headunit so the bass and trebel are at 0, all equalizing or sound processing features are turned off or down to 0. If you have a LOUD feature, turn it off. I then turned my volume up just until I could hear it and then made sure all the speakers worked, the radio worked, and the CD player worked.
You will need to tune your amp now. This is where you really want to read up on the matter. I watched dozens of videos, read quite a few articles and hit up a few forums before even attempting to do this. I will leave this part up to you, but I will tell you how I did mine. I found a professionally recorded music CD with dynamic music and played it at 3/4 volume on the headunit. Then I slowly turned up the gain on the front speakers until I could hear some distortion. I then backed the gain down until the distortion went away and a tiny bit more for good measure. For the rear speakers, I adjusted the gain until I was happy with the sound, but not until I could hear them distort. I ended up turning them up a little more later to get just a bit more power out of them, but then adjusted my fade on the headunit foreward some so they didnt drown out the front speakers. Then I just played with the bass/trebel on the headunit until I was happy with the sound.
Thats it really, Im very happy with the system. The sound is incredibly clear and it has some insane power to it for just speakers, no subs. I can only turn the volume up to 20 out of 50 before my head starts hurting, my mirrors shake and well, the driving experience becomes rather uncomfortable, lol.
I will be taking some more pictures to add to the writeup to make it complete, but thats pretty much it. PEACE.
You will need to run the power and ground wires for your amp. The best place I found to run the ground cable is to the rear strut tower studs. Measure out your ground cable and cut it to length. Strip about 1/2" off of both sides. One end will go to the terminal on the amp and the other end will go to the strut tower stud.
Your installation kit should have some ring terminals in it. Get one that will fit down over the stud. I had to ream mine out to get it to fit. You want to crimp/solder the terminal to the other end of the ground wire. Make sure one more time that the wire fits, then set it aside. DO NOT leave it attached. It will be the very last part of the system you want to install.
Your power wire for the amp will be alot trickier to run since it will have to go through the firewall. First things first, find a grommet to run the power wire through. I used a grommet that was next to the brake booster.
Its somewhat easy to access on the engine side of the firewall but its near impossible to get to on the cabin side. I pulled the carpet and the sound deadener back out of the way as best as I could. Then I used a dial rod to push the grommet through into the cabin from the engine side. The grommet fell down into the car and then after wiggling some wires it fell onto the floor. Run your power wire through the open hole in the firewall. Run the wire down the drivers side of the car. I ran mine into the front corner of the cabin and then down the door opening under the carpet. The bolt holding the seatbelt to the floor by the front seat also holes down the carpet by the door opening. Run your power wire under the carpet, under the bolt or you wont be able to get the plastic panel by your door opening back on. Run your wire back to the amp the same way you ran your RCA cables, except obviously your RCA cables are on the other side of the car. You will need to strip 1/2" off the end of the wire going to the amp so you can attach it to the terminal, but dont attach it yet. Now, starting at the amp, wire tie your power wire down, working your way toward the front of the car. Once it is secured inside, move to the engine bay side. Poke a hole in the grommet to run the power wire through. Slide the grommet down onto the wire all the way back to its hole. I used the same dial rod I pushed the grommet out with to push it back into its hole. Once the grommet is in, run your power wire neatly to the battery. Figure out where you want it to run and where you want to tie it down, then cut the wire to length, giving yourself about 3-4" extra slack. Figure out where you want to run your fuse for the power wire. I mounted mine to the bottom of the diagonal brace on the drivers side.
Cut your power wire where your fuse will be. You can strip 1/2" off the end of the wire still attached to the car. Now, take the small piece you just cut off and strip 1/2" off both ends. On one end you will need to crimp/solder a ring terminal like you did the ground cable. This terminal will go to the positive terminal on the battery. At this point, if you havent already disconnected the battery, do it now, both negative and positive. I removed my battery completely to give myself some room. You will need to take a notch out of the rubber boot on the positive battery cable so the base of the ring terminal will fit. I just used a utility knife and shaved little by little until the ring terminal could fit.
Now, take your fuse and attach it in between the power cable and the piece of cable you just put the ring terminal on. Then secure your fuse and reinstall your battery but dont attach the battery cables.
You can now move onto the headunit wiring itself. Its pretty straight foreward. Your adapter should come with a sheet that says what all the wires are, and your headunit should have a similar sheet for the headunit wiring. If the wires dont come pre stripped, you will need to strip them yourself. You wont be using the speaker wires from the headunit so leave them along. Put a piece of electrical tape over the ends of the speaker wires and any unused wires.
To connect the wires together, twist them together and solder them in place.
Be sure to slide a piece of shrink tube on one of the wires before you connect them. After the are soldered, slide the shrink tube over the joint and shrink it with a heat gun or hairdryer. Then wrap a piece of electrical tape on both sides of the tubing.
For the amp turn on lead, your installation kit should have come with some 18 gauge wire. Just solder one end of it to the wire labeled amp turn on, coming from the headunit. Once you have the wires attached, go ahead and plug the harness into your car. Run the amp turn on lead down behind the dash and back to the amp. I ran mine on the side with the power cable.
You will need to put in the radio adapter now so the new headunit will fit in the dash. It is just held in with the same two screws that held in the stock radio. Now get your headunit and plug the RCA cables, radio antenna cable and wiring harness into it. Slide the headunit into the dash so it snaps securely into the adapter. Put the faceplate on the radio and you are done installing the headunit.
At this point, everything you took out of the interior of your car (gauge bezel, knee panel, dash closeout panels, door panels, door opening step plates, rear deck cover and rear seat) can all be put back in. You are done on the inside of the car.
Now you can also connect the positive battery cable and the amp power cable to the battery. Then connect the amp side of the power cable to the terminal on the amp. Reinstall the ground cable you made earlier.
Now you have to reconnect the negative battery cable. Thats it, your system is now completely installed and you have a completed power ciruit running to it. Go back one more time and be sure all the wires to the amp are securely connected. Also make sure your power and ground cables are securely connected as well as your fuse.
Also, make sure the gains on your amplifier are turned down all the way and your crossovers are set correctly, or at least at a safe level. I set the high pass for the front and adjusted it to around 100-125Hz. I set the crossover to full for the rear speakers. This is where you want to do some research. If you are unsure how to set the crossovers for your setup, do some searching on the web or ask a few different people like I did. I hit up a few different forums and I also got myself an audio book to help out a little.
Now, turn your key to accessory and start up the system. The very first thing you should do is make sure the volume is turned all the way down. Then, adjust your headunit so the bass and trebel are at 0, all equalizing or sound processing features are turned off or down to 0. If you have a LOUD feature, turn it off. I then turned my volume up just until I could hear it and then made sure all the speakers worked, the radio worked, and the CD player worked.
You will need to tune your amp now. This is where you really want to read up on the matter. I watched dozens of videos, read quite a few articles and hit up a few forums before even attempting to do this. I will leave this part up to you, but I will tell you how I did mine. I found a professionally recorded music CD with dynamic music and played it at 3/4 volume on the headunit. Then I slowly turned up the gain on the front speakers until I could hear some distortion. I then backed the gain down until the distortion went away and a tiny bit more for good measure. For the rear speakers, I adjusted the gain until I was happy with the sound, but not until I could hear them distort. I ended up turning them up a little more later to get just a bit more power out of them, but then adjusted my fade on the headunit foreward some so they didnt drown out the front speakers. Then I just played with the bass/trebel on the headunit until I was happy with the sound.
Thats it really, Im very happy with the system. The sound is incredibly clear and it has some insane power to it for just speakers, no subs. I can only turn the volume up to 20 out of 50 before my head starts hurting, my mirrors shake and well, the driving experience becomes rather uncomfortable, lol.
I will be taking some more pictures to add to the writeup to make it complete, but thats pretty much it. PEACE.
Last edited by mrl390; Nov 8, 2009 at 12:14 PM.


Joined: Feb 2010
Posts: 1
Hi, i have a 2005 monte carlo and i wanted to install my kenwood cd player. The problem that i am having is a remote wire. I have 2 orange wires one which is a hot wire but the smaller orange wire doesn't have enough juice to power the radio. Is this a remote wire or not? It barely light my testing light up. Do i have to run a remote wire if so, where because i don't see a place in the fuse box which says bat.


Joined: Jan 2010
Posts: 13
Did you just drill down and bolt the amp mount on from inside the car? i'm looking for a clean way to add a amp to my setup to power my alpines type R's, i've also got a 10" sony i'm probly going to throw in just to even out the bass, but I'd like to get a kenwood or alpine sub... (most likely will just stick to one 10" since i'd rather just have a nice sounding setup instead of vibrating bolts loose on cars stopped next to me at lights)
Did you add a sub to that setup? if so did you actually mount it or did you just throw it in the trunk? I'm trying to figure out a good way to mount a sub so it doesn't move around on me.
(i wish the motor in my 96 looked as nice as the one in your's matt...)
Do you have a amp?
You would generally only use the remote wire if you have amp and cap, otherwise it's unneeded...
Did you add a sub to that setup? if so did you actually mount it or did you just throw it in the trunk? I'm trying to figure out a good way to mount a sub so it doesn't move around on me.
(i wish the motor in my 96 looked as nice as the one in your's matt...)
Hi, i have a 2005 monte carlo and i wanted to install my kenwood cd player. The problem that i am having is a remote wire. I have 2 orange wires one which is a hot wire but the smaller orange wire doesn't have enough juice to power the radio. Is this a remote wire or not? It barely light my testing light up. Do i have to run a remote wire if so, where because i don't see a place in the fuse box which says bat.
You would generally only use the remote wire if you have amp and cap, otherwise it's unneeded...
Last edited by Cschlue; Mar 21, 2010 at 04:49 AM.

Joined: Mar 2010
Posts: 1
Thanks a lot for the tutorial Matt! I scoured the web and this was really the only one I could find and it was BEYOND helpful. The only thing I would add to it (for future readers) is the bit about routing the power cable through the firewall and connecting the ring terminal to the battery.
On the power cable grommet-
I went ahead and followed your instructions to route it through a grommet next to the brake booster but let me tell you, use the small rectangular grommet to the right of the booster. That is, as you're standing in front of your engine looking towards the rear of the car, use the grommet on the RIGHT of the brake booster, not the oval one on the left. I tried the one on the left at first (since I didn't see the one on the right) and ended up getting a cable stuck in there that I just had to cut off. Worse part is that it never made it to the cabin.
So everyone, just use the one on the RIGHT.
On connecting the ring terminal to the battery-
This probably caused me the most difficulty outside of getting the power cable to the cabin. I tried doing what you said and removing some rubber using a knife on the connector but I still couldn't get it on. What worked out better was going down to an automotive store and getting a GM Bolt Extender. Basically, if you look at the part that actually connects to the battery, it's just a bolt in rubber.. A stubby bolt. The GM Bolt Extender is a longer one that allows you to put a screw on top EASILY allowing you to easily add a ring terminal or two.
Matt - Thanks again, this post and images were invaluable.


Joined: May 2010
Posts: 22
Thanks a lot man, i bought a separate side-post that was longer. And i mounted my amp on the side of my trunk, just perfect so that the trunk bar things dont scrape on it. I actually got some 4ga to fit underneath the plastic panels right beside the door when its closed.

are all the door speakers the same size for the 5th gen monte carlo's????? cuz i got an 2 12" diamonds subs, a 1200 watt sony xplod amp. The speaker that works up front is the one in the drivers door, and last is there speaker behind the side wall pieces in the back seats??


Thats correct JJ, All 5th gen montes have 5 1/4" door speakers. There are no speakers in the rear side panels, only 2 in the doors and 2 6x9's in the rear shelf behind the back seat.