
A How To Question


Thread Starter


Joined: Dec 2012
Posts: 107
From: Lombard, IL

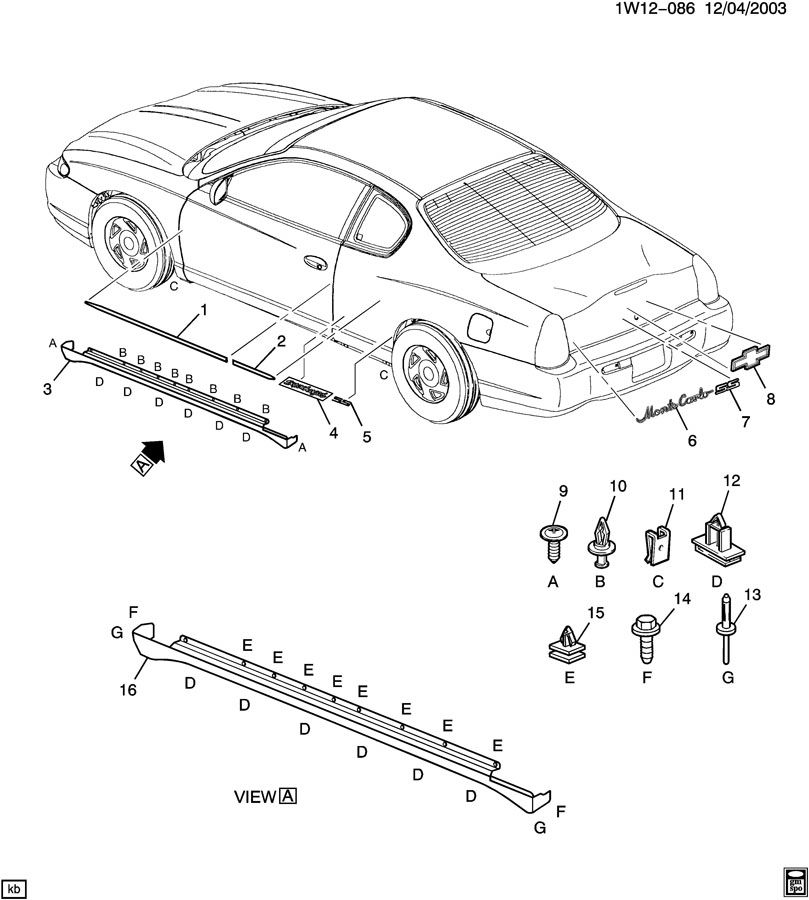
How do you remove the lower body side moldings on a 2002 SS? I can get the screws out of the ends and the underbody clips loose, but the parts feel like they are fastened along the body line.
Is it 2 sided tape? Other clips along the rocker panel? Any help is appreciated.
Is it 2 sided tape? Other clips along the rocker panel? Any help is appreciated.


go to this thread----> https://montecarloforum.com/forum/fw...effects-44109/


Side GFX Install On 2000-2005 Monte Carlo's
This is the original side of the car before the GFX install
The first thing that is done is to put several layers of masking tape on the rocker below the Monte Carlo emblem. This is to protect the paint as you push up and release the original plastic lower rocker.
You also want to put several layers of masking tape on the front fender ahaed of the door. You won't need to protect the door since it will be open as you work.
You will need to use a flat bladed screwdriver to release the clips that hold the rocker to the car. These are located under the car. As you release the clip, pull the rocker toward you so that they release. There are 8 of these on each side of the car.
The Rocker off the car
Once you release the gray clips on the bottom of the rocker, open the door, and start at the back of the car, and pull the rocker out from the bottom while pushing up on it. This will release the clips that are behind the rocker. This takes some force to get the first couple to release. But once the first one does the rest come out easy. With the rocker off, remove the clips that will be left in the car. You get all new ones in the kit so don’t worry about the ones that break.
Here are the new clips that will be used to install the Side GFX.
Here is a shot of the side GFX before being installed.
Put the new clips in the slots provided in the side GFX.
Line up you new side GFX with the car, Open the door, and start at the front, and just snap it on. Snap in the white clips that are behind the GFX first, and then the gray ones that are on the bottom. It’s that easy. Repeat these steps with the other side. This is the easiest part of the install.
Here is the side on the car. Looks good Huh!!!