Something I have been building ...


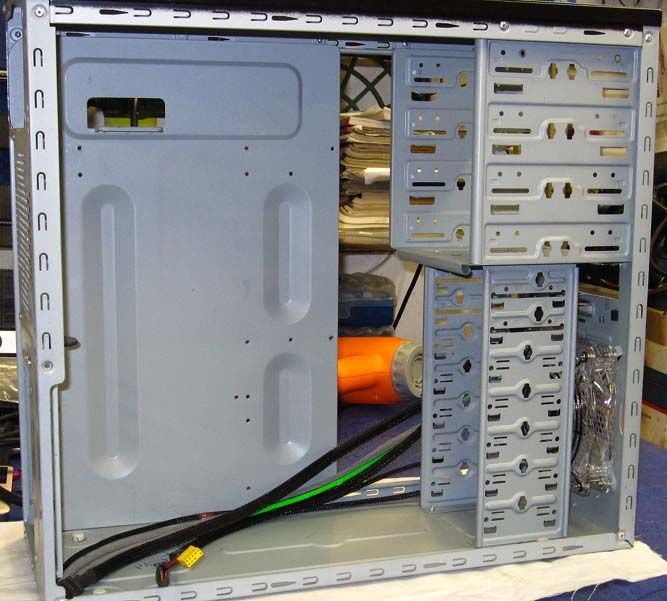
Started off with an empty Cooler Master Elite 330 chassis I had, & went from there ...
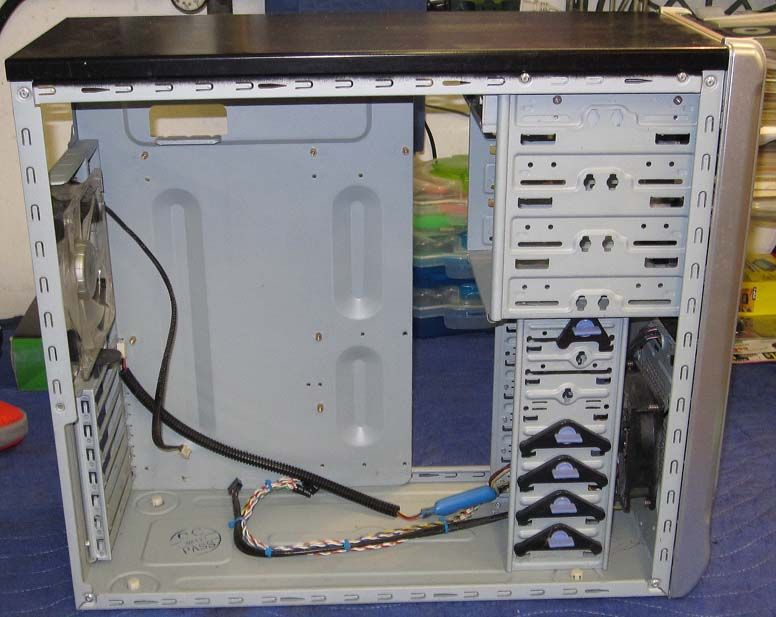
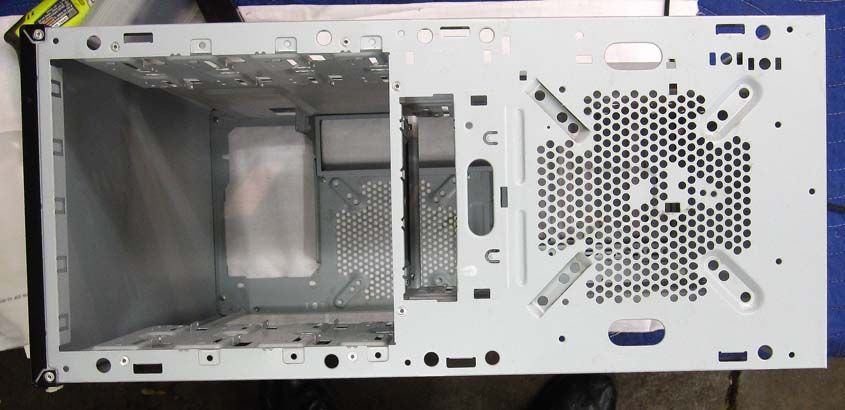
Removed front bezel & panels, plus dirty, old fans, ... & ended up with this ...
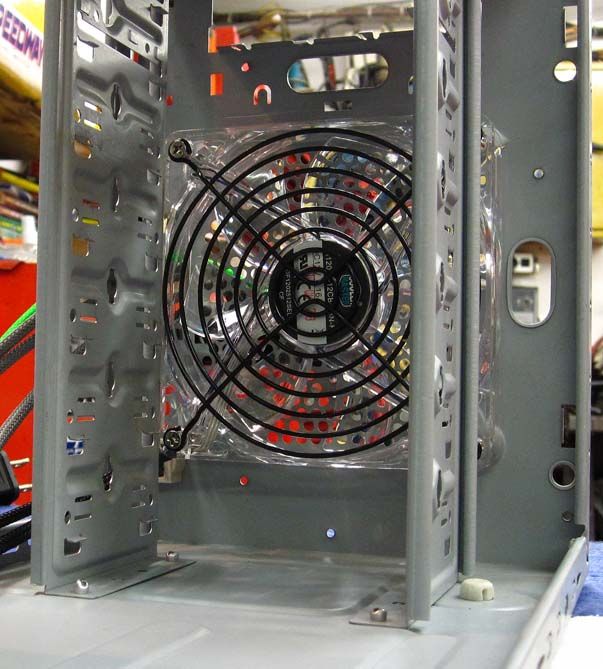
New 120mm "intake" fan with blue LEDs, of course! (A matching exhaust fan, too.)
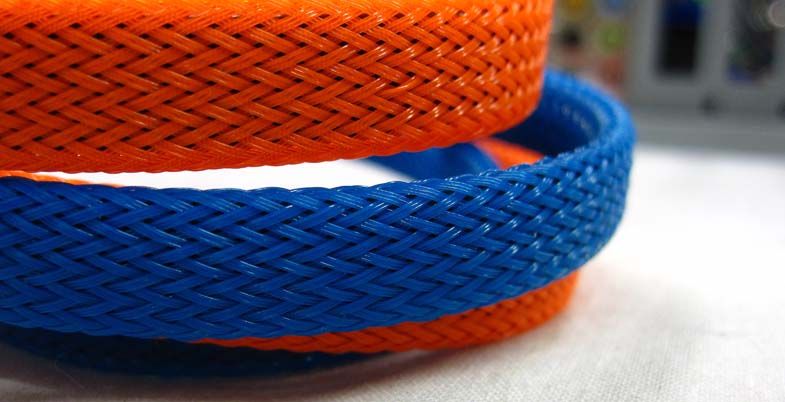
Decided to custom cut/sleeve all wires, cables for nice look, protection, organization, & better airflow/cooling for when I start overclocking.
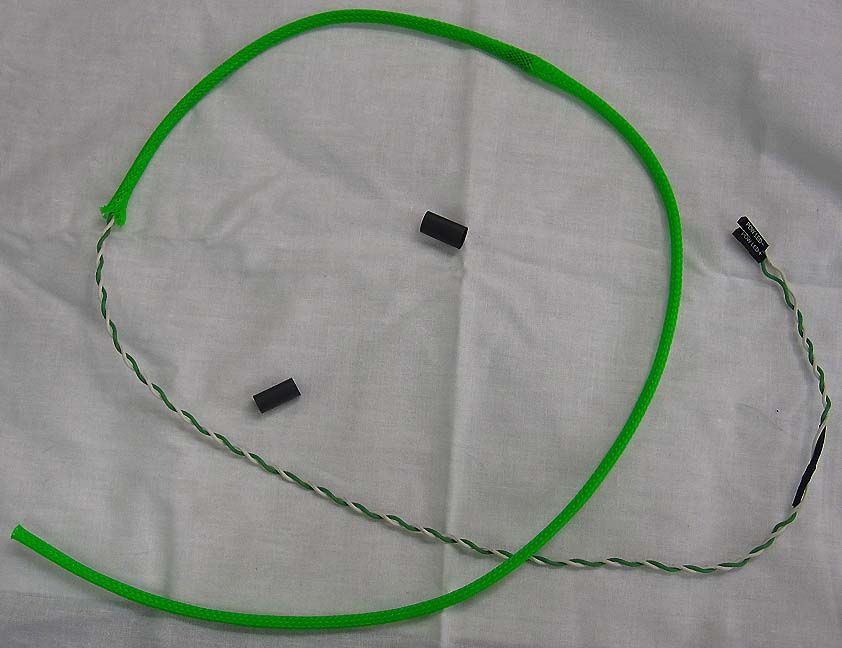
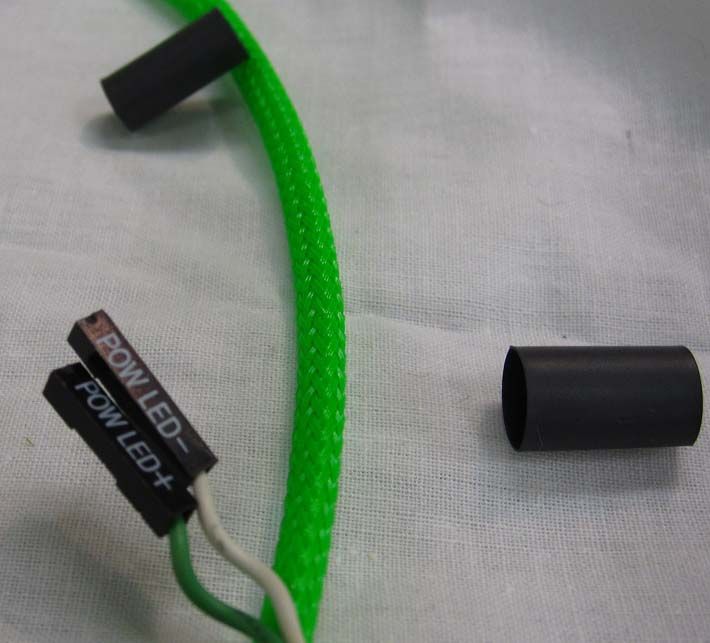
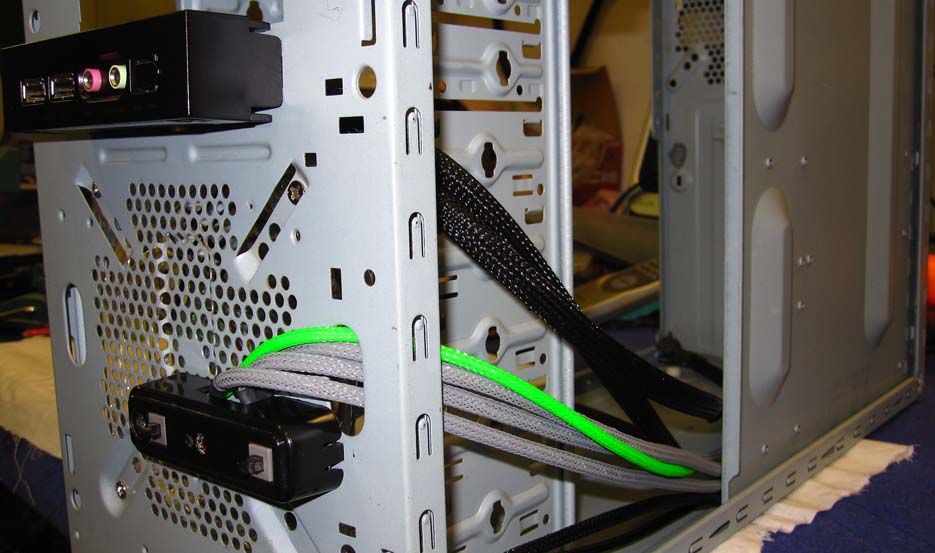
Front power switch/reset panel all sleeved ...
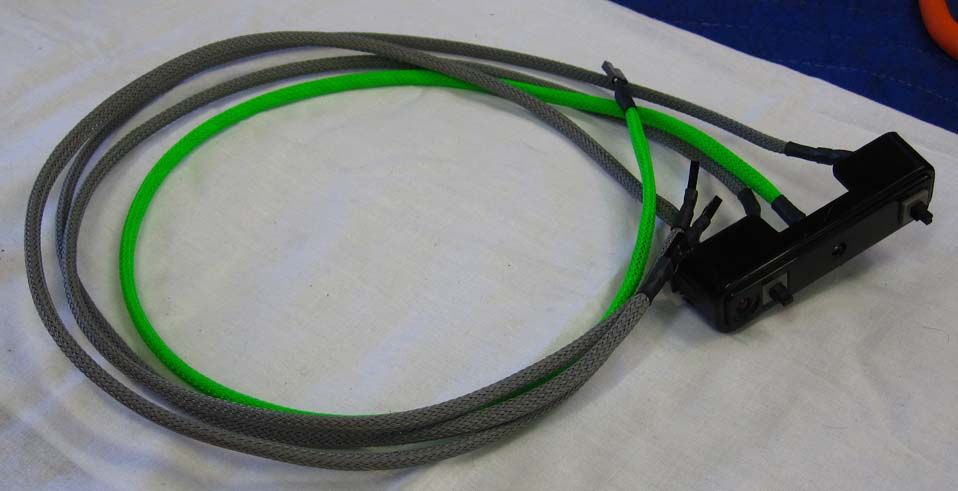
... now mounted.
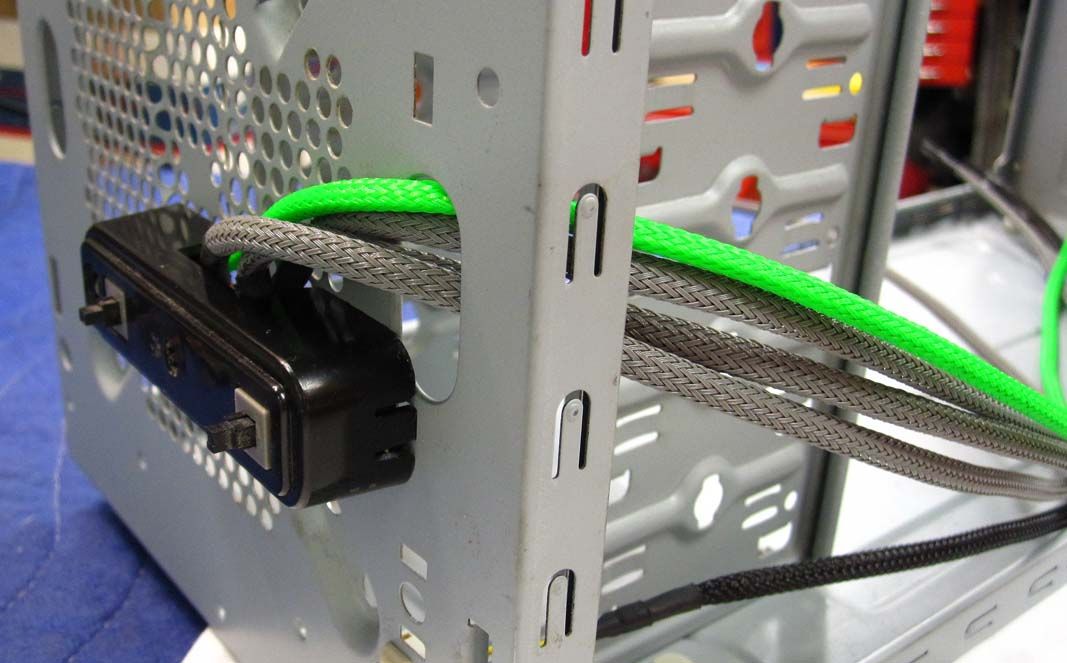
... Audio/USB panel, above, too.
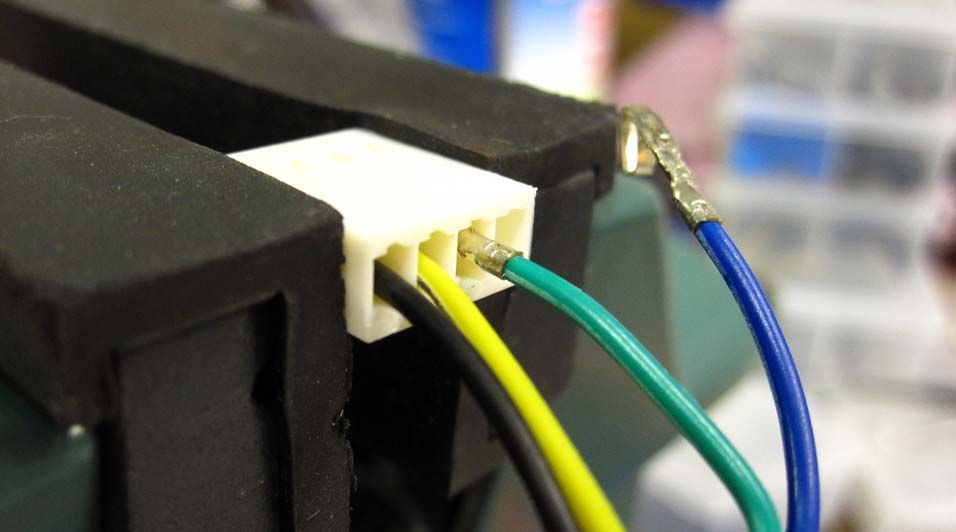
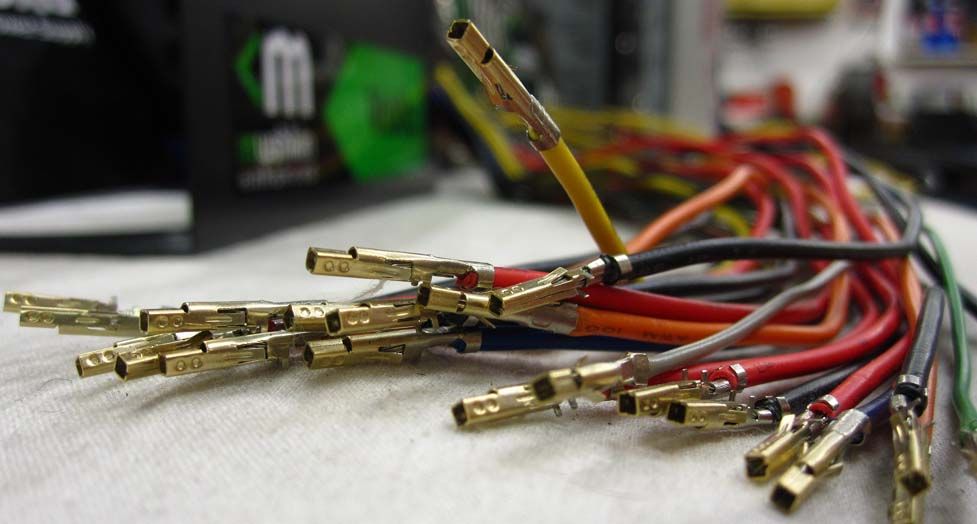
Popping out pins before sleeving Cooler Master 120mm BladeMaster CPU cooling fans' cables ...
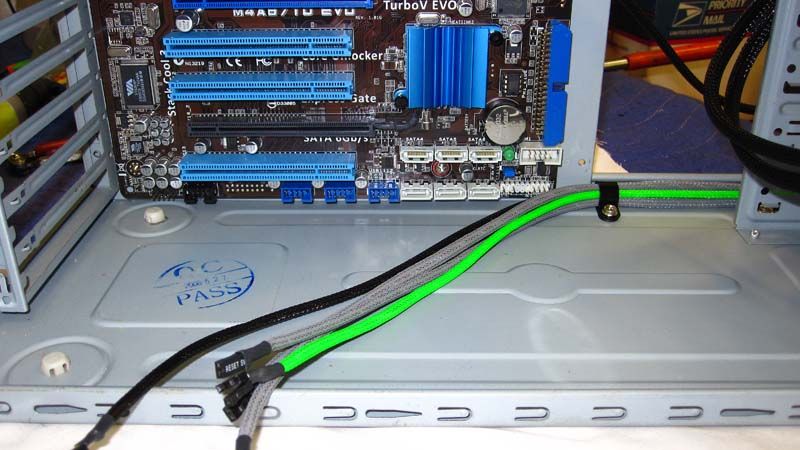
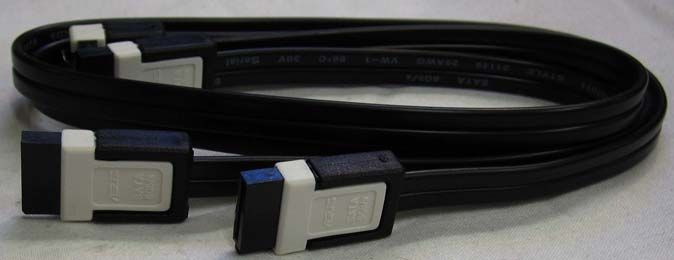
SATA 6.0Gb/s cables from ASUS ... for SSD & Blu-ray drive data ...
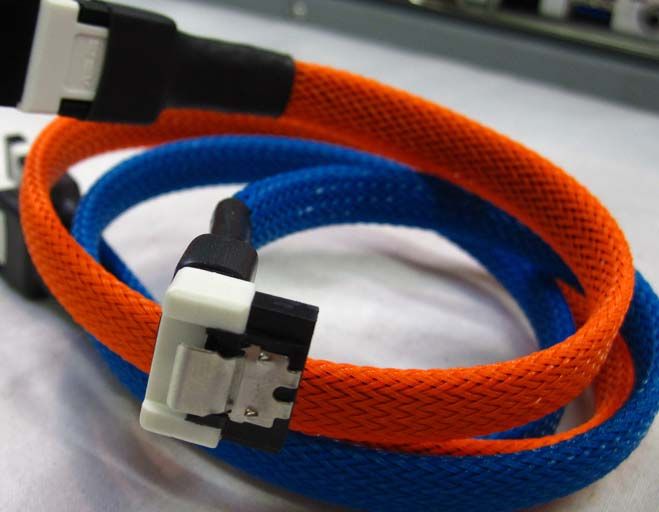
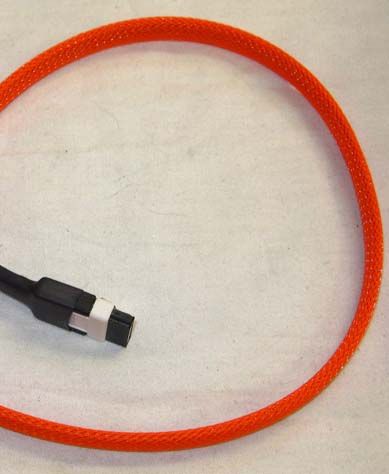
Orange is my favorite color, so I figured I would stray from my color scheme & sleeve the SSD - operating system drive - SATA cable as such ...

Removed front bezel & panels, plus dirty, old fans, ... & ended up with this ...
New 120mm "intake" fan with blue LEDs, of course! (A matching exhaust fan, too.)
Decided to custom cut/sleeve all wires, cables for nice look, protection, organization, & better airflow/cooling for when I start overclocking.
Front power switch/reset panel all sleeved ...
... now mounted.
... Audio/USB panel, above, too.
Popping out pins before sleeving Cooler Master 120mm BladeMaster CPU cooling fans' cables ...
SATA 6.0Gb/s cables from ASUS ... for SSD & Blu-ray drive data ...
Orange is my favorite color, so I figured I would stray from my color scheme & sleeve the SSD - operating system drive - SATA cable as such ...
Build thread con't. ...
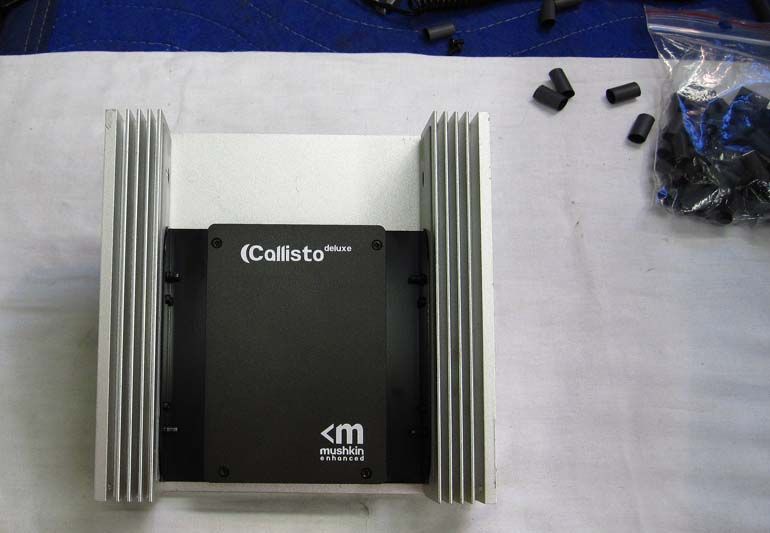
Mushkin Enhanced Callisto Deluxe 60GB SSD
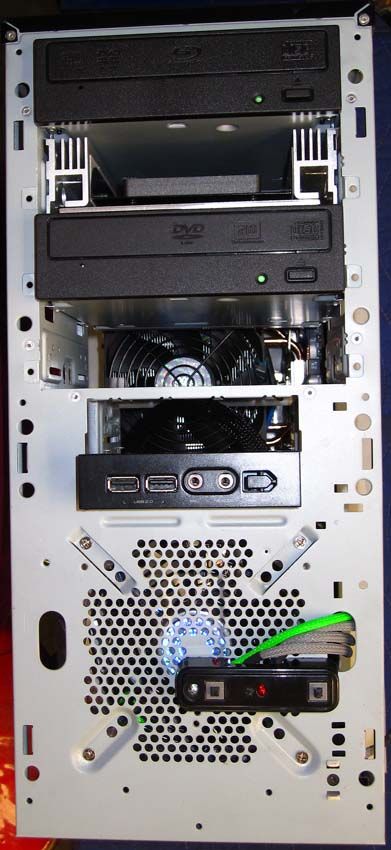
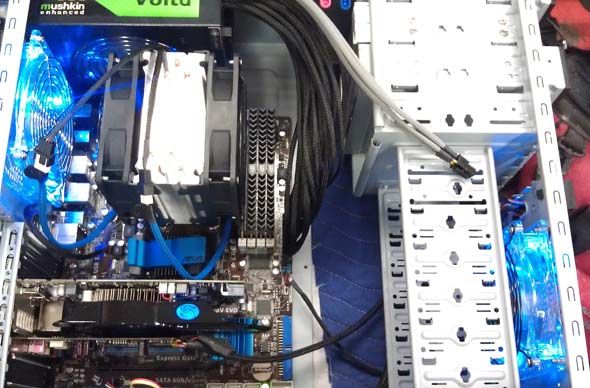
Front of case with audio/USB & power/reset panels, Pioneer Electronic optical drives, & the Mushkin SSD.
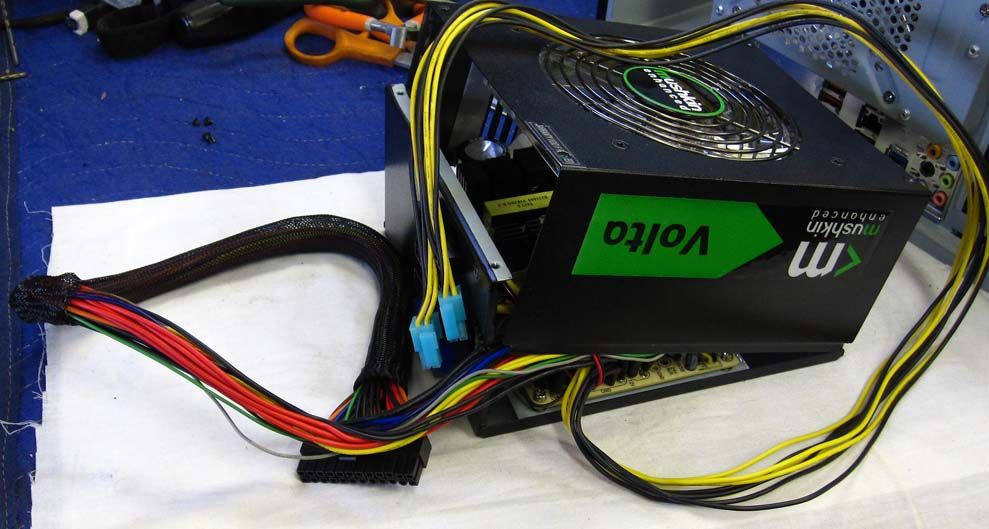
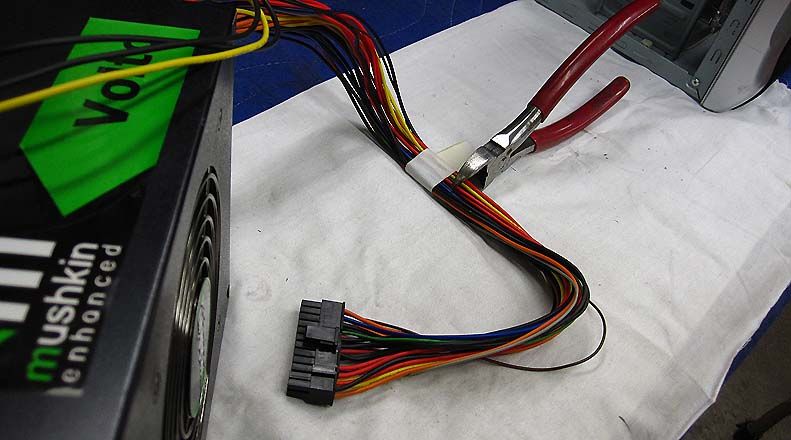
Now came the fun part! To be really effective with airflow, organization, etc., modding the power supply is a big piece of hardware to pay attention to. This one was/is not fully "modular", so I voided the warranty by cracking the case, then I measured FOUR times, & cut ONCE!
... ...
...
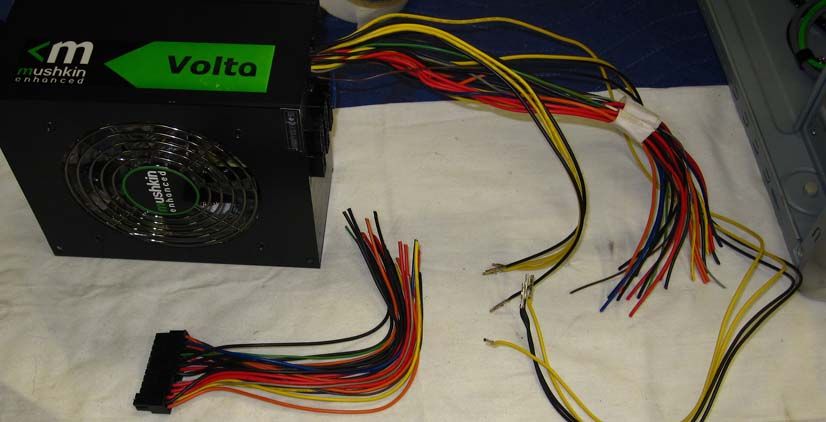
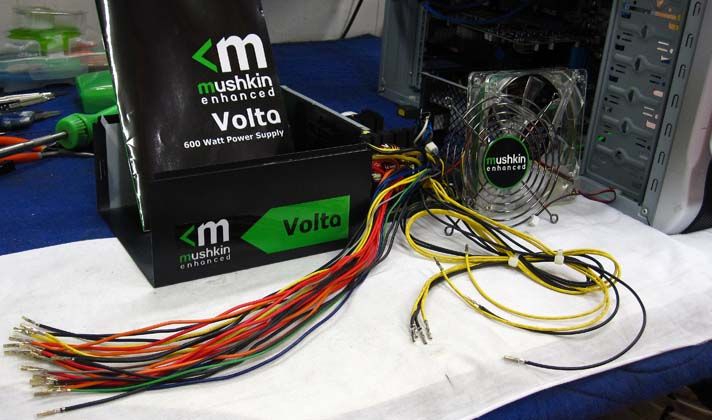
After removing a little over 10" of unecessary cable(s) for this build, & this case, I crimped on new MOLEX crimps, & changed the ATX end from a 20+4 to a 24, ...
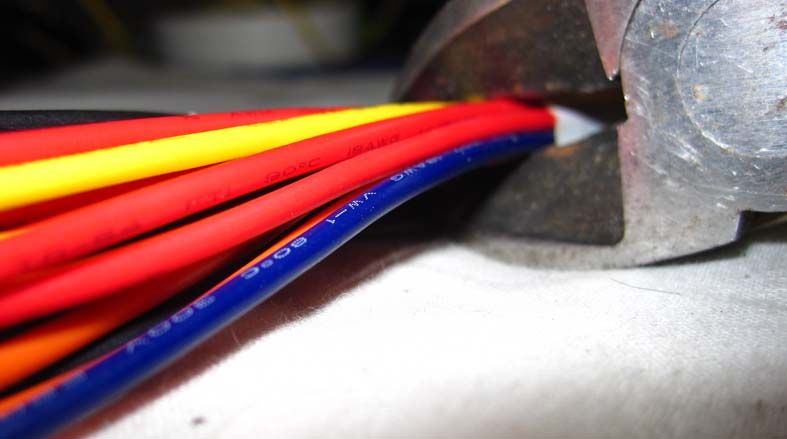
... but before sliding them into the new connenctor, I sleeved all 24 wires with 1/8" black sleeve. I also removed an even 12" off a ATX 12V rail, & sleeved them gray ... Then I initially powered it up ...

.........................
I still have a custom 6-pin power cable to make from scratch & sleeve accordingly for my video card, along with making a 5-connection daisy-chain SATA power cable to power my SSD, two storage drives, & optical drives from one 8-pin out on my PSU, ... along with a handful of other things to finish up, buefore I can button-up ...
Anyhow, I mocked everything up, except the storage drives, & got the following BIOS screen ...
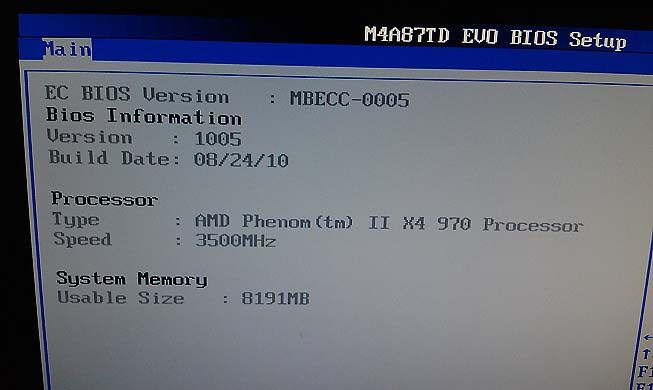
The safe boot was good enough for me to load Windows 7 Ultimate x64, ... though I will go dual-boot with a Linux distro when all is said & done.
More pictures to come, if it seems folks are interested ...
Componets used (so far):
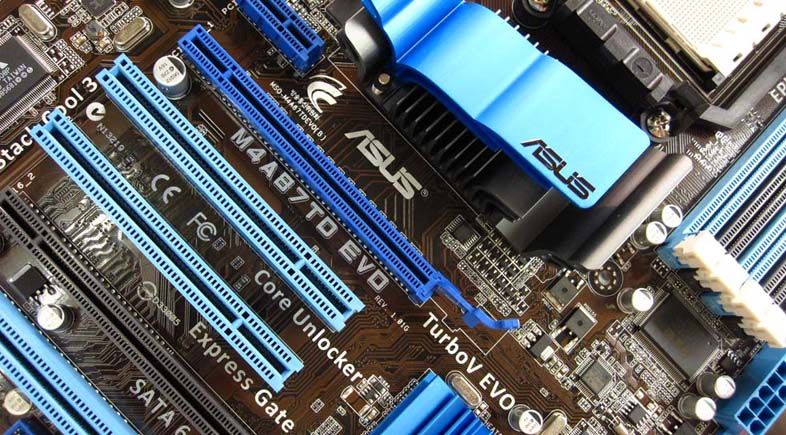
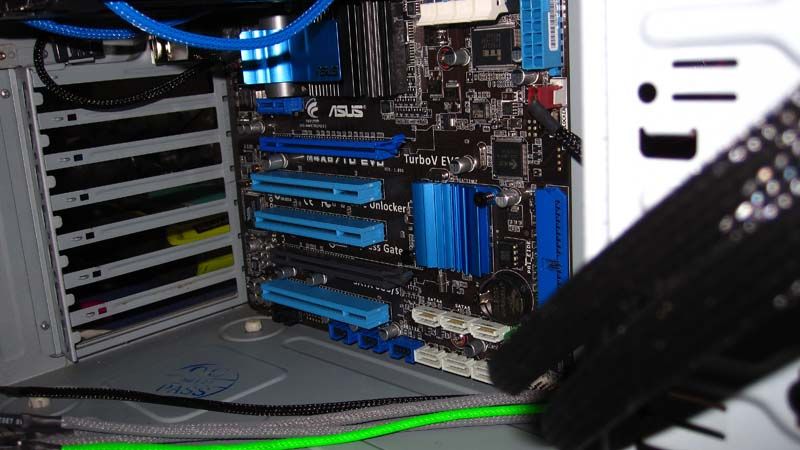
ASUS M4A87TD EVO
AMD Phenom II X4 970 Black Edition (3.5GHz)
Mushkin Enhanced Ridgeback DDR3 1600 (8GB)
Sapphire ATI Vapor-X Radeon HD 6770 PCI-e 2.1 (1GB GDDR5)
ASUS Xonar DS 7.1 PCI
Mushkin Enhanced Callisto Deluxe 2.5" 60GB SSD (OS)
Western Digital Caviar Black 3.5" 1TB 7200RPM 64MB SATA 6.0Gb/s (x2)
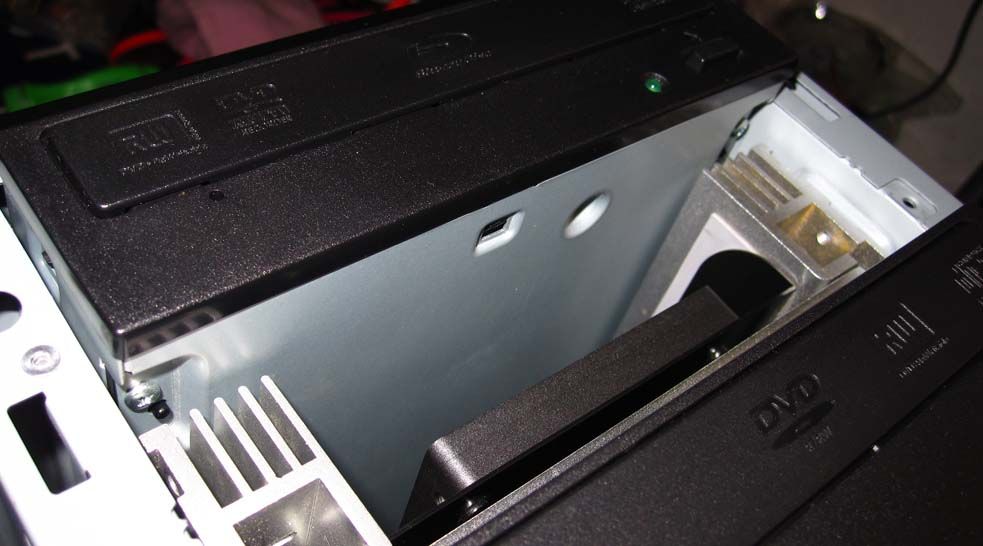
Pioneer Electronics DVD-RW SATA Combo
Pioneer Electronics Blu-ray/DVD-RW SATA Combo
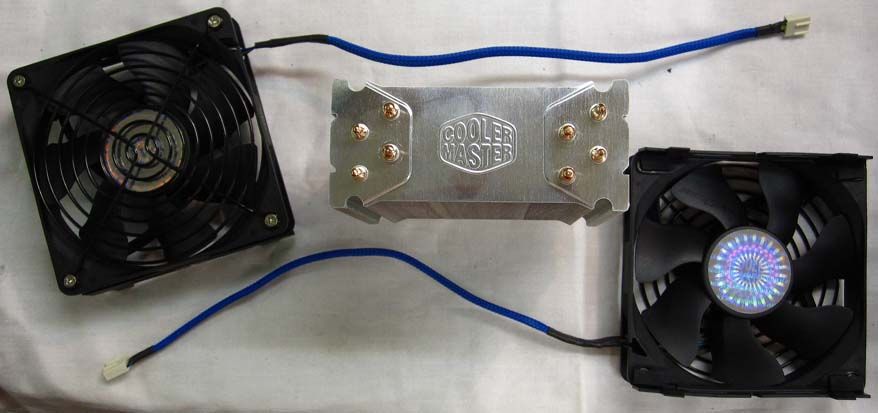
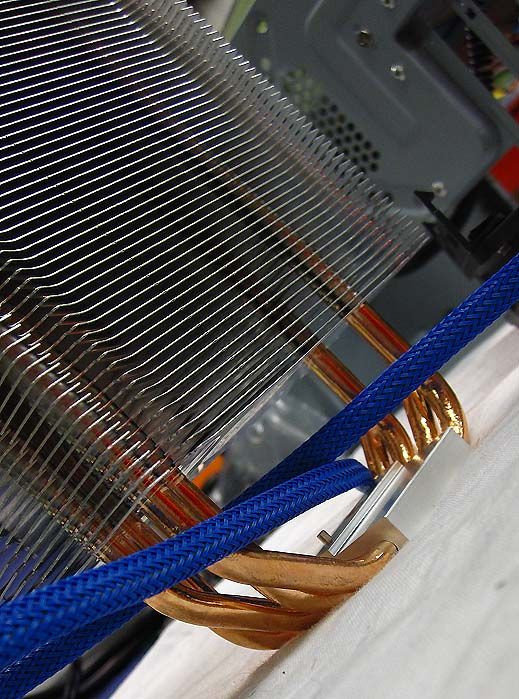
Cooler Master Hyper 212+ CPU Cooler (dual BladeMasters in push/pull config)
Mushkin Enhanced Volta 600W PSU
Mushkin Enhanced Callisto Deluxe 60GB SSD
Front of case with audio/USB & power/reset panels, Pioneer Electronic optical drives, & the Mushkin SSD.
Now came the fun part! To be really effective with airflow, organization, etc., modding the power supply is a big piece of hardware to pay attention to. This one was/is not fully "modular", so I voided the warranty by cracking the case, then I measured FOUR times, & cut ONCE!
...
...After removing a little over 10" of unecessary cable(s) for this build, & this case, I crimped on new MOLEX crimps, & changed the ATX end from a 20+4 to a 24, ...
... but before sliding them into the new connenctor, I sleeved all 24 wires with 1/8" black sleeve. I also removed an even 12" off a ATX 12V rail, & sleeved them gray ... Then I initially powered it up ...
.........................
I still have a custom 6-pin power cable to make from scratch & sleeve accordingly for my video card, along with making a 5-connection daisy-chain SATA power cable to power my SSD, two storage drives, & optical drives from one 8-pin out on my PSU, ... along with a handful of other things to finish up, buefore I can button-up ...
Anyhow, I mocked everything up, except the storage drives, & got the following BIOS screen ...
The safe boot was good enough for me to load Windows 7 Ultimate x64, ... though I will go dual-boot with a Linux distro when all is said & done.
More pictures to come, if it seems folks are interested ...
Componets used (so far):
ASUS M4A87TD EVO
AMD Phenom II X4 970 Black Edition (3.5GHz)
Mushkin Enhanced Ridgeback DDR3 1600 (8GB)
Sapphire ATI Vapor-X Radeon HD 6770 PCI-e 2.1 (1GB GDDR5)
ASUS Xonar DS 7.1 PCI
Mushkin Enhanced Callisto Deluxe 2.5" 60GB SSD (OS)
Western Digital Caviar Black 3.5" 1TB 7200RPM 64MB SATA 6.0Gb/s (x2)
Pioneer Electronics DVD-RW SATA Combo
Pioneer Electronics Blu-ray/DVD-RW SATA Combo
Cooler Master Hyper 212+ CPU Cooler (dual BladeMasters in push/pull config)
Mushkin Enhanced Volta 600W PSU


Good Morning `Jason,
It looks like you have taken apart my brain LOL
LOL
I don't know very much about the internals of a computer, but we have many member's that are into building their own computers & will appreciate the power machine that you are building...
I sure hope you get it to work better then my computer installed brain
 ...
...
Good luck on your project & please keep us updated...
p.s. Great Photo's in your thread...What type of camera are you using.
Thanks for posting/sharing!
It looks like you have taken apart my brain
LOLI don't know very much about the internals of a computer, but we have many member's that are into building their own computers & will appreciate the power machine that you are building...
I sure hope you get it to work better then my computer installed brain
...Good luck on your project & please keep us updated..
.p.s. Great Photo's in your thread...What type of camera are you using.
Thanks for posting/sharing!


Dang, that's some crazy S***! Look like you do some amazing work. You can tell someone that has no problem doing something right when everything is cut to the correct length AND sleeved to protect from heat. Good work!


Lookin good! I built mine, wifey's and the kids puter. It is fun to do for sure. Yours looks awsome! What are the specs on it? (ram Voltage disk space ect???)