
Permanently Mount a RADAR Detector


Thread Starter
|

Can't spell PIMP without an MP
Monte Of The Month -- November 2010
2010 Monte Of The Year


Joined: Jul 2010
Posts: 2,626
From: Grove City, Ohio
Good evening all. Before you ask, YES I searched...
2006 Monte Carlo SS...
I am installing my RADAR detector permanently into The Beast and I have a quick wiring question. I am trying to figure out the switched +12V wire that leads into my mirror (originally intended for OnStar). I am pretty sure that the solid black wire is my ground wire, Which one is the POS?
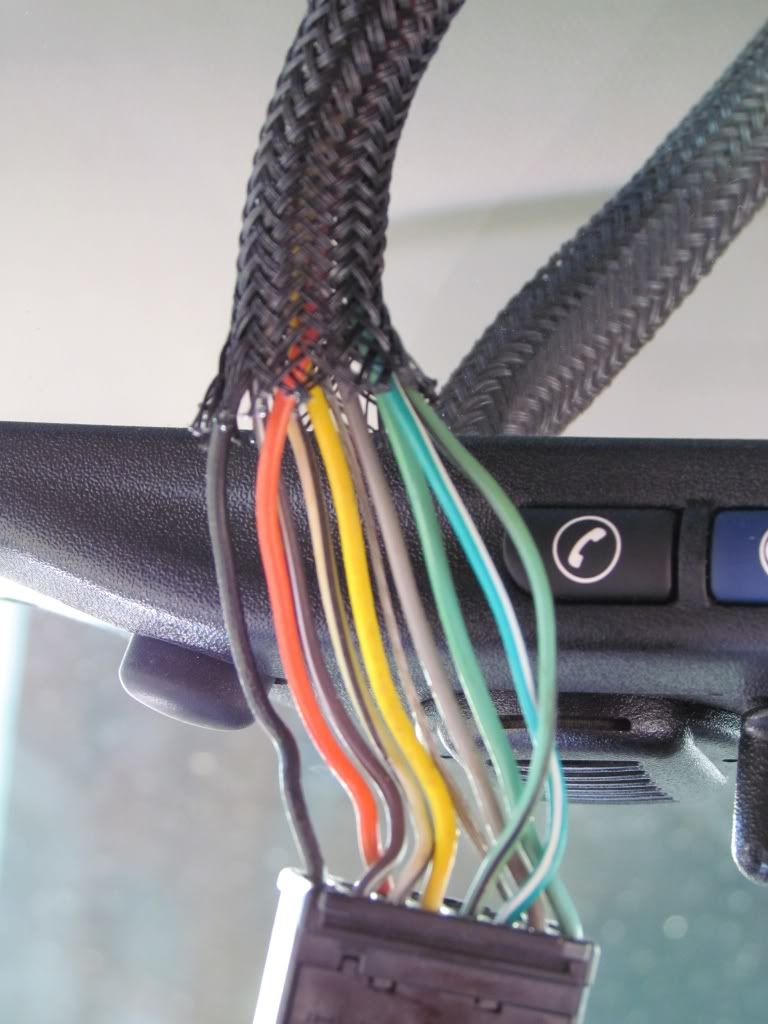
Thank you very much!
2006 Monte Carlo SS...
I am installing my RADAR detector permanently into The Beast and I have a quick wiring question. I am trying to figure out the switched +12V wire that leads into my mirror (originally intended for OnStar). I am pretty sure that the solid black wire is my ground wire, Which one is the POS?
Thank you very much!
Last edited by MillerMonteSS; Oct 20, 2012 at 04:32 PM. Reason: Added year/model info
Thread Starter
|
Can't spell PIMP without an MP
Monte Of The Month -- November 2010
2010 Monte Of The Year
Joined: Jul 2010
Posts: 2,626
From: Grove City, Ohio
I figured out that this info would be handy considering all of the similar questions that are asked...
2006 Chevrolet Monte Carlo Car Radio Wiring Diagram
Car Radio Battery Constant 12v+ Wire: Red/White
Car Radio Accessory Switched 12v+ Wire: The radio harness does not provide a switched power source. Run a wire to the fusebox for switched power.
Car Radio Ground Wire: Black/White
Car Radio Illumination Wire: Violet/White
Car Stereo Dimmer Wire: Purple/White
Car Stereo Antenna Trigger Wire: Pink
Car Stereo Amp Trigger Wire: Pink
Car Stereo Amplifier Location: Under the rear deck in the trunk.
Car Audio Front Speakers Size: N/A
Car Audio Front Speakers Location: N/A
Left Front Speaker Positive Wire (+): Tan
Left Front Speaker Negative Wire (-): Gray
Right Front Speaker Positive Wire (+): Light Green
Right Front Speaker Negative Wire (-): Dark Green
Car Audio Rear Speakers Size: N/A
Car Audio Rear Speakers Location: N/A
Left Rear Speaker Positive Wire (+): Brown
Left Rear Speaker Negative Wire (-): Yellow
Right Rear Speaker Positive Wire (+): Dark Blue
Right Rear Speaker Negative Wire (-): Light Blue
Left Subwoofer Speaker Positive Wire (+): Dark Blue/White (at amplifier)
Left Subwoofer Speaker Negative Wire (-): Light Green/Black (at amplifier)
Right Subwoofer Speaker Positive Wire (+): Dark Green (at amplifier)
Right Subwoofer Speaker Negative Wire (-): Light Blue/Black (at amplifier)
Copied from modifiedlife.com


Thread Starter
|
Can't spell PIMP without an MP
Monte Of The Month -- November 2010
2010 Monte Of The Year
Joined: Jul 2010
Posts: 2,626
From: Grove City, Ohio
I will be splicing the power supply to the detector directly into the OnStar harness power. I already took the adaptor apart to make sure there were no resistance features built into it. The detector should run directly on a 12V supply. I just can't figure out which is the +12V Switched.
On mine i ordered a new cable for wireing & a add-a-fuse & ran it off the radio fuse & hid the wire in the plastics & headliner, that way it was wired in but not 100% perminant if u ever wanted to go back, think it be better for u to do that than splice into the wire 
Thread Starter
|
Can't spell PIMP without an MP
Monte Of The Month -- November 2010
2010 Monte Of The Year
Joined: Jul 2010
Posts: 2,626
From: Grove City, Ohio
Nope. I want permanent... This car will NEVER leave my stable. If I ever have to replace my detector, I will still have the 1/4" power supply nipple that I can slide off and replace just the detector.


This is a guide that I got from somewhere. I have not verified it - though the same guide was true for locating the trunk release wire (I relocated the trunk-open button and plan to use the original button for a loud blasting horn :0 )
Accessory Positive Wire (+): Brown
Accessory Positive Wire Location: At Ignition Harness or BCM, Green Plug, Pin 21. The BCM (body control module) is located to the left of the steering column.
Wouldn't the OnStar be always on, being for emergencies and therefore have no switched power?
I've been trying to chase down an accessory B+ for my permanent bluetooth speakerphone. I can see the brown wire on the green plug from the the pop off dash cover, but have not pursued it yet.
Thread Starter
|
Can't spell PIMP without an MP
Monte Of The Month -- November 2010
2010 Monte Of The Year
Joined: Jul 2010
Posts: 2,626
From: Grove City, Ohio
This is a guide that I got from somewhere. I have not verified it - though the same guide was true for locating the trunk release wire (I relocated the trunk-open button and plan to use the original button for a loud blasting horn :0 )
Accessory Positive Wire (+): Brown
Accessory Positive Wire Location: At Ignition Harness or BCM, Green Plug, Pin 21. The BCM (body control module) is located to the left of the steering column.
Wouldn't the OnStar be always on, being for emergencies and therefore have no switched power?
I've been trying to chase down an accessory B+ for my permanent bluetooth speakerphone. I can see the brown wire on the green plug from the the pop off dash cover, but have not pursued it yet.
Accessory Positive Wire (+): Brown
Accessory Positive Wire Location: At Ignition Harness or BCM, Green Plug, Pin 21. The BCM (body control module) is located to the left of the steering column.
Wouldn't the OnStar be always on, being for emergencies and therefore have no switched power?
I've been trying to chase down an accessory B+ for my permanent bluetooth speakerphone. I can see the brown wire on the green plug from the the pop off dash cover, but have not pursued it yet.
Sorry if that was not clear - the brown wire is at the BCM. Way toward the firewall.
Do you have the overhead console with the garage door opener buttons? Might be another source to check with a multimeter.
Do you have the overhead console with the garage door opener buttons? Might be another source to check with a multimeter.
Last edited by Barovelli; Oct 20, 2012 at 06:08 PM.
Thread Starter
|
Can't spell PIMP without an MP
Monte Of The Month -- November 2010
2010 Monte Of The Year
Joined: Jul 2010
Posts: 2,626
From: Grove City, Ohio
Okay, I got it working. I took the housing to the rearview apart and used the driver's side bulb fixture as the power source. I no longer have a bulb in there, but I never use it anyway. I still have a bulb on the passenger side if it becomes necessary. Now, when I open my car door, the RADAR detector turns on by itself and stays on until the car has been sitting unattended for 10 minutes. Thanks Barovelli.