Mod Guide: Changing you DASH (Speedo Light color) for under $10 !! Some pics


HOW TO CHANGE THE COLOR OF THE DASH LIGHTS FOR UNDER $10 !!
Ok guys, This is what I did to change my Speedo, oil press, temp, volt, fuel, and TACH. I am putting in pictures near the end because I don�t know how to insert them step by step. SO IF you want to give this a shot, it worked for me. I changed the color of my dash lights as mentioned above for under $10. I was going to send in my cluster and have the bulbs changed to LED�s, but I figured I try some OLD SCHOOL stuff I did on some Vintage Audio gear. I didn�t change the lights, I changed the color of the lens that filters the light. VERY VERY simple. I will try to explain it the best I can, IF you have any questions, PLEASE just email or PM me. First off I disconnected the battery because I didn�t want to fry anything. 2nd, I took the dash apart enough just to get to the Speedometer (I�m sure you all know this, so I didn�t go step by step for this) After the Speedo was in my house I did the following........Go to the nearest HOBBY shop or a place like Michaels
Find where they keep the STYRENE plastic They carry translucent colors
Pick the color you want to use, make sure it�s a DARK color, not light blue, use DARK blue, or Dark RED ( If you use some color that doesn�t have a dark enough pigment, it will not come out the right color, it will just �Tint� the white.
Make sure when you get the plastic, its at least thick enough, so it doesn�t bend or flex
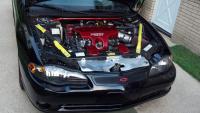
Go home, park the car and get the tools out to take apart the dash to get to the speedometer
Once you have the Speedo out (20-30 minutes.) take it apart
When you take the speedometer apart, make sure you are very careful when removing the �dash needles�
Remove each 1 of the 3 sections ( the Speedometer, the Cluster of 4, and the Tach.)
After the speedometer is apart, there is a BLACK (with the white numbers and gauges / letters/etc.) plastic with a clear piece of plastic stuck to it, get a hair dryer and heat it up a little and the black/white piece of laminate with the gauge numbers and speedometer readings on it pull apart (be careful not to �kink or rip it�
After they are apart, get a pair of scissors and cut out the EXACT size and style of the backside that is WHITE ONLY (see pictures) and then press it on to cover the WHITE on the backside of the numbers.
Put the clear plastic pieces back on, you may need a little bit of adhesive for this.
Then proceed to put the speedometer back together.
When you put the needles back on, make sure they are at the lowest setting , just like they were when you took it apart.
Clean the inside of the speedometer plastic (clear) incase you got finger prints on the inside of t because you don�t want to have to take it BACK apart just to wipe fingerprints off.
Reinstall your speedometer, hook up the wires.
Re attach your battery cable.
Turn on the ignition, and cover the light sensor on the dash (so your headlights will turn on your dash lights), or just turn the **** until the dash lights go on after you pull the headlight switch out.
Enjoy your new colored lights J


I wanted to post them ALL at one time, but it only let me post 5 at a time, SO here is some others....Michael...
In the 2nd in 3rd pictures on this one (where the speedometer black plastic with the numbers on it) thats what you want to heat a little so it doesnt crease the speedometer plastic to seperate it from the clear plastic bottom...


It worked out GREAT. Im not saying do not use LEDs, I plan to, BUT this is just a quick way to change the color of the lights to see even if you like the color. I am doing the next one with RED on the sides and the middle Speedometer is going to be Blue and see how that looks. IS it looks good, thats the way Ill go for good.... Again, you could do this for a perm coloring of the speedo, but it of course it would be a ton better with colored LEDS, as well as brighter. but its a poor mans way of changing the color... thanks....Michael...