
Fixing the Famous 5th Gen Rust
#21
 05-13-2013, 08:38 PM


Wow that looks like a big job but your making good progress. Body work is one skill I wish I had.


#23
05-13-2013, 10:41 PM

Join Date: Nov 2008
Location: Iowa
Posts: 2,026
 Isn't some amount of filler inevitable? To smooth it all out after welding and grinding?
Sorry for the delay (just getting caught up).
As for the POR15, optimally you would want to coat both surfaces. But if you opt not to, at least coat the inside (as the rust damage is from the inside out).
Areas no one sees, you can brush the product on (and it actually flattens out nicely). Make sure to remove any loose material or debris (best results are going to the bare metal if possible). And make sure to use their "metal prep" product. Helps etch the metal.
In areas that will be seen or painted, try to spray the product (as I understand, to maintain the chemical bonding properties, you must thin it with their thinner).
Words of advice:
- Where gloves. I speak from experience, get it on you and you will spend 1-2 weeks for it to come off your skin naturally (no scrubbing ever seemed to work).
- If you don't use the entire can in one use, place a double layer of syran wrap between the lid and the can (if possible, have the wrap dip into the can and avoid air between the POR15 and the wrap, helps it last longer).
- Lastly, when applied by brush, that stuff bonds very solid. Sanding to feather in could be a pain in the butt. Hence why finish/exposed areas I recommend spraying it (I have never sprayed POR15, but when helping a friend with a Jeep years ago, we learned it does not quite "sand" down easily).
I did make quite the mess painting it on. Good thing I wore gloves. I got a small speck of it on my wrist and you're right.. it's staying there
Thanks Lou. It's definitely a lot more work that I had planned on.
#24
05-13-2013, 10:45 PM
Join Date: Nov 2008
Location: Iowa
Posts: 2,026
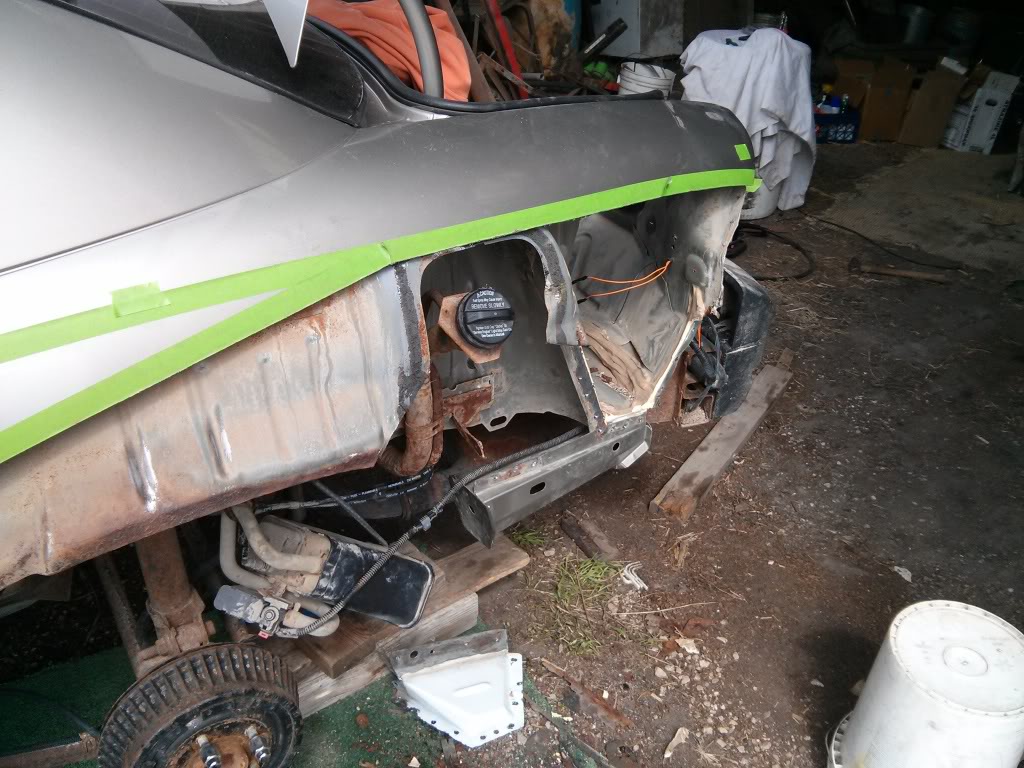
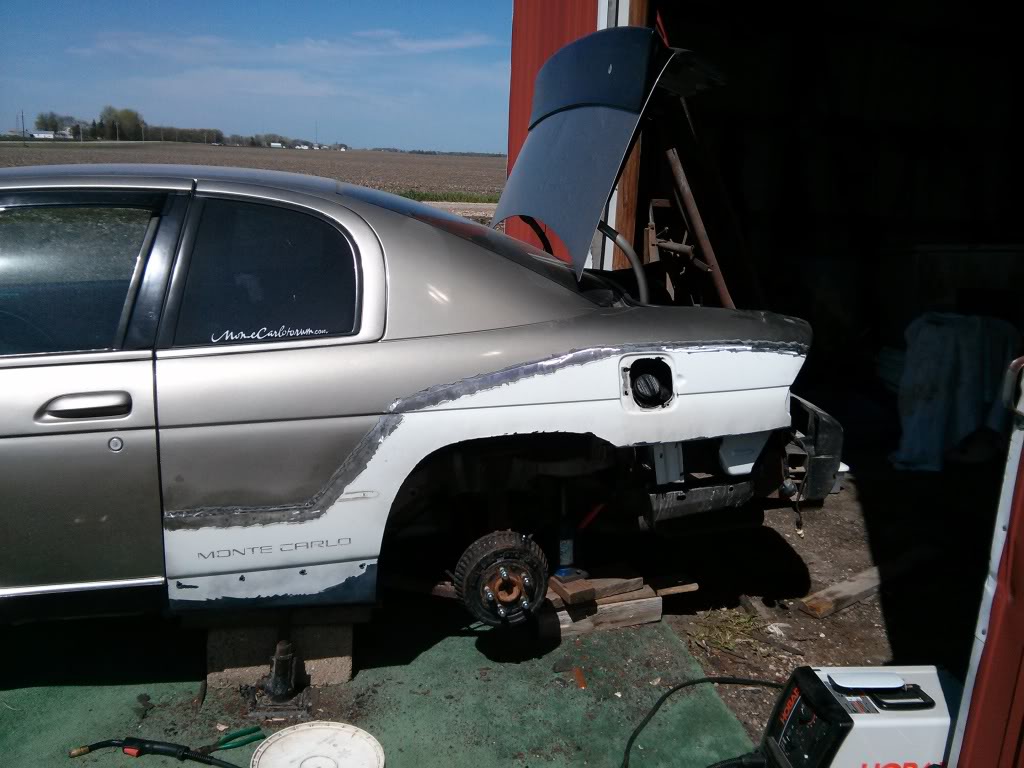
Progress from today...
Cut out some of the rusty inner skin and replaced it with parts from the donor car. Also applied POR-15 to the rusty areas.
Cut out some of the rusty inner skin and replaced it with parts from the donor car. Also applied POR-15 to the rusty areas.


#25
05-15-2013, 11:52 PM
Join Date: Nov 2008
Location: Iowa
Posts: 2,026
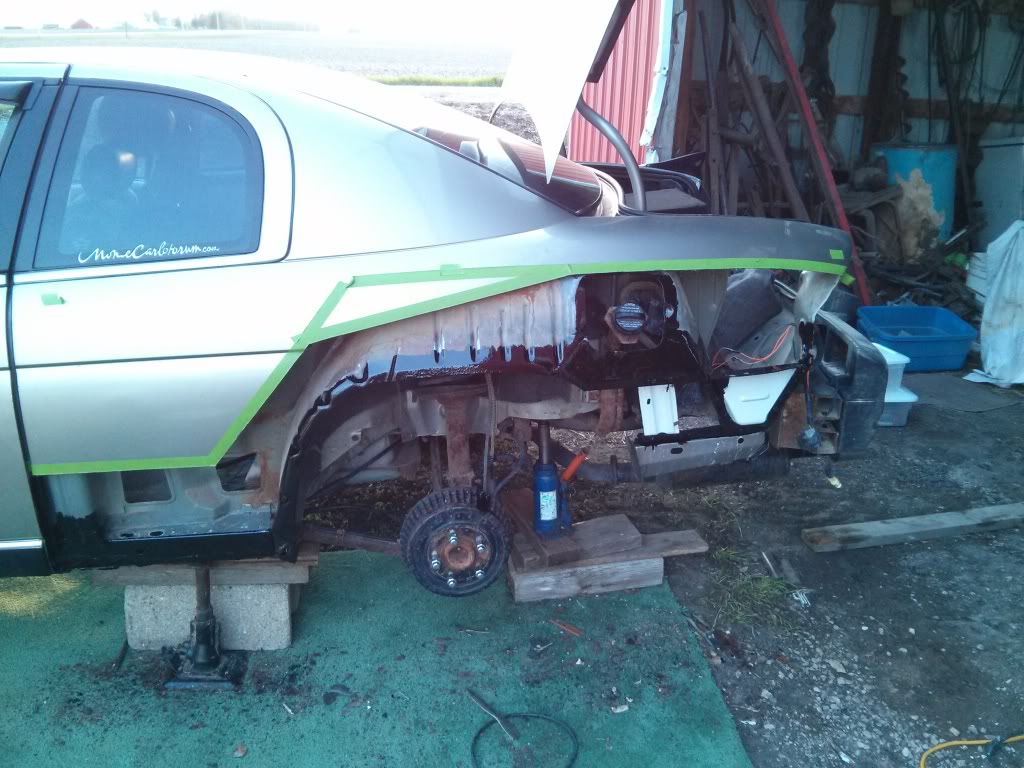
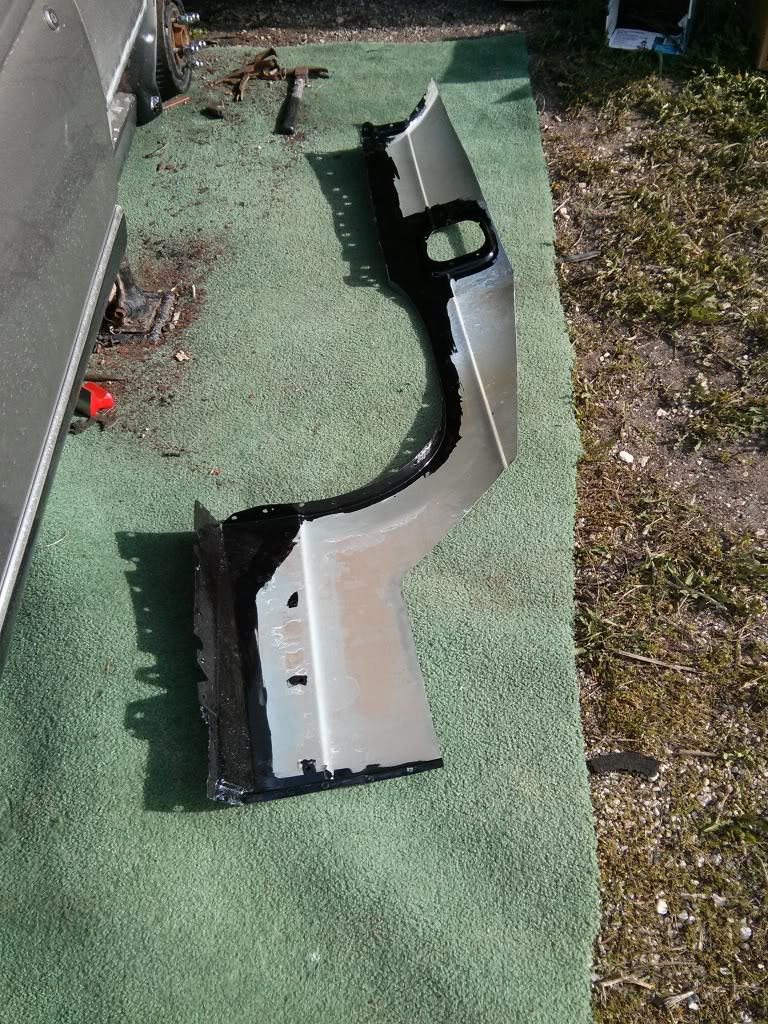
Prepped the donor panel with POR-15
Tacking the panel in place
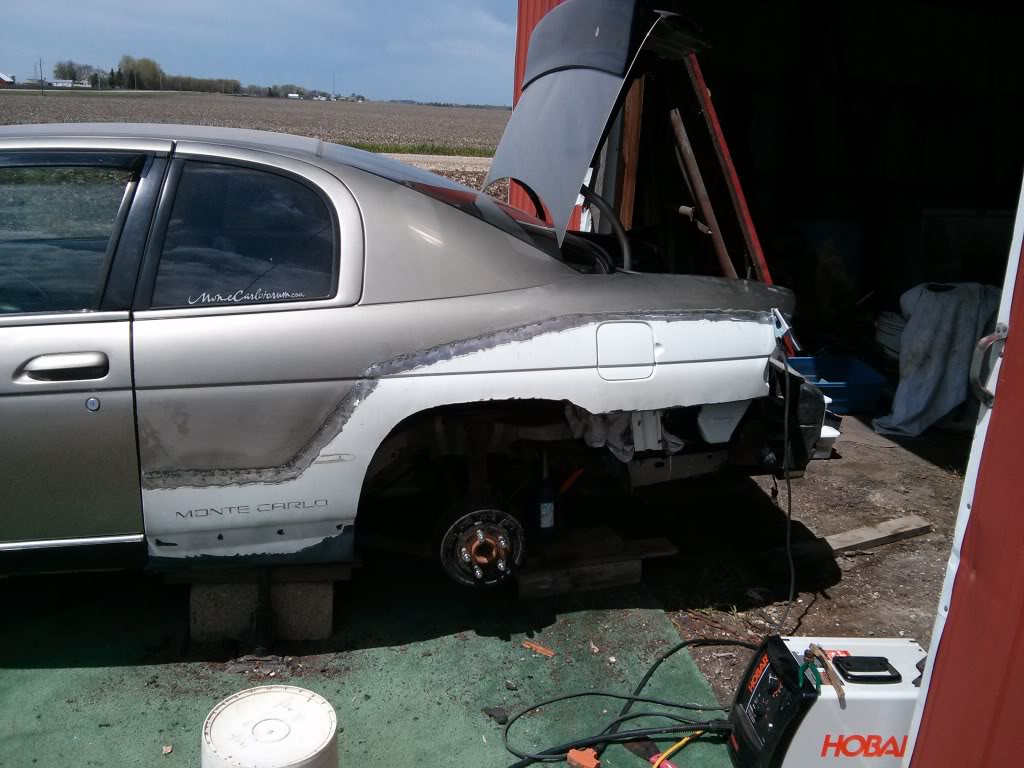
One tack at a time

More welds.
That's it for now. I've finished the welding and ground it all down smooth. Hopefully paint it tomorrow!

Tacking the panel in place


One tack at a time

More welds.

That's it for now. I've finished the welding and ground it all down smooth. Hopefully paint it tomorrow!
Last edited by zzapultimate; 05-15-2013 at 11:54 PM.


#28
05-16-2013, 11:36 AM


Join Date: Apr 2010
Location: Mentor, Ohio
Posts: 12,225
So far that's looking great!! You'll be really happy when it's said and done and you can say you did it yourself too!!
#29
05-16-2013, 10:22 PM
Join Date: Nov 2008
Location: Iowa
Posts: 2,026
Thanks for the comments!
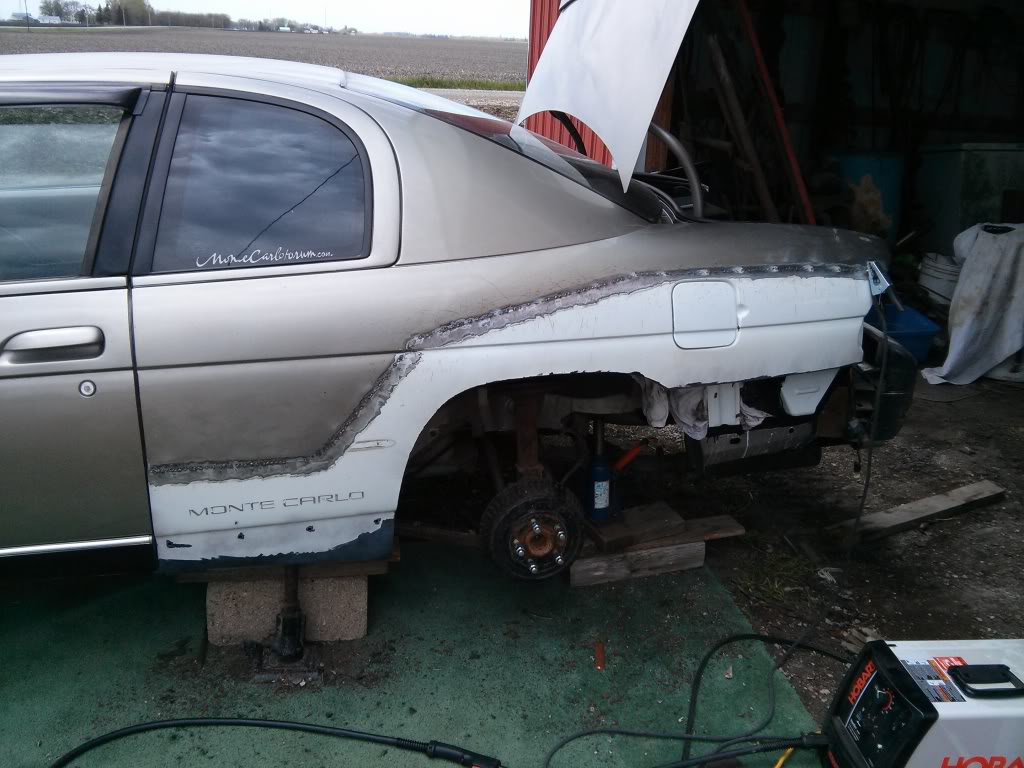
Got the filler all done today. Came out decent. Fiberglass filler first then a couple layers of bondo all sanded down with the DA.
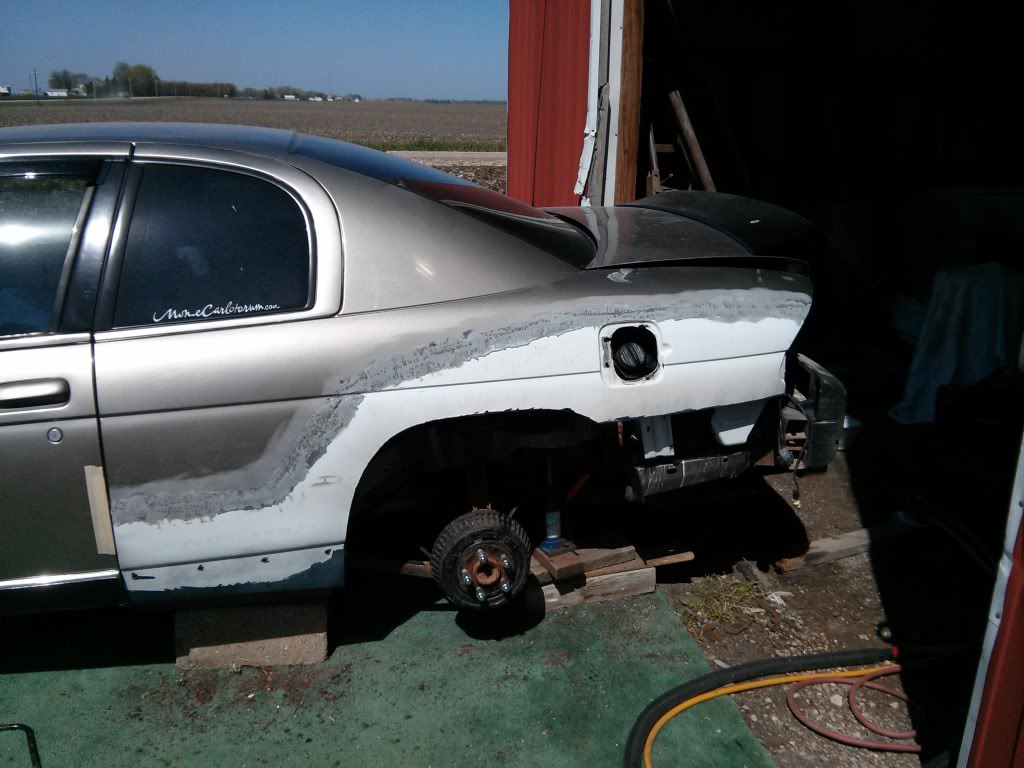
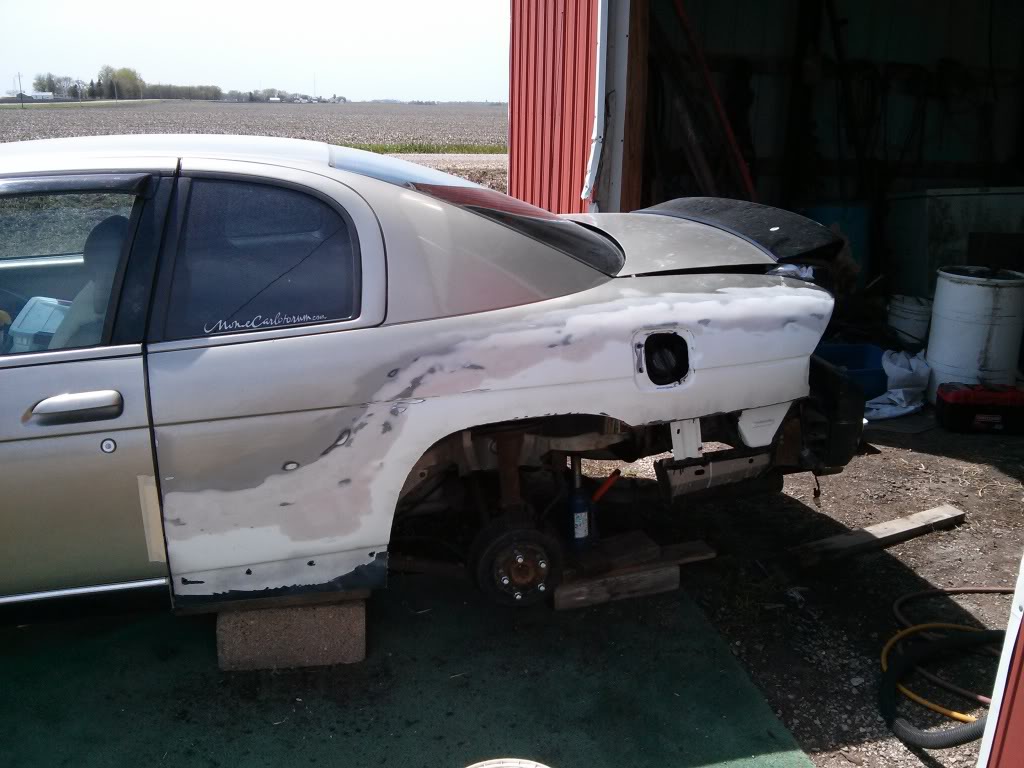
It's sitting in primer at the moment
Got the filler all done today. Came out decent. Fiberglass filler first then a couple layers of bondo all sanded down with the DA.


It's sitting in primer at the moment
#30
05-16-2013, 10:45 PM
Join Date: Apr 2010
Location: Mentor, Ohio
Posts: 12,225
That's looking great!! Hopefully it sanded nice and smooth (I mean no steps between the pieces and the layers of filler).
Keep the progress coming
Keep the progress coming