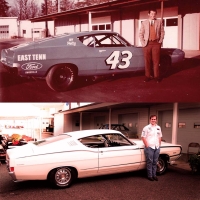
A Progress Update on the Fard Torino Restoration


I'm sorry I ahve not been up to my posting ways guys!! But I have been VERY busy working on this Ford Torino. as I will try to illustrate with these photos! The summer has been quite busy with 2 online classes and this car outside, plus all the normal chores I do while at home... I still have a few lawns I mow on teh side, and with economy I had a hard time finding a job for the summer. Therefore, there has been lots of Torino time here lately!!
Plus, there were problems aside from the Torino. We had to do some work on the '50 Chevy. The fuel tank ahd been having problems with soemthing floating its way over the pick up tube and causing you to run out of gas in random places. It used to only run after 10 gallons, but it eventually got to where it would sometimes run out after burning just 4 gallons! We finally got a new fuel tank and put in that. Plus, the running boards and fenders had some scuffs in them, and the running boards had some rust marks in them. If you guys recall, we got that truck from an Uncle of mine who was halfway done restoring it hwen we got it. He had painted the front fenders, rear fenders, and running boards already. They had been scuffed up a little bit being loose for a few years before oign on the car (adn the front fenders were already on), so that was a weekend right there.
There were also some problems with the locks at my brothers house, some a/c problems there, and we had to replace the exhaust on my dads truck after some holes rusted in a part of the pipe and a muffler fell off.
But anyways, thats enough of those problems. Heres how the Torino is coming along!
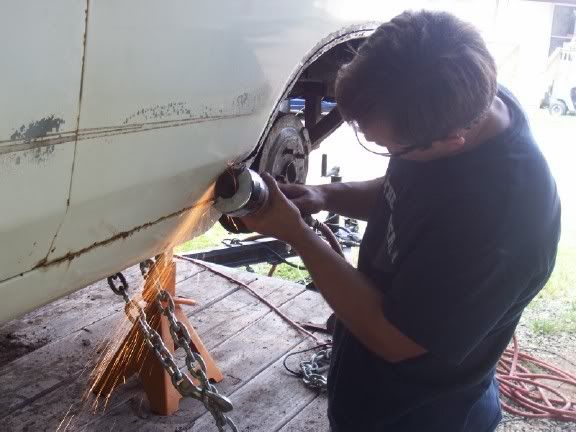
First, I had to cut out all the rusty metal on the car so that it could be replaced with fiberglass panels and filled in. Heres a picture of me doing that with an air cut-off.
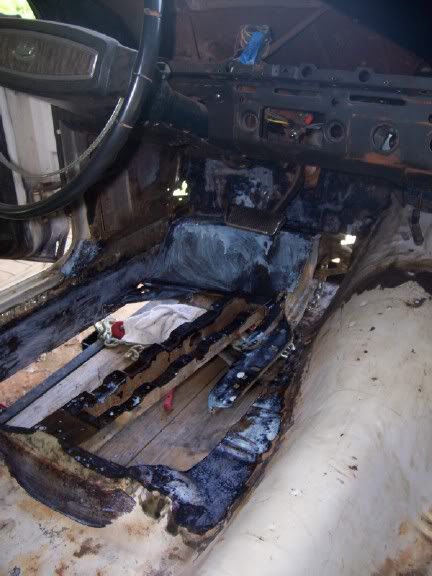
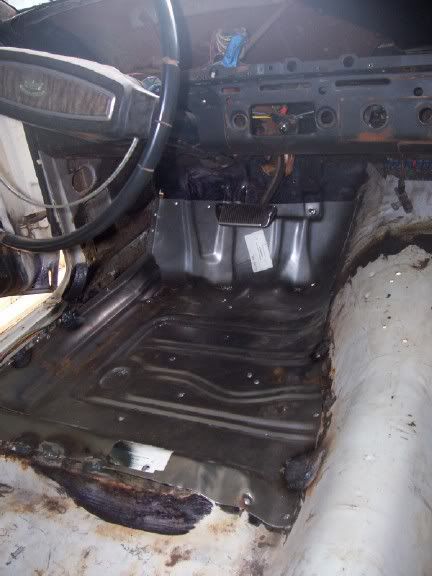
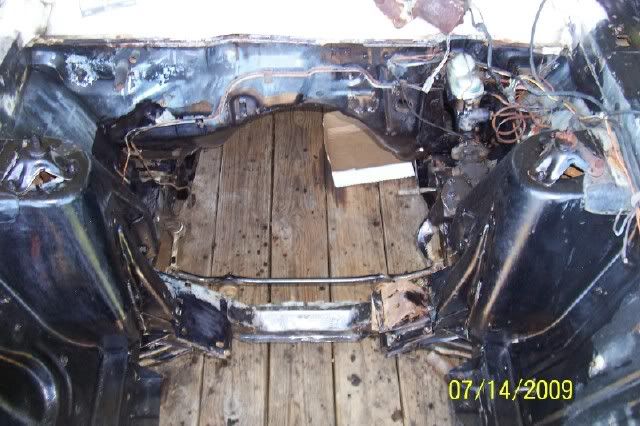
We also had to cut out the drivers side floor pan and toe board completly since it was so rusty.
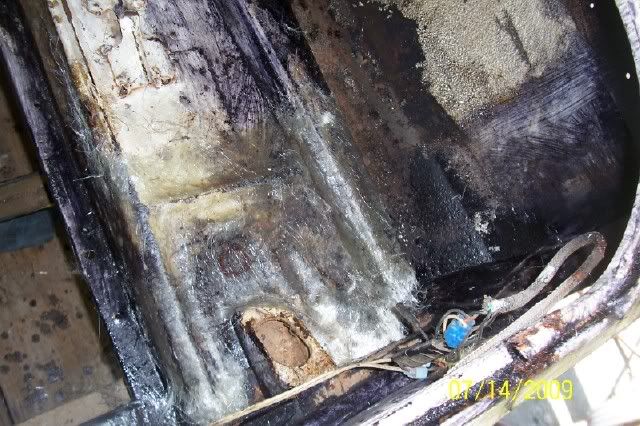
The white stuff that you see here is stuff called Rust Doctor. It chemically converts the rusty metal to magnite, which is an inert metal, or so they say. That magnite is also black. However, the stuff goes on whtie and dries to black. It seems to do a really good job, and it should for $100 a gallon. After cutting out the rusty sections and preparing to lay in the new pan, I treated the surface rust on the remainder of the metal with the rust doctor and while I waited for it to dry, I took this picture.
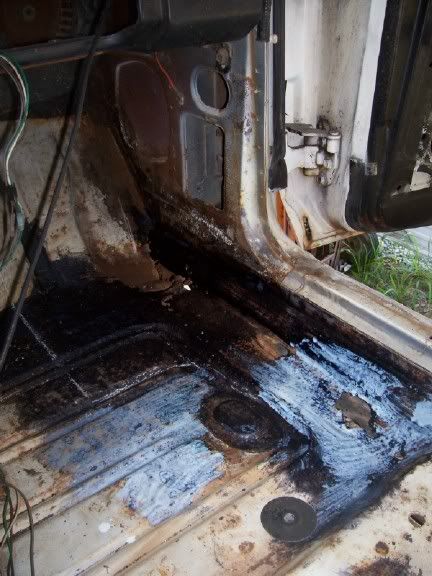
The passenger side was not nearly as bad as the drivers side was. A thin section along the door jam and a hole almost the size of a baseball was rusted out. I cut out just that side and treated it with Rust Doctor.
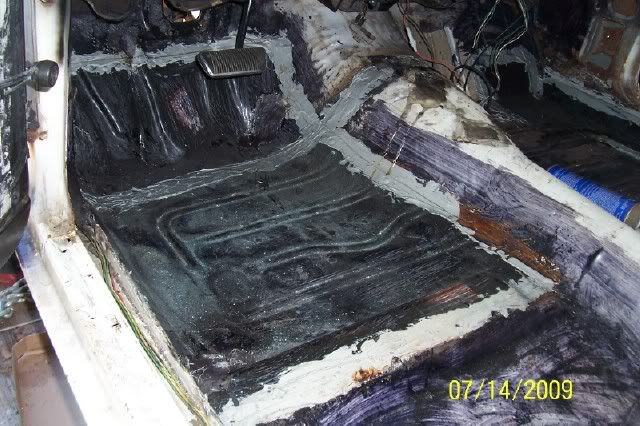
And then we rivoted and welded in a new floor pan and toe board on the drivers side of the car. It came out well!
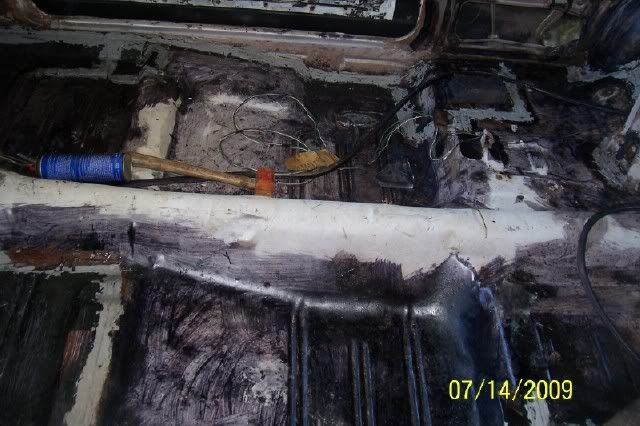
I used a $15 piece of sheet metal from farm supply to mold the new floor pan for the passenger side with.
I also treated and seam sealed the floor pans in with 3M's seam sealer stuff. The blue looking dust is from where I sanded the black dashboard before taking the picture. The pan is really black from the rust doctor. (no idea why the dust looks blue, optical illusion i assume)
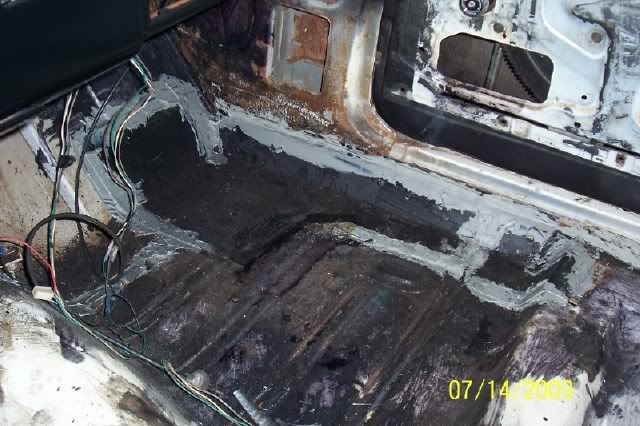
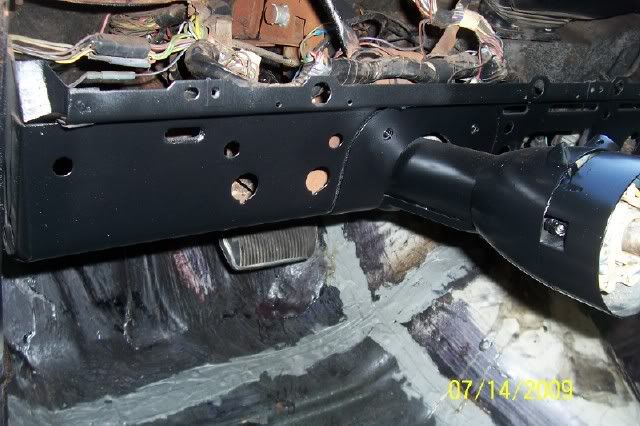
Later, I treated all of hte surface rust inside the car with the Rust Doctor and this is how it looks!
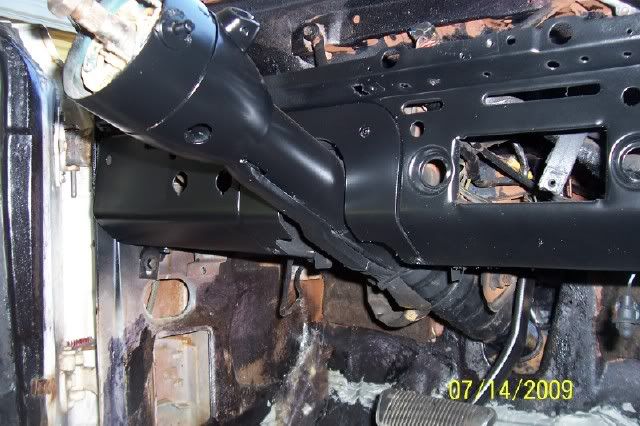
I also used the rust doctor to treat all of the surface rust in the engine compartment. It came out looking a lot better.

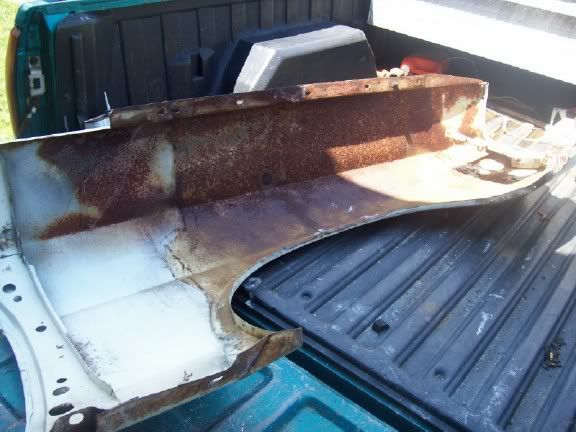
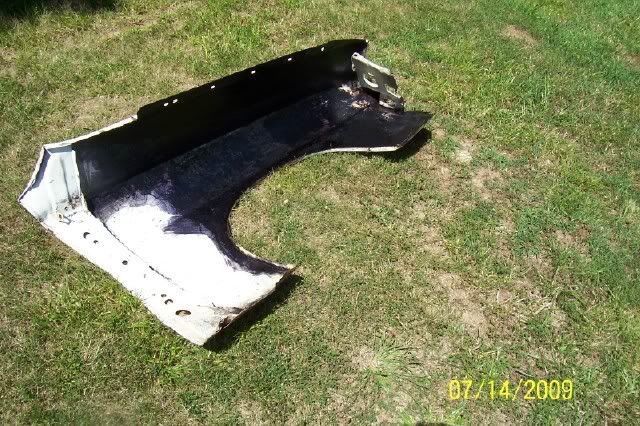
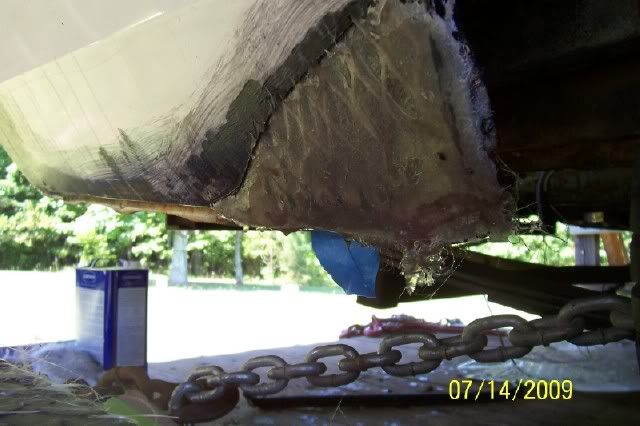
I also pulled out the fendars one day and ground all the rust off of them, tehn treated them with rust doctor.
Before and After!!!
And after cutting out all the rusty metal and treating it, ti was time to fiberglass in some pieces. I haven't finished doing this yet, but here are some pictures of the panels that have been fiberglassed thus far.
A section of fiberglass in teh trunk!
And heres one I did all by myself! Dad this one originally, but we forgot to put enough hardener in the fiberglass. I toe the piece out, cleaned it, and replaced it myself! The metal you see in the fiberglass is a piece of expanded metal from farm supply that I cut with an acetelyne torch so that the fiberglass could have something to hold onto and mold to. I made this piece all by myself mixing fiberglass and using the torch to cut it out and mold it without dads help! I was so proud..
I also repainted the dash. You can look back at some ofthe pictures of floor pans above and see the dahs before it was painted.
In this first picture, you can see my 1 run between the radio and ignition cut outs. Overall, I think I did a good job!
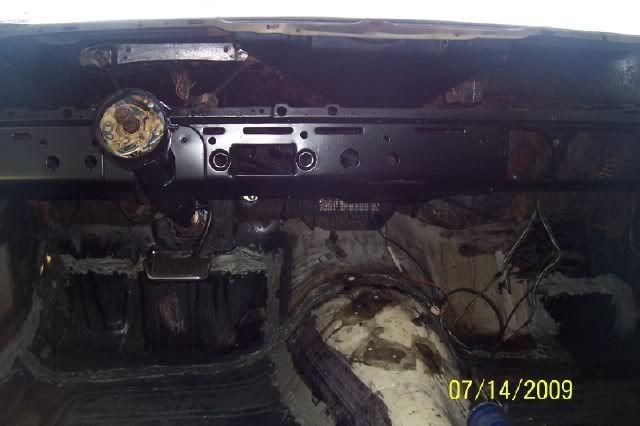
Since there is a run between the radio and ignition cut outs, always view the dash from this angle.
And some other pictures of the dash...
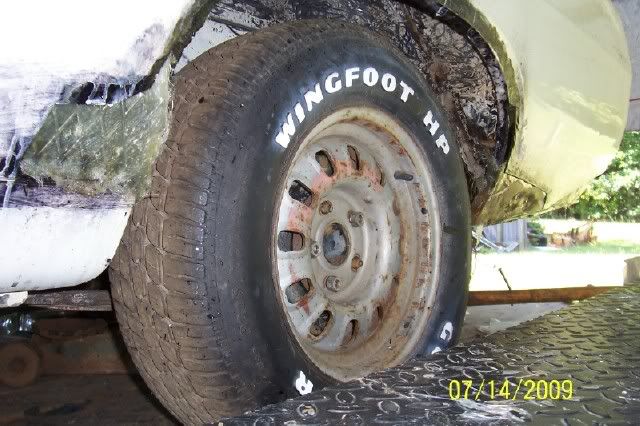
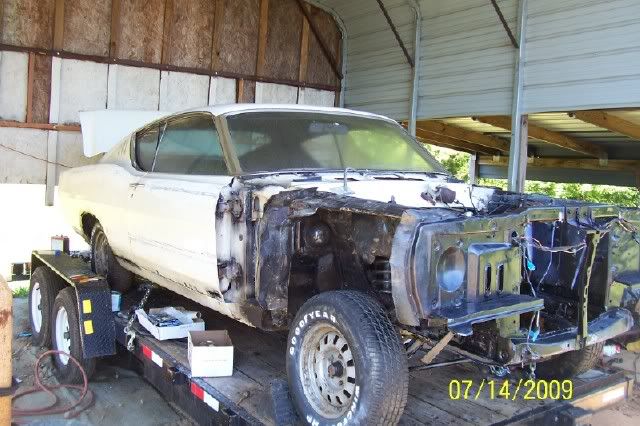
Also, it took a whole day, but I got all of the c-stripe residue off and sanded that area smooth (also on the fenders while I had them out). Heres how the body looks today:
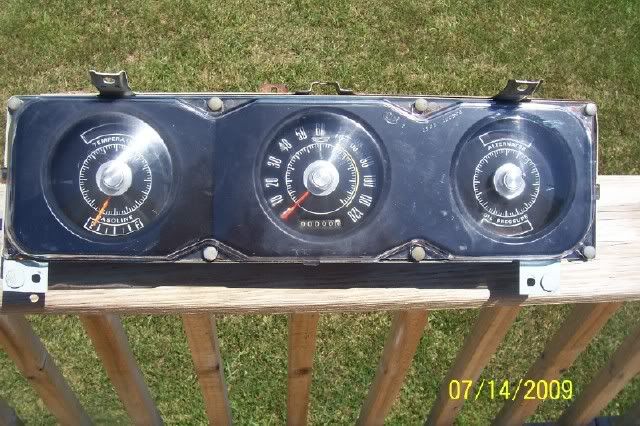
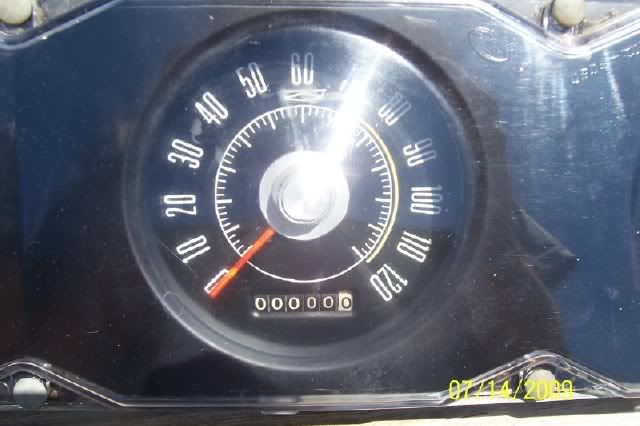
And one final thing. One night before going in, I went out to the storage shed and pulled out the gauge cluster. I cleaned it up as best I could, and zeroed the odometer. Thats a very tedious process, but I did it!
To see previous updates, check these links.
https://montecarloforum.com/forum/sh...ghlight=torino
https://montecarloforum.com/forum/sh...ghlight=torino
https://montecarloforum.com/forum/sh...ghlight=torino
Plus, there were problems aside from the Torino. We had to do some work on the '50 Chevy. The fuel tank ahd been having problems with soemthing floating its way over the pick up tube and causing you to run out of gas in random places. It used to only run after 10 gallons, but it eventually got to where it would sometimes run out after burning just 4 gallons! We finally got a new fuel tank and put in that. Plus, the running boards and fenders had some scuffs in them, and the running boards had some rust marks in them. If you guys recall, we got that truck from an Uncle of mine who was halfway done restoring it hwen we got it. He had painted the front fenders, rear fenders, and running boards already. They had been scuffed up a little bit being loose for a few years before oign on the car (adn the front fenders were already on), so that was a weekend right there.
There were also some problems with the locks at my brothers house, some a/c problems there, and we had to replace the exhaust on my dads truck after some holes rusted in a part of the pipe and a muffler fell off.
But anyways, thats enough of those problems. Heres how the Torino is coming along!
First, I had to cut out all the rusty metal on the car so that it could be replaced with fiberglass panels and filled in. Heres a picture of me doing that with an air cut-off.
We also had to cut out the drivers side floor pan and toe board completly since it was so rusty.
The white stuff that you see here is stuff called Rust Doctor. It chemically converts the rusty metal to magnite, which is an inert metal, or so they say. That magnite is also black. However, the stuff goes on whtie and dries to black. It seems to do a really good job, and it should for $100 a gallon. After cutting out the rusty sections and preparing to lay in the new pan, I treated the surface rust on the remainder of the metal with the rust doctor and while I waited for it to dry, I took this picture.
The passenger side was not nearly as bad as the drivers side was. A thin section along the door jam and a hole almost the size of a baseball was rusted out. I cut out just that side and treated it with Rust Doctor.
And then we rivoted and welded in a new floor pan and toe board on the drivers side of the car. It came out well!
I used a $15 piece of sheet metal from farm supply to mold the new floor pan for the passenger side with.
I also treated and seam sealed the floor pans in with 3M's seam sealer stuff. The blue looking dust is from where I sanded the black dashboard before taking the picture. The pan is really black from the rust doctor. (no idea why the dust looks blue, optical illusion i assume)
Later, I treated all of hte surface rust inside the car with the Rust Doctor and this is how it looks!
I also used the rust doctor to treat all of the surface rust in the engine compartment. It came out looking a lot better.
I also pulled out the fendars one day and ground all the rust off of them, tehn treated them with rust doctor.
Before and After!!!
And after cutting out all the rusty metal and treating it, ti was time to fiberglass in some pieces. I haven't finished doing this yet, but here are some pictures of the panels that have been fiberglassed thus far.
A section of fiberglass in teh trunk!
And heres one I did all by myself! Dad this one originally, but we forgot to put enough hardener in the fiberglass. I toe the piece out, cleaned it, and replaced it myself! The metal you see in the fiberglass is a piece of expanded metal from farm supply that I cut with an acetelyne torch so that the fiberglass could have something to hold onto and mold to. I made this piece all by myself mixing fiberglass and using the torch to cut it out and mold it without dads help! I was so proud..
I also repainted the dash. You can look back at some ofthe pictures of floor pans above and see the dahs before it was painted.
In this first picture, you can see my 1 run between the radio and ignition cut outs. Overall, I think I did a good job!
Since there is a run between the radio and ignition cut outs, always view the dash from this angle.
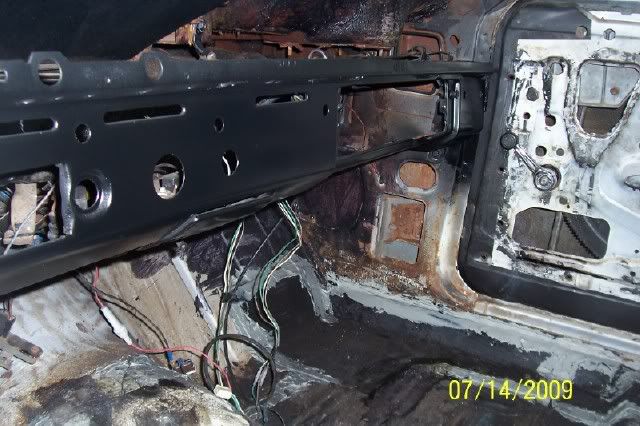
And some other pictures of the dash...
Also, it took a whole day, but I got all of the c-stripe residue off and sanded that area smooth (also on the fenders while I had them out). Heres how the body looks today:
And one final thing. One night before going in, I went out to the storage shed and pulled out the gauge cluster. I cleaned it up as best I could, and zeroed the odometer. Thats a very tedious process, but I did it!
To see previous updates, check these links.
https://montecarloforum.com/forum/sh...ghlight=torino
https://montecarloforum.com/forum/sh...ghlight=torino
https://montecarloforum.com/forum/sh...ghlight=torino


Monte Of The Month -- August 2007


Joined: Sep 2006
Posts: 5,231
Looking like a lot of work Duane! Got to feel good tho with the progress you're making.
Not sure you shoulda messed with the odometer tho. I'd reset it myself. It's called odometer tampering, and it's a federal offense. I got an ex-brother-in-law that spent some time away for it.
When you go to sell the car, that's when you'll have the problem.
Not sure you shoulda messed with the odometer tho. I'd reset it myself. It's called odometer tampering, and it's a federal offense. I got an ex-brother-in-law that spent some time away for it.
When you go to sell the car, that's when you'll have the problem.

Joined: Jun 2009
Posts: 852
From: Dayton, ohio
I agree with rockn about the odometer, you don't want to end up in the pokey after pouring your blood and sweat in this car...
car looks great so far, cant wait to see the final pictures! Keep us updates as to your progress, i love post's like this! (makes me want to start a frame up on a 1st gen Monte).
Wouldn't this be sexy sitting in the driveway!

OR this!

car looks great so far, cant wait to see the final pictures! Keep us updates as to your progress, i love post's like this! (makes me want to start a frame up on a 1st gen Monte).
Wouldn't this be sexy sitting in the driveway!
OR this!
Last edited by 03Monte; Jul 14, 2009 at 12:52 PM.


")

Hi `Duane, I'm really/really impressed with the work that you have performed
on your Torino. I envy you, but I know that it has to be hard/fun work : )
Really appreciate you taking the time to post/share your progress. Thanks, we enjoyed.
Hope that you are having some fun during your summer break.
Look 4ward to your future posts 4-Sure.
___________________________________
Member 03Monte...Luv that Black 1st Gen,
plus that Black Torino is AweSome : )
Thanks...I do luv posts like `Duane has shared.
It keeps dreams alive.
I've got documentation that the car actually had 63,542 miles showing. Besides, it's only illegal if you do it with malicious intent, such as selling it. And besides, when I'm done with this car, it might as well have 0 miles on it 
Thanks for all your support guys. I've still got a long way to go so I'll still need it!
And please forgive me for not posting enough lately
Thanks for all your support guys. I've still got a long way to go so I'll still need it!
And please forgive me for not posting enough lately