Resizing for Signatures/Creating Before and After Photos
#1
 02-11-2014, 08:50 AM


To be able to easily resize photos and create before and after shots we are going to look into a program called Irfanview. This program can be seen here:
LINK -> IrfanView - Official Homepage - one of the most popular viewers worldwide
The direct download from CNET can be found here:
LINK -> IrfanView - CNET Download.com
This is an extremely lightweight program that won't slow down your computer and is fully scanned and has no problems.
To start, we are going to re-size for signatures.
After we have downloaded Irfanview we want to open the program and follow these instructions.
1. Click 'File' and then 'Open' to select the image that you are looking to re-size.
2. Now that your image is open we are going to click 'Image' and then click 'Resize/Resample'.
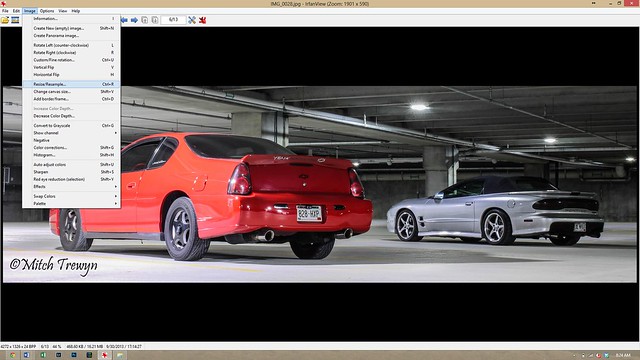
resize by trewyn15, on Flickr
3. With the re-size window open, we are going to want to make sure that we have the 'Preserve aspect ratio' button selected. This is going to ensure that our photo stays proportional when re-sized.
Now that we are sure this is checked we can put in our re-size value, starting with 'height' at 200 pixels (make sure pixels is selected below the 'Select new size' input) as this is the recommended height for signature images on our page.
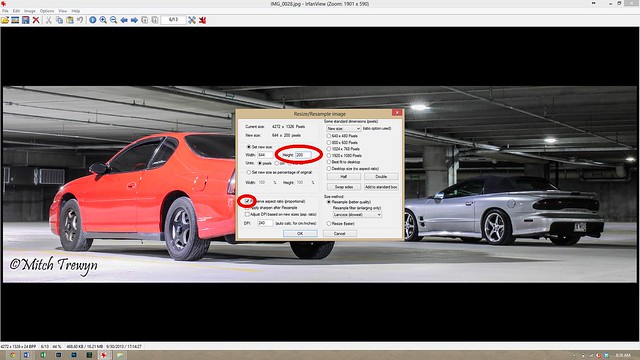
resize1 by trewyn15, on Flickr
4. Click okay and we now have a correctly sized photo to be used in your signature.
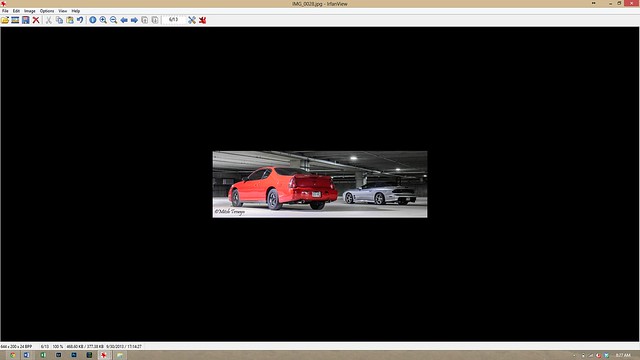
resize2 by trewyn15, on Flickr
Now we will create a before and after photo.
1. This time we are going to open Irfanview, but we are not going to open an image.
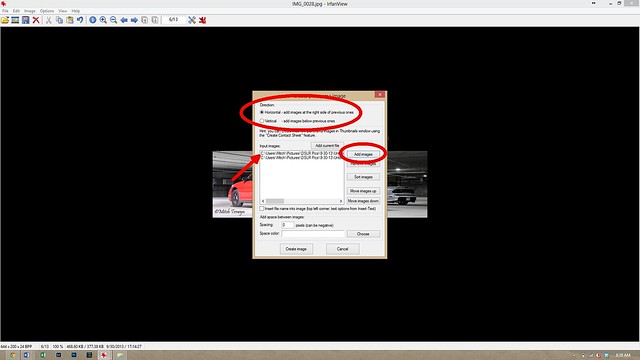
2. Select the 'Image' tab and then select the third option, 'Create Panorama Image'.
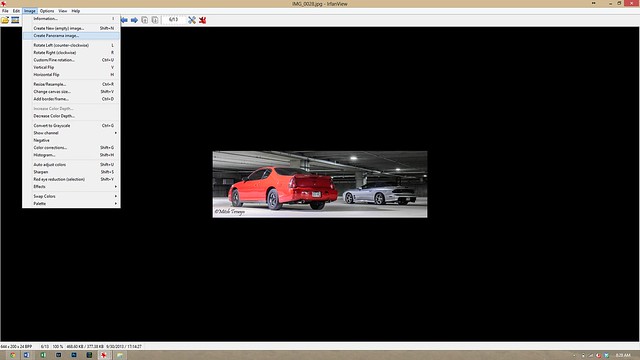
panorama by trewyn15, on Flickr
3. Click the 'Add images' button and select the photos that you would like to include in the before and after photo.
Next you will want to decide if your want your photo to come out as a horizontal (side to side) photo or a vertical (top to bottom) photo.
One you have selected your direction of the photo you will want to ensure that you have the right image in the right position. In the 'Input images' section the top photo will always be on the top or left, depending on your selection of direction.
You can then click the 'Create image' button.
panorama1 by trewyn15, on Flickr
4. You now have a single image including two images.
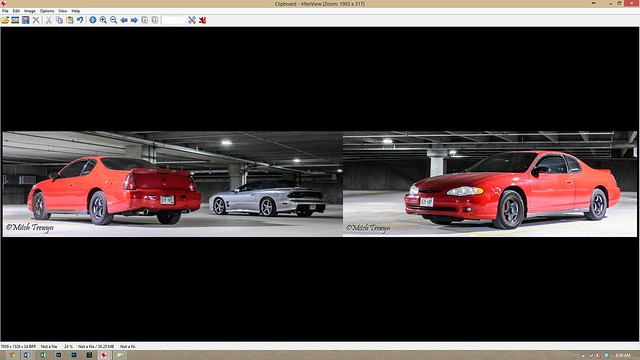
panorama2 by trewyn15, on Flickr
After you are done with either set of steps you must click 'File' -> 'Save As' and save your photo in the location you prefer on your computer.
After you have saved your photos to your computer you can use this method to upload your photos to MCF.
LINK -> https://montecarloforum.com/forum/of...res-mcf-36253/
To upload your signature you must go to the top banner and select 'Quick Links' -> 'Edit Signature'. You can then put the [IMG] code into the signature box and it will show up below all of your posts.
Please posts any comments/concerns/questions that you may have
LINK -> IrfanView - Official Homepage - one of the most popular viewers worldwide
The direct download from CNET can be found here:
LINK -> IrfanView - CNET Download.com
This is an extremely lightweight program that won't slow down your computer and is fully scanned and has no problems.
To start, we are going to re-size for signatures.
After we have downloaded Irfanview we want to open the program and follow these instructions.
1. Click 'File' and then 'Open' to select the image that you are looking to re-size.
2. Now that your image is open we are going to click 'Image' and then click 'Resize/Resample'.
resize by trewyn15, on Flickr
3. With the re-size window open, we are going to want to make sure that we have the 'Preserve aspect ratio' button selected. This is going to ensure that our photo stays proportional when re-sized.
Now that we are sure this is checked we can put in our re-size value, starting with 'height' at 200 pixels (make sure pixels is selected below the 'Select new size' input) as this is the recommended height for signature images on our page.
resize1 by trewyn15, on Flickr
4. Click okay and we now have a correctly sized photo to be used in your signature.
resize2 by trewyn15, on Flickr
Now we will create a before and after photo.
1. This time we are going to open Irfanview, but we are not going to open an image.
2. Select the 'Image' tab and then select the third option, 'Create Panorama Image'.
panorama by trewyn15, on Flickr
3. Click the 'Add images' button and select the photos that you would like to include in the before and after photo.
Next you will want to decide if your want your photo to come out as a horizontal (side to side) photo or a vertical (top to bottom) photo.
One you have selected your direction of the photo you will want to ensure that you have the right image in the right position. In the 'Input images' section the top photo will always be on the top or left, depending on your selection of direction.
You can then click the 'Create image' button.
panorama1 by trewyn15, on Flickr
4. You now have a single image including two images.
panorama2 by trewyn15, on Flickr
After you are done with either set of steps you must click 'File' -> 'Save As' and save your photo in the location you prefer on your computer.
After you have saved your photos to your computer you can use this method to upload your photos to MCF.
LINK -> https://montecarloforum.com/forum/of...res-mcf-36253/
To upload your signature you must go to the top banner and select 'Quick Links' -> 'Edit Signature'. You can then put the [IMG] code into the signature box and it will show up below all of your posts.
Please posts any comments/concerns/questions that you may have
Last edited by red04montels; 02-11-2014 at 08:52 AM.


#3
02-11-2014, 06:04 PM

I've seen people have trouble with the before and after photos on Facebook and thought I would do the signatures as well as some here have some large photos for signatures.
Hopefully it helps everyone out!
I use this program solely because it's light and easy to use with some nice features.

Thread
Thread Starter
Forum
Replies
Last Post
6th Gen ('00-'05): Before and after dipping the rims and painted the calipers
loqenSS
Tires/Rims/Suspension
13
07-21-2015 12:59 PM
Space
Off Topic
1
11-13-2013 04:27 PM