Mod Guide: How to install a Power Log / PLOG (front exhaust manifold)
#1
 10-03-2012, 12:56 PM


Greetings,
It was PLOG time yesterday. I will update this as I get the photos loaded.
1. Get your stuff together while your car completely cools. You will need
- Ratchet
- Extensions and swivel (if you have one)
- 1/2 Socket, deep.
- 15mm Socket
- Power Log (or replacement manifold)
- Flashlight
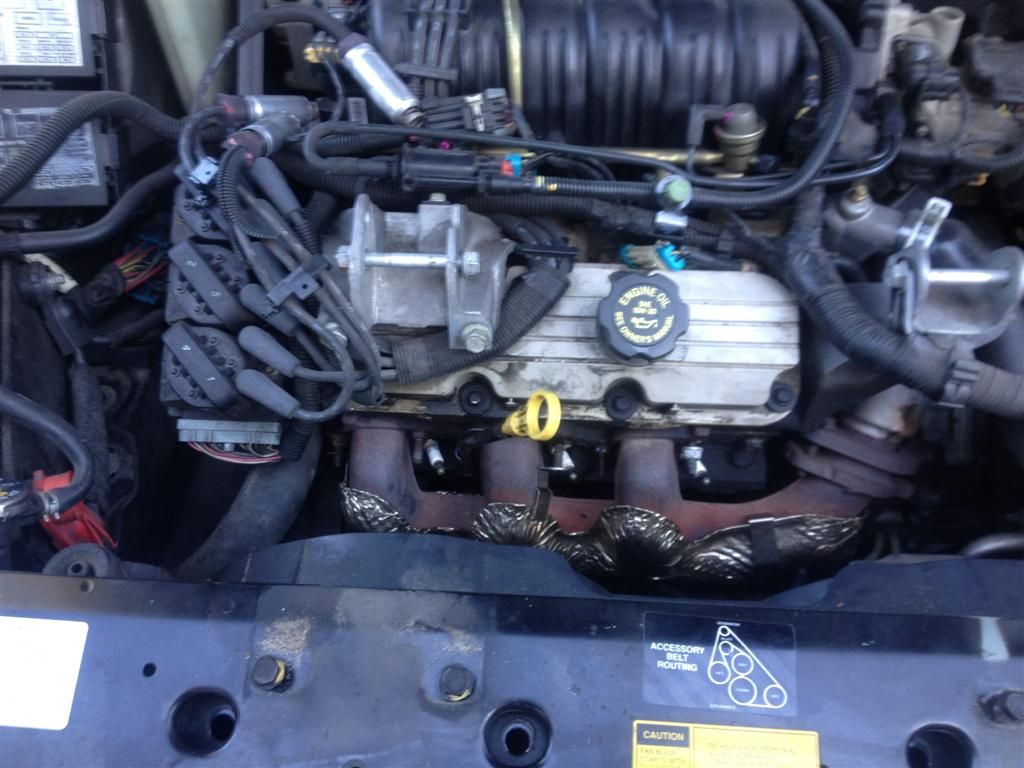
2. Open the hood and take the top 3800 engine cover off.

3. Remove Dog Bones. I used the 15mm socket for the rear bolts and 1/2" socket for the front 4 bolts of the mount. I removed the whole thing because it gives more room and is just as easy to remove than just the dog bone.
4. Remove the right black bracket that holds (? the engine cover? ). Just remove the one nut on the left and the black bolt on the right with the 1/2" socket. Replace the black bolt so you do not lose it. Keep the nut somewhere safe. There will be more of the same nut coming soon.
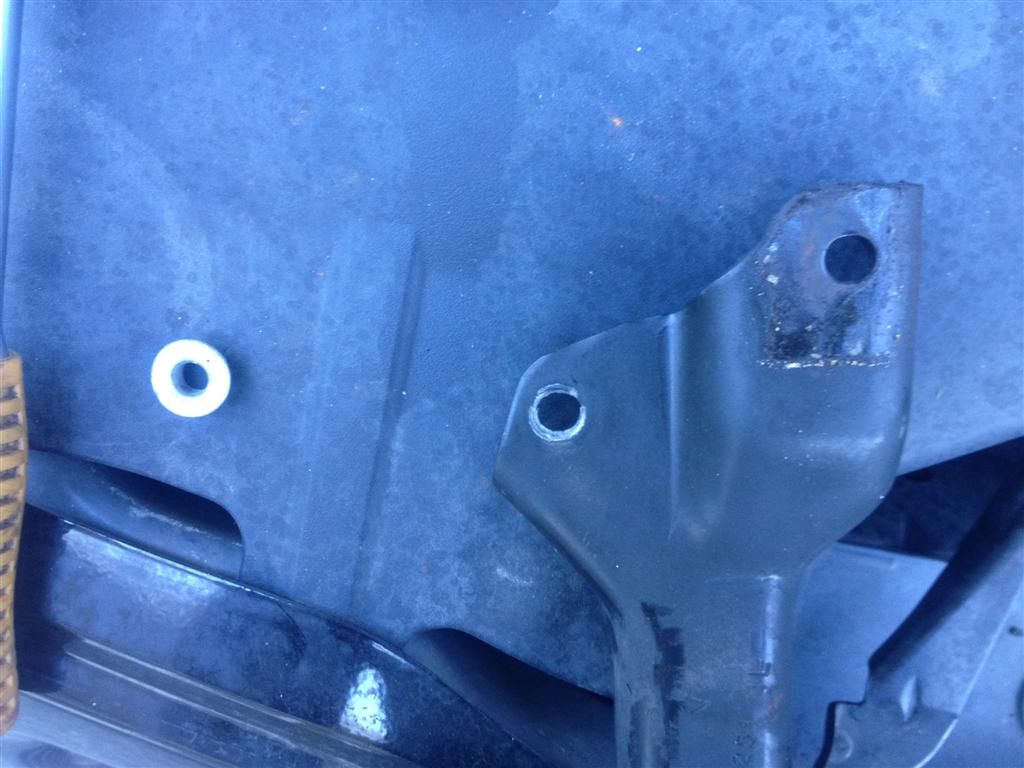
5. Remove the black bracket on the left. This will make it easy to pull that stubborn #1 spark plug wire off. Replace the two black bolts. Again, 1/2" socket.
6. Pull the 1, 3, and 5 spark plug wires off of the front of the engine. Give the rubber a full twist and then pull the metal to remove. It can be hard. Wear gloves or you may get bashed up like I did when they finally give.
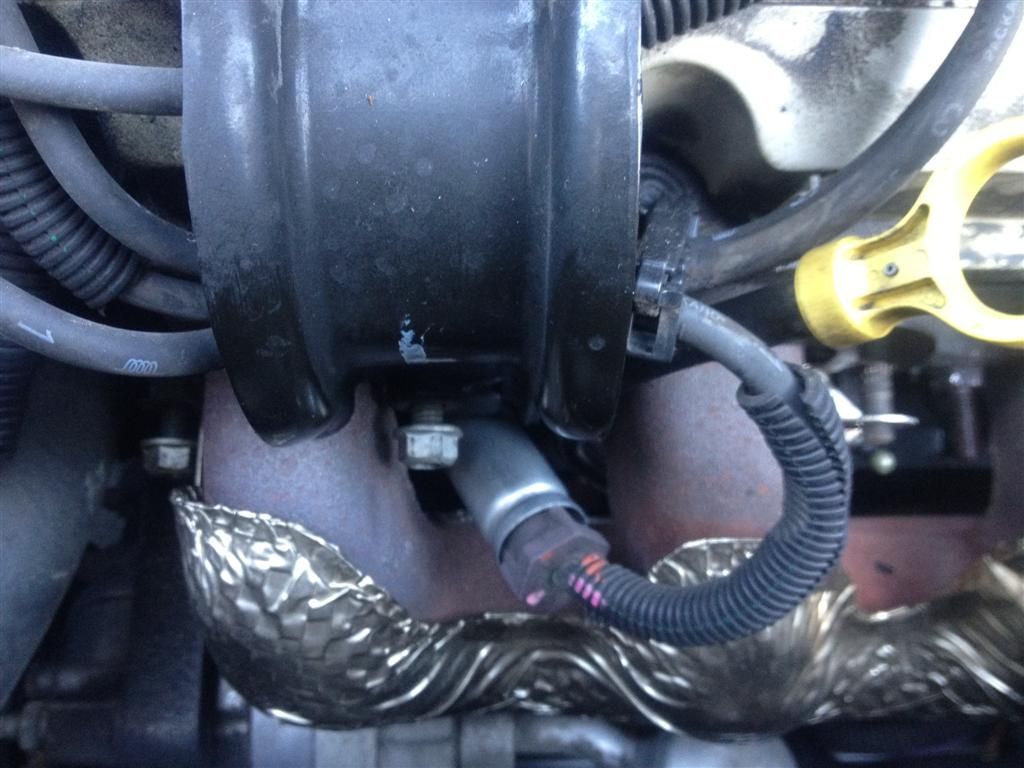
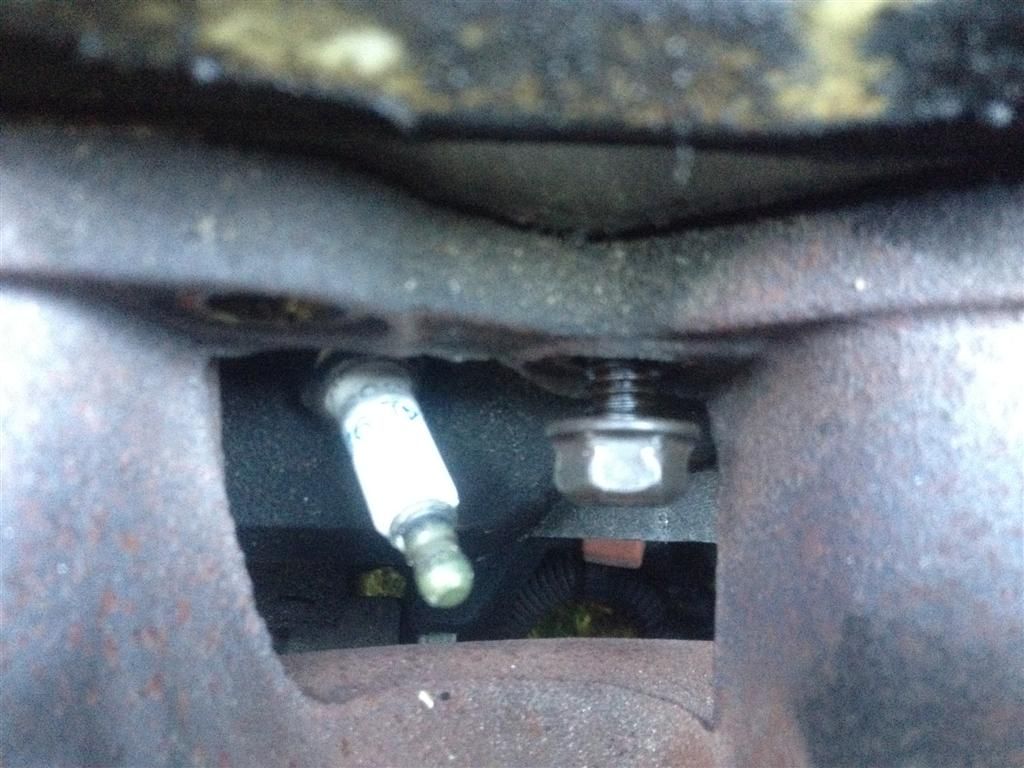
7. start removing the nuts and bolts. Start with the middle bolt that holds the heat shield and dipstick tube. It's the one just to the right of the middle exhaust port.
8. Carefully pull out the dipstick tube. It is only held in by the nut you removed in the last step and an o-ring. Pull it straight up and put it aside. Keep dirt out of this tube. Clean it.
9. Remove the remainder of the nuts and bolts holding the manifold to the block. All of this is using the 1/2" socket. You can remove the heat shield now.
10. Remove the two bolts that connect the outlet of the manifold to the cross over pipe (pipe that connects to the rear manifold). 1/2" Socket, extensions and swivel. I removed the air flow sensor wire to give me a bit more room.
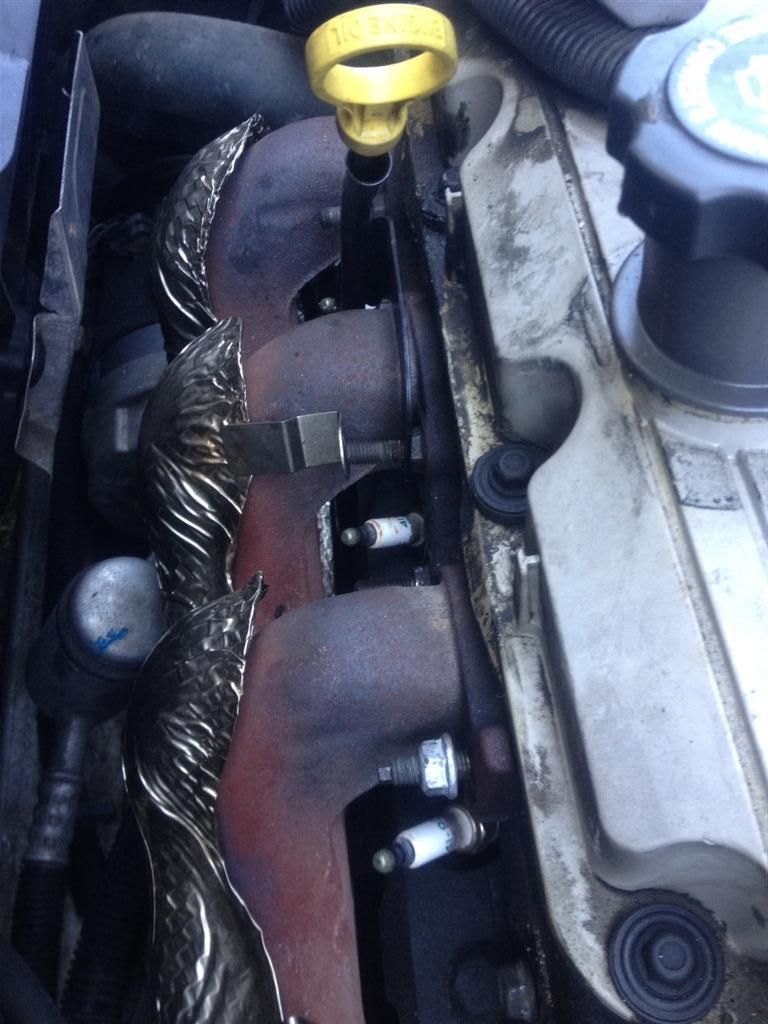
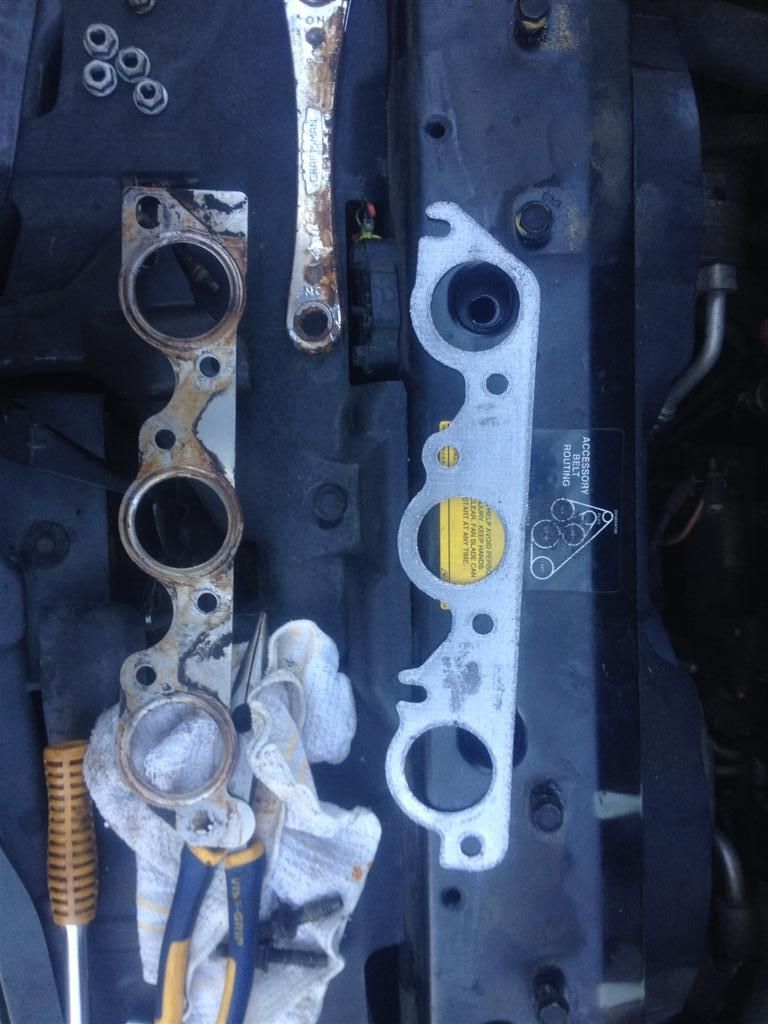
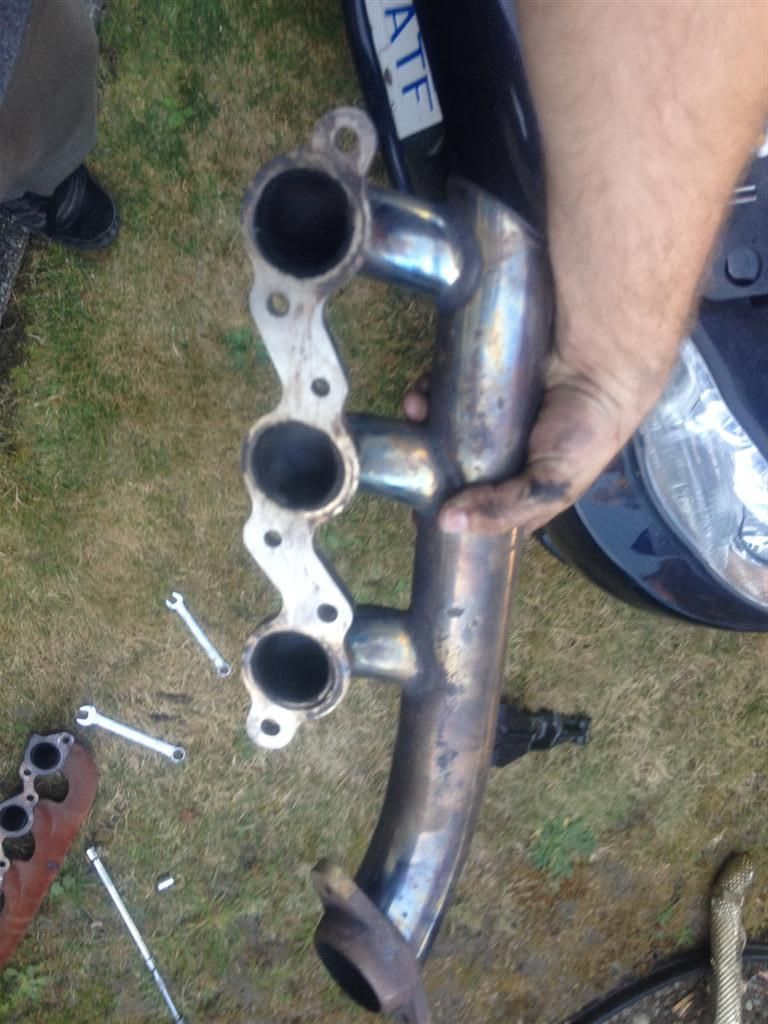
11. Remove manifold. Take a look in the ports and you can see how restrictive it actually is. Not shocking but still, why? Remove the old metal gasket. NOTE IT'S MOUNTING POSITION. You will want to match the new gasket with the old to make sure you have it on the right way.
12. Clean clean clean. You need to clean off the block where the old gasket was. Use alcohol, carb cleaner, brake cleaner... anything that will evaporate quickly. Use rags to wipe it clean. (I went through 10 rags) You cannot clean enough here. There should be lots to clean up.
13. install new gasket (edit: I am told you can reuse the stock metal ones). As much as I wish these were hanging gaskets, the ones I had are not; however, it was very easy to install.
14. Install your new power log (or manifold). You do not want to tighten anything yet. VERY loose and hanging is a good thing here. Replace the bolts from which they came. Before you get the urge to tighten them, do not forget about...
 (I know, used. But a slightly loved one still works fine).
15. Install the 2 cross-over pipe bolts. You want to evenly turn these until the pieces are mated but not tight.
16. Go back to the manifold and start snugging the middle bolts and nuts up and working your way out. SNUG ONLY do not tighten yet. Make sure everything is mating correctly.
17. Go back to the cross-over pipe bolts and tighten them evenly. Quarter turn, go to the next bolt, quarter turn, go back to the 1st bolt, etc etc. Until it is tight. Not too tight. That will come soon.
18. Grab your torque wrench and start tightening the middle of the manifold bolts down. The stock motor called for 11 lbs/foot. Later service manuals called for 15-25. I did 20. It's not much but it works just fine.
19. Work your way out from the middle of the manifold double checking each bolt and nut.
20. Go back to the cross-over pipe and tighten them evenly to a good 20-25lbs/foot.
21. Put your clean dipstick tube back. It's impossible to see the hole without a flashlight so use one to get it back in. Try not to scrape any grease and dirt into the dipstick tube hole. Do this right. Apply the nut to hold the tube in place.
22. Start putting the brackets back in the order you removed them. Hand tight plus a quarter turn works good for me.
23. Start the car. Do not be shocked by the smoke that comes off. Most gaskets will do this at first. It wont last long. Listen for whizzing noises or whistles coming from any of the joints. Everything should be as was.
24. If everything seems good, go for a drive. Get the engine up to a good operating temperature. Go back and open the hood. Make sure there are no leaks.
25. Let the car cool completely and check the torque of the bolts. They should be the same. If they are not, not a big deal, just tighten them down again.
26. Put the engine cover back on.
27. Have a beer and relax. Bask in the glory that is one of the easier mods to perform (yet are thankful of this writeup).
Please note: If the studs come out with the nuts, do not worry. You can reinstall them but first clean the heck out of them, put on some Loctite 242 and reinstall hand tight only. The nut you put on after keeps everything tight and the Loctite will hold the stud into place.
IF you somehow manage to strip a stud, you can get a replacement at most any auto parts stores. Before you install a new stud, you must clean out the old hole. I don't care how long it takes. Save yourself headaches and get the Q-tips and alcohol and brake cleaner. Clean Clean Clean. Then, if available (and highly suggested) run a tap through to make sure the threads inside are not damaged.
It was PLOG time yesterday. I will update this as I get the photos loaded.
1. Get your stuff together while your car completely cools. You will need
- Ratchet
- Extensions and swivel (if you have one)
- 1/2 Socket, deep.
- 15mm Socket
- Power Log (or replacement manifold)
- Flashlight
2. Open the hood and take the top 3800 engine cover off.
3. Remove Dog Bones. I used the 15mm socket for the rear bolts and 1/2" socket for the front 4 bolts of the mount. I removed the whole thing because it gives more room and is just as easy to remove than just the dog bone.
4. Remove the right black bracket that holds (? the engine cover? ). Just remove the one nut on the left and the black bolt on the right with the 1/2" socket. Replace the black bolt so you do not lose it. Keep the nut somewhere safe. There will be more of the same nut coming soon.
5. Remove the black bracket on the left. This will make it easy to pull that stubborn #1 spark plug wire off. Replace the two black bolts. Again, 1/2" socket.
6. Pull the 1, 3, and 5 spark plug wires off of the front of the engine. Give the rubber a full twist and then pull the metal to remove. It can be hard. Wear gloves or you may get bashed up like I did when they finally give.
7. start removing the nuts and bolts. Start with the middle bolt that holds the heat shield and dipstick tube. It's the one just to the right of the middle exhaust port.
8. Carefully pull out the dipstick tube. It is only held in by the nut you removed in the last step and an o-ring. Pull it straight up and put it aside. Keep dirt out of this tube. Clean it.
9. Remove the remainder of the nuts and bolts holding the manifold to the block. All of this is using the 1/2" socket. You can remove the heat shield now.
10. Remove the two bolts that connect the outlet of the manifold to the cross over pipe (pipe that connects to the rear manifold). 1/2" Socket, extensions and swivel. I removed the air flow sensor wire to give me a bit more room.
11. Remove manifold. Take a look in the ports and you can see how restrictive it actually is. Not shocking but still, why? Remove the old metal gasket. NOTE IT'S MOUNTING POSITION. You will want to match the new gasket with the old to make sure you have it on the right way.
12. Clean clean clean. You need to clean off the block where the old gasket was. Use alcohol, carb cleaner, brake cleaner... anything that will evaporate quickly. Use rags to wipe it clean. (I went through 10 rags) You cannot clean enough here. There should be lots to clean up.
13. install new gasket (edit: I am told you can reuse the stock metal ones). As much as I wish these were hanging gaskets, the ones I had are not; however, it was very easy to install.
14. Install your new power log (or manifold). You do not want to tighten anything yet. VERY loose and hanging is a good thing here. Replace the bolts from which they came. Before you get the urge to tighten them, do not forget about...
(I know, used. But a slightly loved one still works fine).15. Install the 2 cross-over pipe bolts. You want to evenly turn these until the pieces are mated but not tight.
16. Go back to the manifold and start snugging the middle bolts and nuts up and working your way out. SNUG ONLY do not tighten yet. Make sure everything is mating correctly.
17. Go back to the cross-over pipe bolts and tighten them evenly. Quarter turn, go to the next bolt, quarter turn, go back to the 1st bolt, etc etc. Until it is tight. Not too tight. That will come soon.
18. Grab your torque wrench and start tightening the middle of the manifold bolts down. The stock motor called for 11 lbs/foot. Later service manuals called for 15-25. I did 20. It's not much but it works just fine.
19. Work your way out from the middle of the manifold double checking each bolt and nut.
20. Go back to the cross-over pipe and tighten them evenly to a good 20-25lbs/foot.
21. Put your clean dipstick tube back. It's impossible to see the hole without a flashlight so use one to get it back in. Try not to scrape any grease and dirt into the dipstick tube hole. Do this right. Apply the nut to hold the tube in place.
22. Start putting the brackets back in the order you removed them. Hand tight plus a quarter turn works good for me.
23. Start the car. Do not be shocked by the smoke that comes off. Most gaskets will do this at first. It wont last long. Listen for whizzing noises or whistles coming from any of the joints. Everything should be as was.
24. If everything seems good, go for a drive. Get the engine up to a good operating temperature. Go back and open the hood. Make sure there are no leaks.
25. Let the car cool completely and check the torque of the bolts. They should be the same. If they are not, not a big deal, just tighten them down again.
26. Put the engine cover back on.
27. Have a beer and relax. Bask in the glory that is one of the easier mods to perform (yet are thankful of this writeup).
Please note: If the studs come out with the nuts, do not worry. You can reinstall them but first clean the heck out of them, put on some Loctite 242 and reinstall hand tight only. The nut you put on after keeps everything tight and the Loctite will hold the stud into place.
IF you somehow manage to strip a stud, you can get a replacement at most any auto parts stores. Before you install a new stud, you must clean out the old hole. I don't care how long it takes. Save yourself headaches and get the Q-tips and alcohol and brake cleaner. Clean Clean Clean. Then, if available (and highly suggested) run a tap through to make sure the threads inside are not damaged.
Last edited by Shandley; 10-03-2012 at 03:13 PM.
#2
10-03-2012, 03:12 PM


Join Date: Sep 2008
Location: Southeast PA
Posts: 25,136
Thanks for the great how-to!
The only thing I would add is that it is a good practice to remove the spark plugs on the front as well. They are pretty fragile, and if you slip... you're buying new haha
Also you don't ALWAYS need to change that gasket. Since it is metal, you can get away with reusing that one.
The only thing I would add is that it is a good practice to remove the spark plugs on the front as well. They are pretty fragile, and if you slip... you're buying new haha
Also you don't ALWAYS need to change that gasket. Since it is metal, you can get away with reusing that one.

#4
10-03-2012, 03:34 PM
Join Date: Sep 2008
Location: Southeast PA
Posts: 25,136
Because it's a metal gasket, it shouldn't "crush" like a nylon one and be ruined. I reused mine with no problems. In fact, when I took the front manifold off, I just put the PLOG on, because the gasket stayed on the block.
#5
10-20-2019, 12:00 PM


Looking to do when setup arrive front and rear power log will the crossover require a donut gasket long story took off manifolds and installed headers kept the manifolds just incase headers didn't work for me but they did went back to manifolds and got a leak at the crossover pipe decided on going back to headers found plog set up installed egr exhaust and intake block off plates tried fixing crossover pipe leak and snapped the bolt head looked online to see if the n/a and s/c manifolds were different seen dorman crossover as OEM replacement and it had two donut gaskets and idk if I need them for plogs set up any help greatly appreciated looked at YouTube video of plog install good video just don't show all of install
https://youtu.be/IgykRSt88k4
Last edited by 04l67; 10-20-2019 at 12:04 PM.

Thread
Thread Starter
Forum
Replies
Last Post